Using a Chromebook
Prerequisites
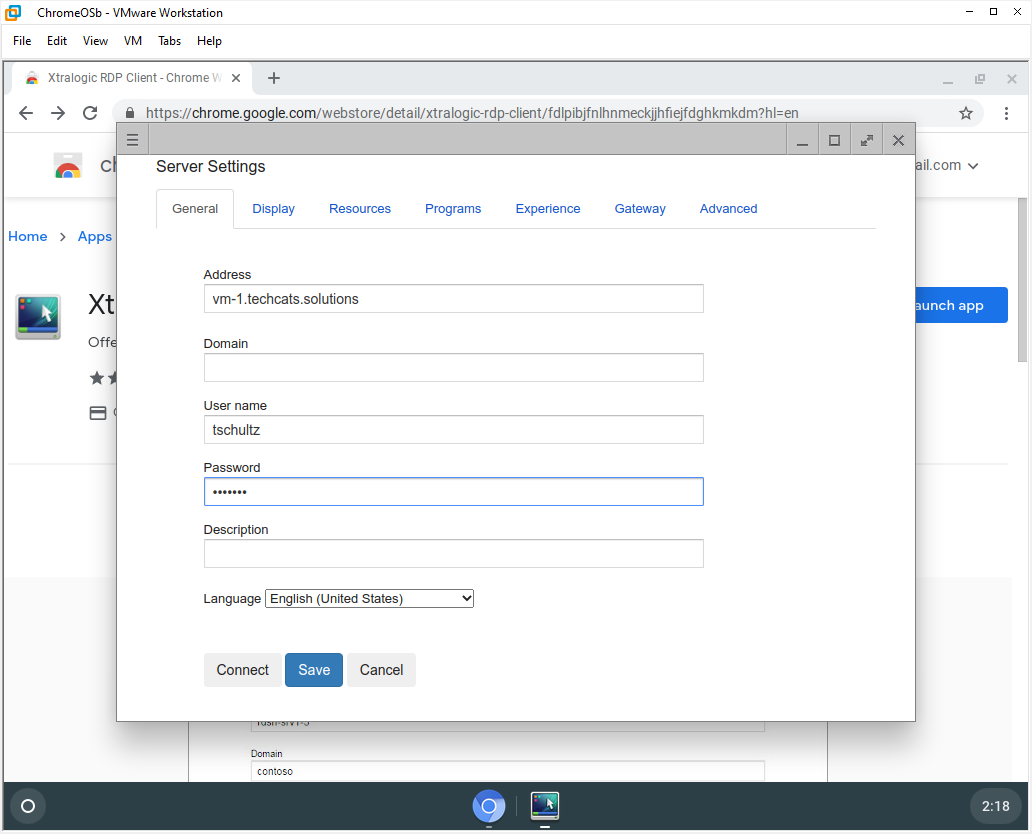
You know your remote desktop DNS name / computer name / IP address and your remote desktop user name and password. In the screen shots below the DNS name is vm-1.techcats.solutions and tschultz is the user name.
Install a Remote Desktop Client
If you do a quick search you will likely find Chrome Remote Desktop but this app helps you allow other computers (mainly Chromebooks) to access your Chromebook remotely. It does not let you access a Windows computer as a remote desktop client which is needed in this case.
You might try installing the Microsoft Remote Desktop app from Google Play (e.g., search for Microsoft Remote Desktop) but on my ChromeOS virtual machine trying this led to an installation error. If your 'bare metal' Chromebook lets you install this app then using it will be very similar to using the app on a Mac described elsewhere.

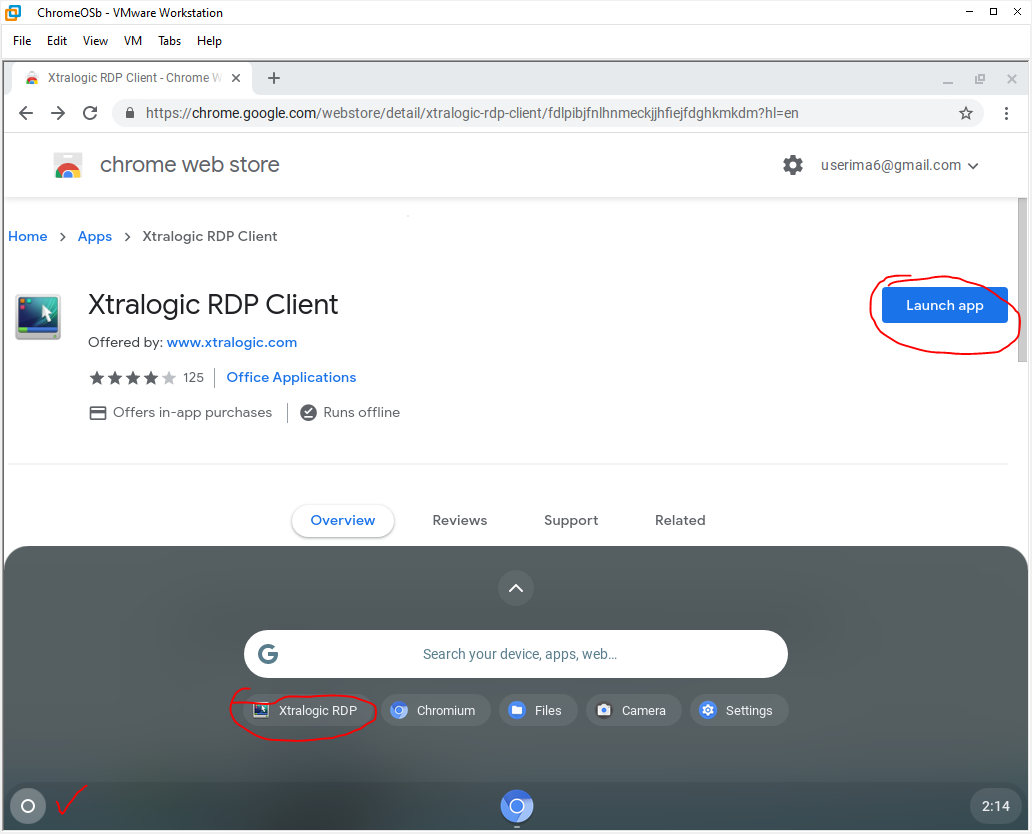
An alternative is to use the Xtralogic RDP Chrome extension available at https://chrome.google.com/webstore/detail/xtralogic-rdp-client/fdlpibjfnlhnmeckjjhfiejfdghkmkdm; when you visit the site in your Chromebook choose Add to Chrome. For full use Xtralogic RDP requires a subscription but apparently one connection can be created without payment.
After Xtralogic RDP has been added it can be launched by re-visiting the download site or looking through apps on your Chromebook
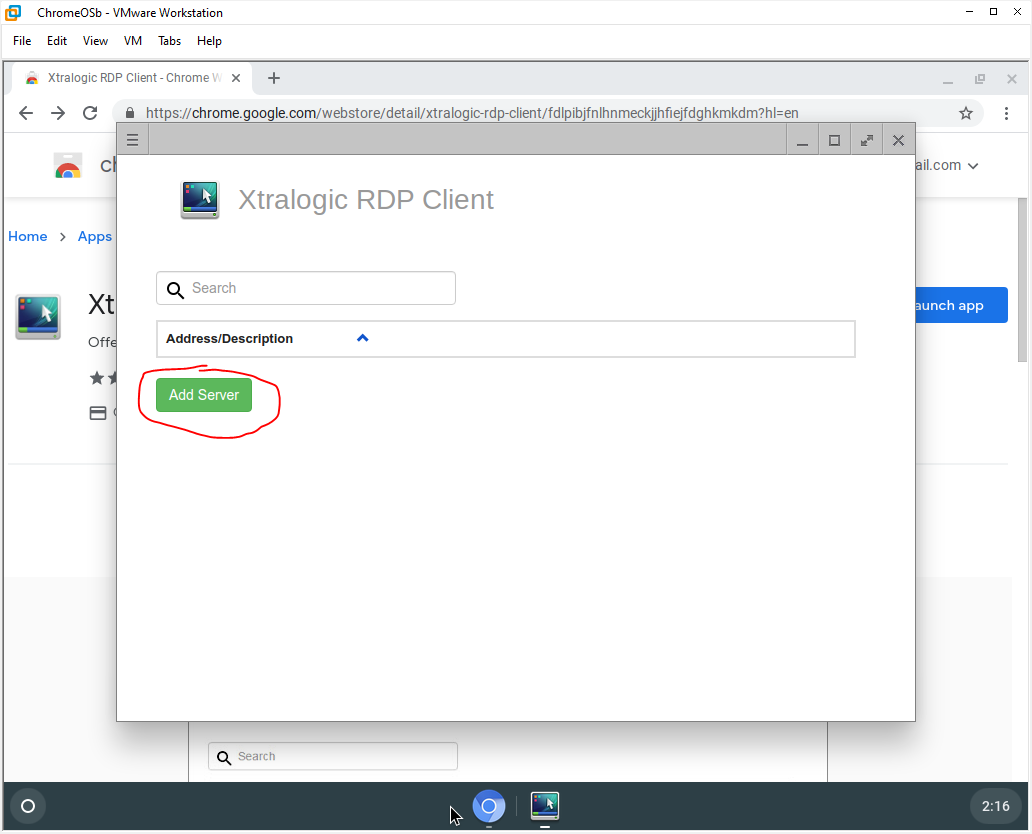
In Xtralogic RDP for the first time click Add Server to begin defining your connection.
Enter your remote DNS name in Address and your User name and Password where indicated and then click Save.
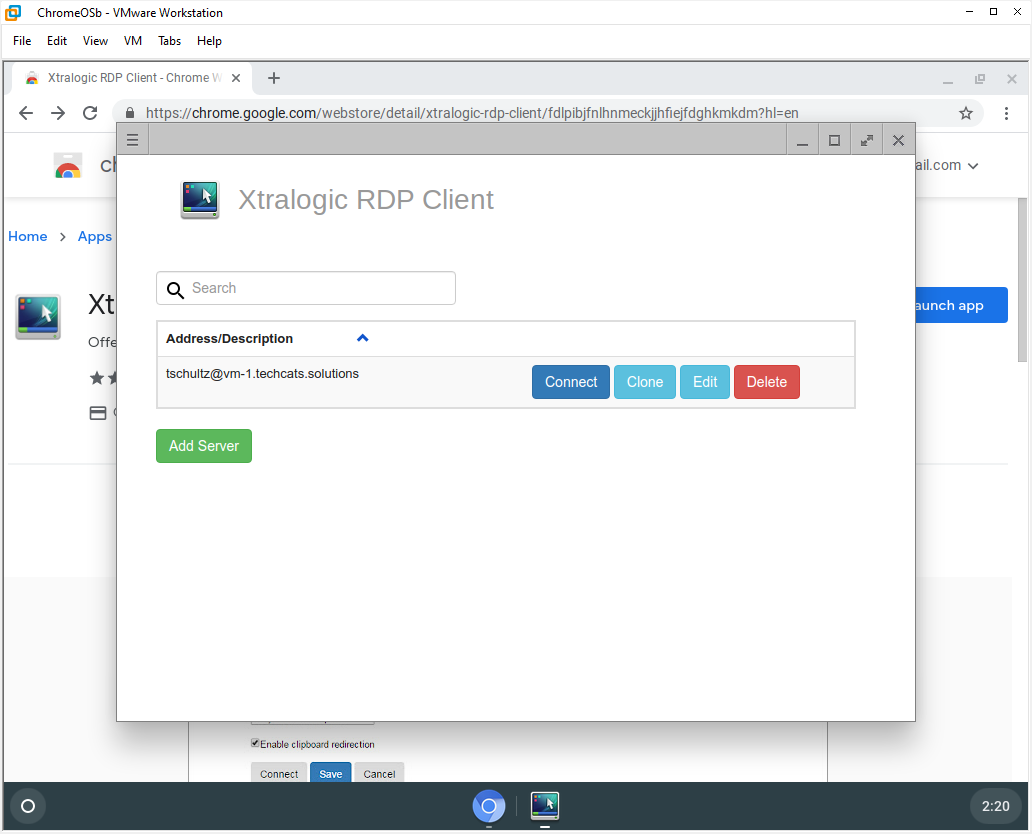
After saving the server settings or when you launch Xtralogic RDP in the future choose Connect next to the server description.
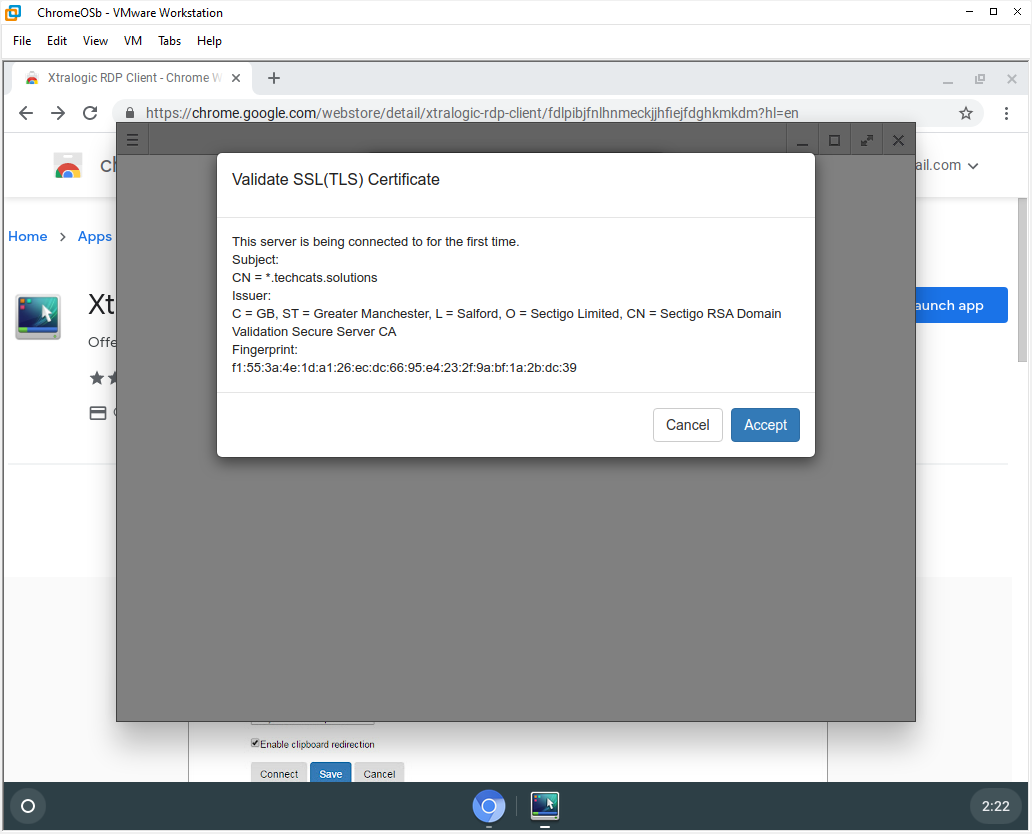
Choose Accept on the popup regarding the certificate.
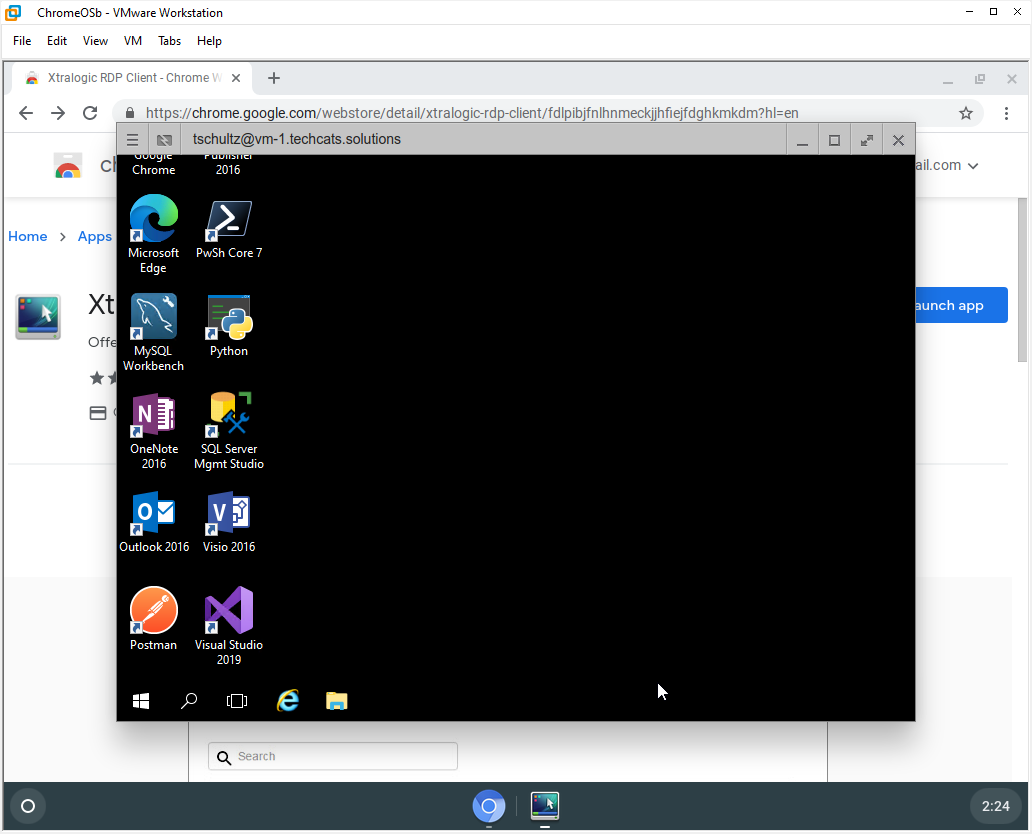
You should connect to the remote desktop in a window (or, perhaps, full screen) on your Chromebook. This window can be resized and moved as you need to complete your remote work. When done logout of the remote desktop and close the Xtralogic RDP app.
Customize your setup
When Xtralogic RDP is relaunched Edit can be used (before Connect) to work with settings for the remote session.

The Display tab lets you control the remote session's display on your Chromebook. It may take some practice to find settings that work best.

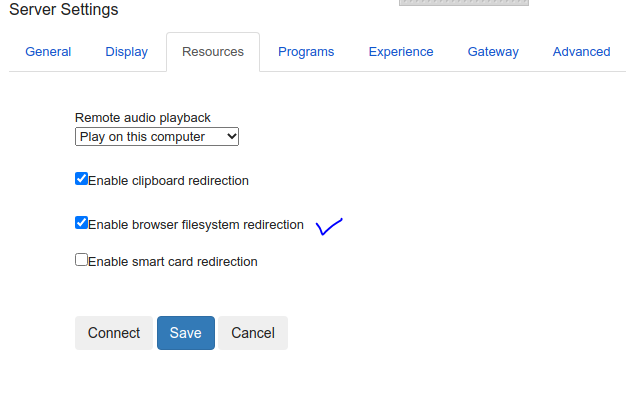
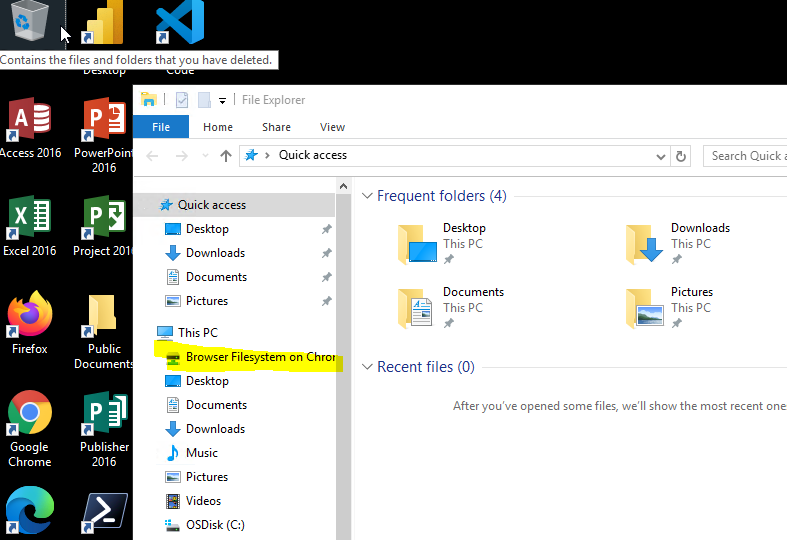
The Resources tab can allow Chromebook resources to be accessible in the remote session. In the example below enabling browser filesystem redirection made the Chromebook's filesystem available in the remote session as a place to save and copy files.
Other server setting tabs are probably best left alone unless you have a specific purpose or need in mind; they require a bit of expertise to use well.