Windows Server VM 1st Steps
Some PopUp Guidance
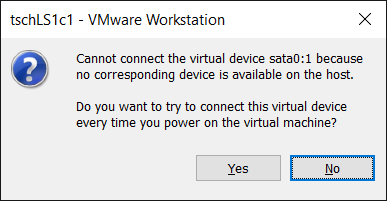
If you see something like the following when starting a VM using VMware, click No. It is just warning that a virtual device (e.g., floppy drive, CD) can't be found so we are telling VMware not to check at every power on. We can use VM Settings to connect a device when we need the VM to have it.
If you see something like the following before or after using a VM with VMware, just click OK. It is reminding us that anything connected by USB to our host computer could be connected instead to the VM.

When you first login after a fresh VM build
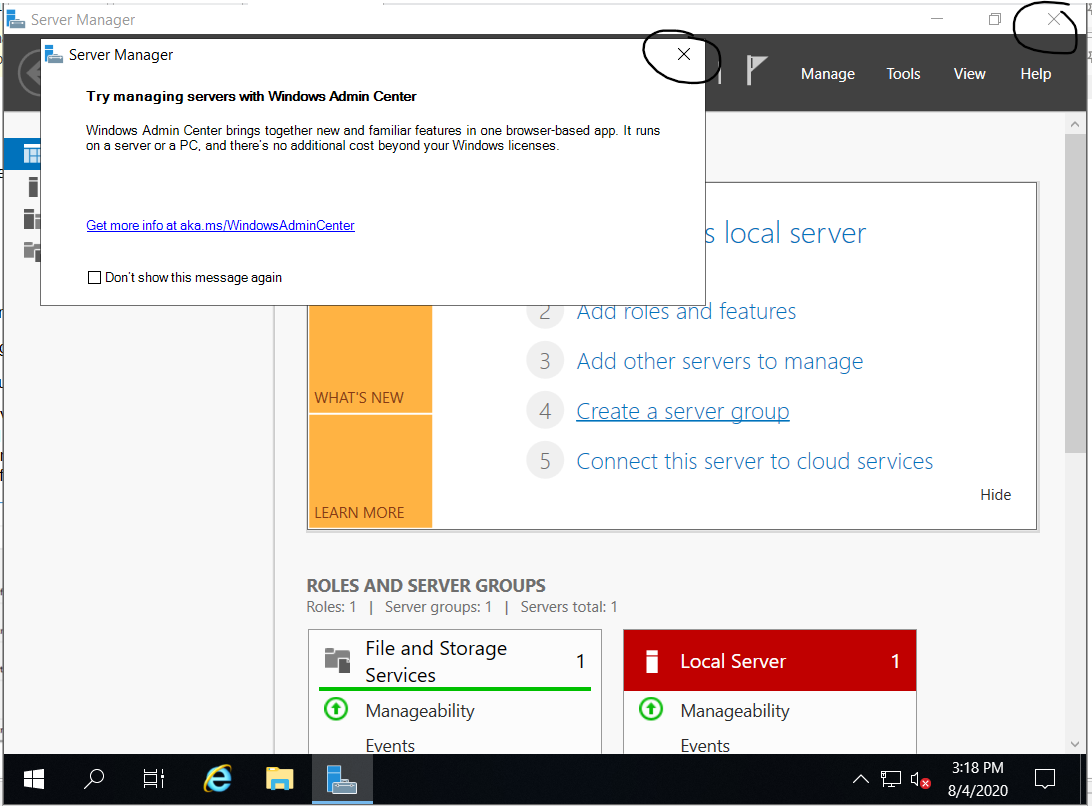
As a default Windows Server opens Server Manager and that brings a popup inviting us to try the browser based Windows Admin Center. For a local, stand-alone VM the Windows Admin Center is not really useful so dismiss it (X in upper-right corner of popup). Server Manager is useful but for now dismissing it is recommended (more to clear clutter than anything else).
Set computer name, manual updates, time zone, apply updates
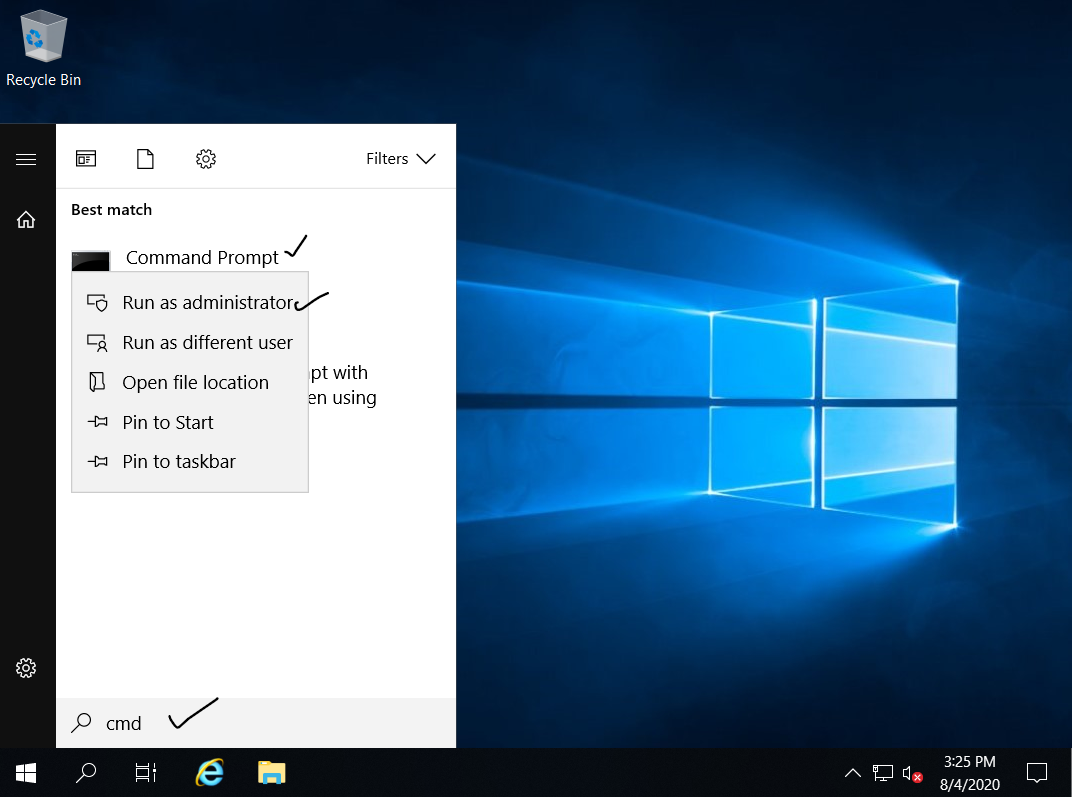
Click Start (i.e., Windows button), type cmd, right-click Command Prompt, and click Run as administrator; indicate yes that you will allow changes to be made to the computer on the popup. At the command prompt use sconfig to start the server configuration utility.

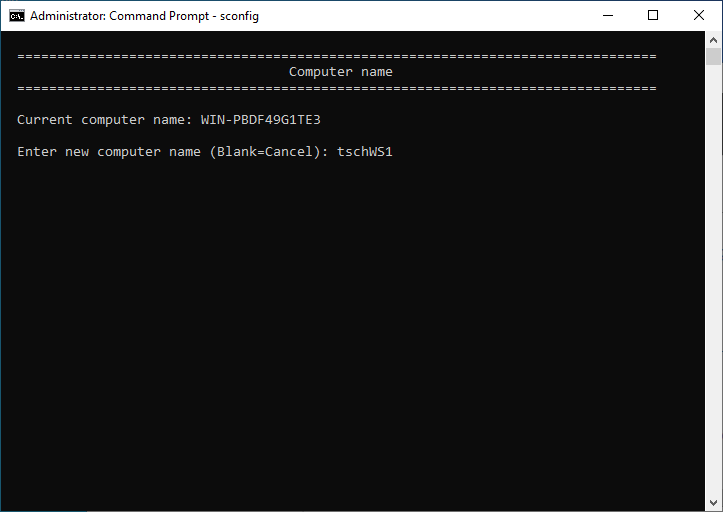
Use option 2 to change the computer name (e.g., I am using tschWS1 but use your own computer name)
A restart will be required after changing the computer name; best to go ahead and do it (select yes from the popup, use sconfig option 13, shutdown /r from the command prompt, or use Start | Power button | Restart | select a reason).
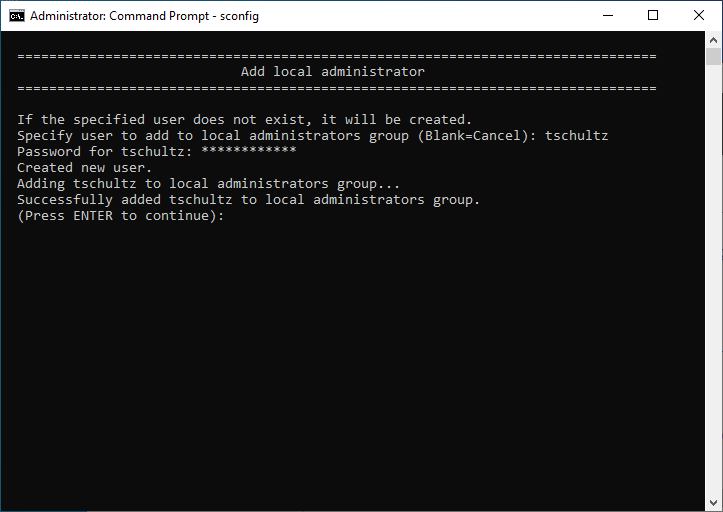
Suggested: Use Option 3 to create another local administrator with your AU login ID (i.e., AU email before the @); it's often a good practice to not use the default Administrator login.
Use option 11 for Windows Activation. Use sub-option 1 to check which version of Windows Server actually got installed. Often the Datacenter version gets installed by VMware even when Standard was selected. No problem but make sure you have the key for the correct version.
Then use sub-option 3 to enter the product key. If it fails double-check your key and your Windows Server version match. Finally, use sub-option 2 to activate Windows.
Use option 5 to make updates manual (for our use, not necessarily a best-practice suggestion) by choosing option M.
Use option 9 to set the timezone if needed
Suggested: Use option 10 to set telemetry off (again, good for our use but not necessarily a general recommendation). After agreeing to change telemetry settings choose (suggested) option 1 to turn off telemetry.
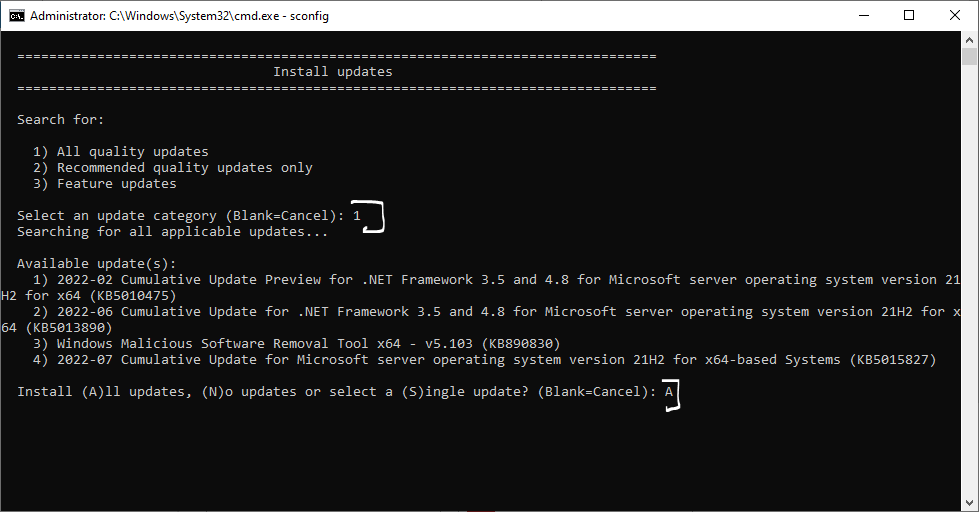
Use option 6 to Download and Install Updates. Select (suggested) option 1 for All quality updates and then A to install all updates. This may take awhile so be patient but not a good time to have your host computer go in sleep mode. A restart of your VM will be required.
VM Tools
It helps managing your VM to have tools appropriate to your hypervisor installed in your VM and they may have been installed automatically when you installed your OS. Exactly how depends on your host platform and hypervisor.
Using VMWare (i.e., Fusion on an Intel Mac or Workstation on a PC) there are menu options. After starting up the VM use Virtual Machine | (Re)Install VMware Tools (in Fusion) or VM | (Re)Install VMware Tools (in Workstation). If the option is Reinstall instead of Install then VMware tools are already installed.
Using UTM (i.e., on an M1 Mac) follow the guidance at Spice Tools on Windows Server.