Ubuntu Desktop VM 1st Steps
Some PopUp Guidance
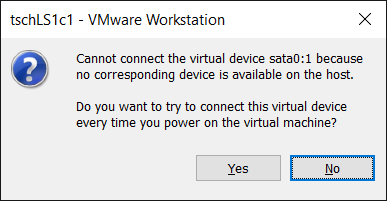
If you see something like the following when starting a VM using VMware, click No. It is just warning that a virtual device (e.g., floppy drive, CD) can't be found so we are telling VMware not to check at every power on. We can use VM Settings to connect a device when we need the VM to have it.
If you see something like the following before or after using a VM with VMware, just click OK. It is reminding us that anything connected by USB to our host computer could be connected instead to the VM.

When you first login after a fresh VM build
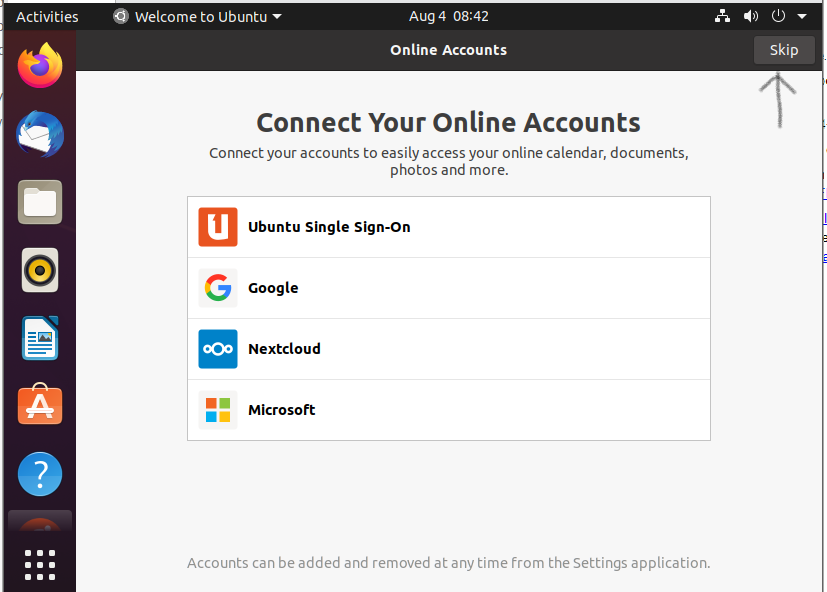
Ubuntu will ask you to Connect Your Online Accounts; skipping is recommended.
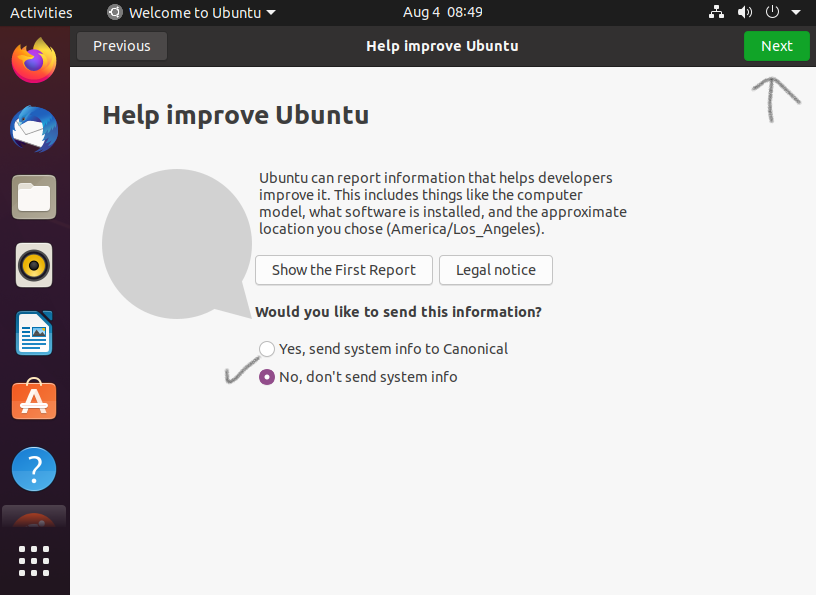
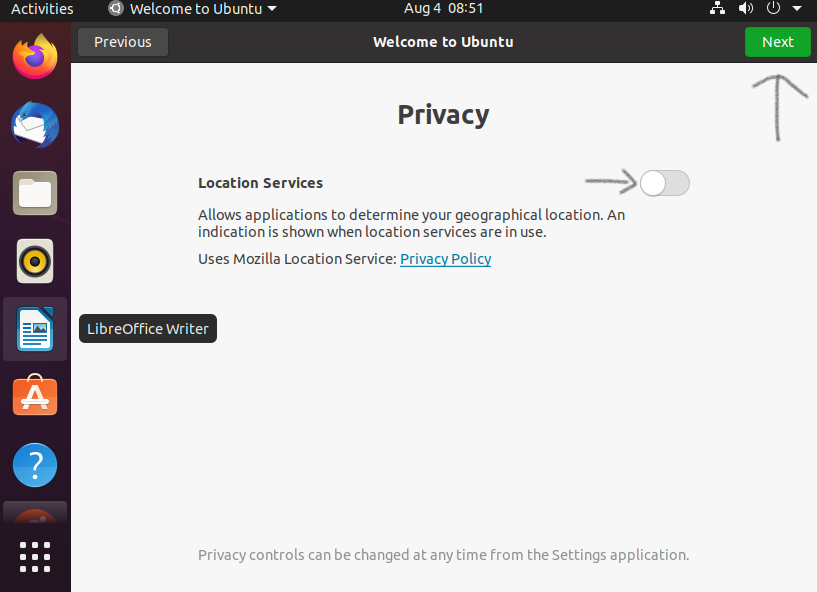
Suggested is not sending info is recommended for a VM being used primarily for learning and testing. Similarly with not activating Location services.
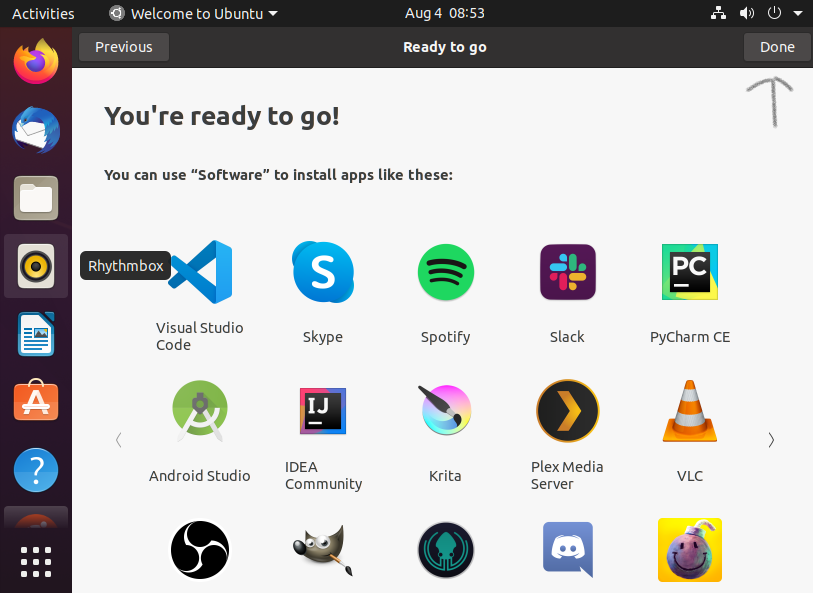
Click Done to actually use Ubuntu Desktop ... software will be installed later.
Set updates to manual and install updates
Adapted from references How to disable automatic updates in Ubuntu and How to update Linux server
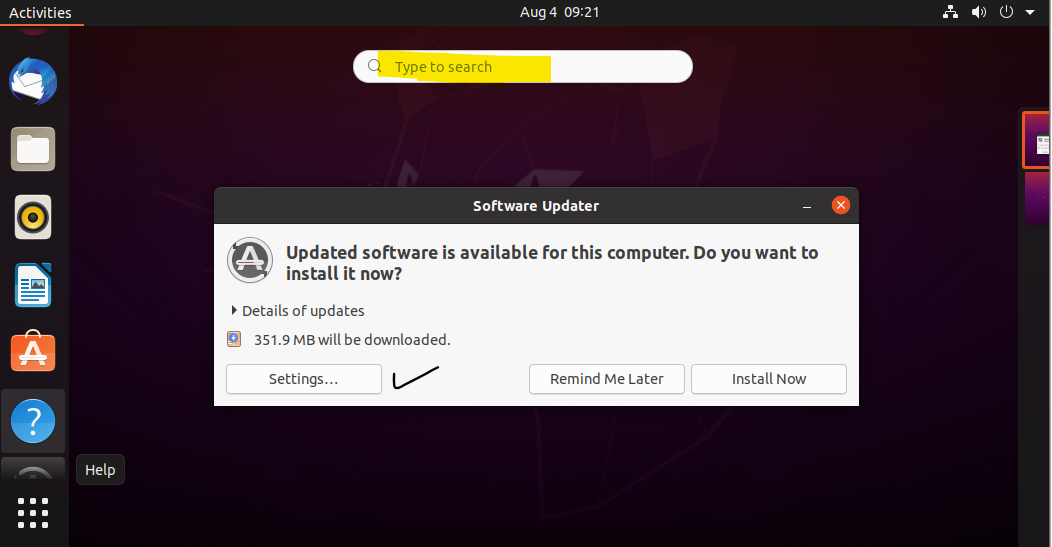
The desktop will likely alert you about software updates available. Automated updates (partly IMHO) can get in the way of learning to manage an OS so recommended is turning off auto-updates. Updates are important so be sure to a system update shortly after building your VM and regularly while using it.
If Software Updater does not appear automatically (or has gone away) use the search (click and type Software Updater to find the application and open it.
Click the Settings button and change Automatically check for updates to Never (you will need to authenticate with your administrative credentials and may need to reload the list of current updates). Then click Close and close the Software Updater application (red X in upper right-hand corner).

'Old school' way to install Linux updates including a restart: Open a Terminal window and issue the commands
sudo apt-get update
sudo apt-get upgrade
sudo shutdown -r now
When back in your VM it doesn't hurt to remove any unneeded packages using
sudo apt-get autoremove
(Re)Set the timezone
Adapted from reference How to change the timezone in Linux
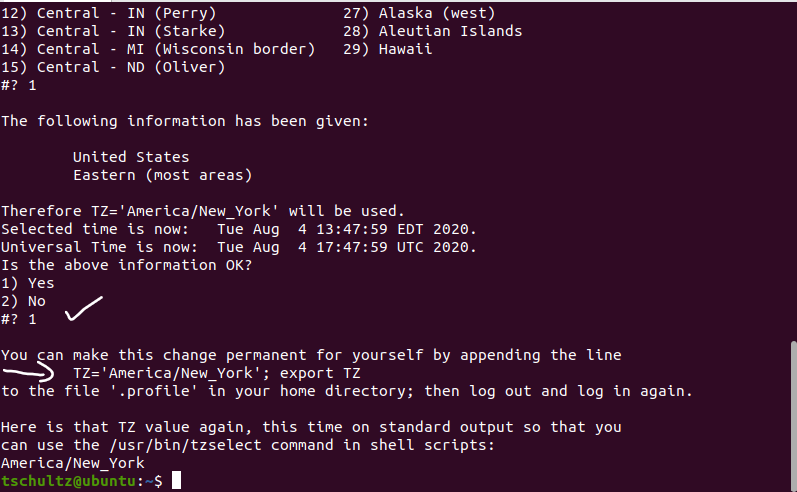
From a terminal window use the date command to check the computer time; Ubuntu typically defaults to Pacific time. To change this use the tzselect command identifying appropriate answers for continent, country, etc. After confirming the information is OK a line to be added to your .profile in your home directory is provided.
Assuming you are in your home directory use nano .profile to edit your profile and add the indicated line at the bottom.

Save the updated .profile, log out and back in again, and the date should report from the adjusted time zone.
Change the computer (host) name
Adapted from reference How to set or change system hostname in Linux
The command below will permanently set the host name to tschLS1 (of course, use the actual host name you want instead)
sudo hostnamectl set-hostname tschLS1
This is the same as using an editor to change the /etc/hostname file to the single line containing the desired host name (how it was done before the hostnamectl command was developed). To see the effect, exit and re-enter the Terminal window.
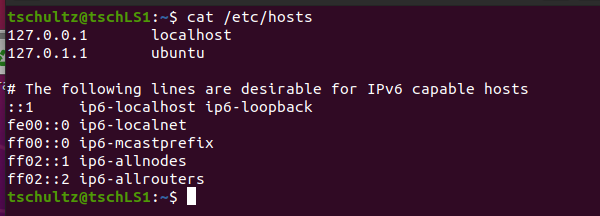
There is also an /etc/hosts file which has to do with mapping local IP addresses. Use an editor to change /etc/hosts from something like this:
to something like this (for host tschLS1, yours may differ)

Adjust Screen Blanking
For a VM I recommend not allowing the screen to blank after a period of time (requiring a re-login). In the Ubuntu Desktop click Applications (the tic-tac-toe looking grid), search for and click Settings, and in Power make Screen Blank Never and Automatic Suspend off.


VM Tools
It helps managing your VM to have tools appropriate to your hypervisor installed in your VM and they may have been installed automatically when you installed your OS. Exactly how depends on your host platform and hypervisor.
Using VMWare (i.e., Fusion on an Intel Mac or Workstation on a PC) there are menu options. After starting up the VM use Virtual Machine | (Re)Install VMware Tools (in Fusion) or VM | (Re)Install VMware Tools (in Workstation). If the option is Reinstall instead of Install then VMware tools are already installed. Often with Linux VMs, this option is grayed out (for reasons that are hard to fathom) and it is nice to have a something more reliable. From a terminal on your VM the command
vmware-toolbox-cmd -v
will show which version of VMware Tools is installed or result in a command not found error if not. In Ubuntu Desktop the command
sudo apt install open-vm-tools-desktop
will install VMware Tools for you. In the screen cap below my attempt to install indicated I had the latest version.

Using UTM (i.e., on an M1 Mac)
xxx
spice
xxx
sudo apt install spice-vdagent spice-webdavd
xxx