Ubuntu Desktop VM on an M1 Mac
Note: If you have an Intel and not an M1 Mac (e.g., see How to check if your Mac has an M1 chip) then use Ubuntu Desktop VM on an Intel Mac instead of this guidance.
Prerequisites:
- Your Mac can host a Ubuntu Desktop VM (e.g., see Local VM Hosting) and UTM has been installed.
- You have access to an Ubuntu Desktop install .iso.
Configure the VM
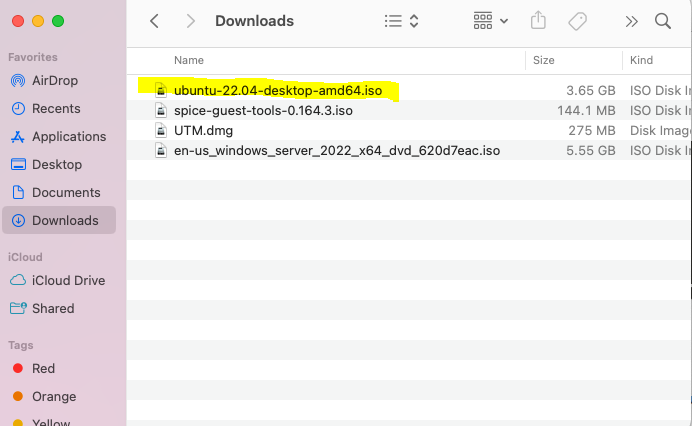
In this example the Ubuntu Desktop install .iso is in Downloads on the Mac. Start UTM (click the icon in the task bar or use Launch Pad and search for it)

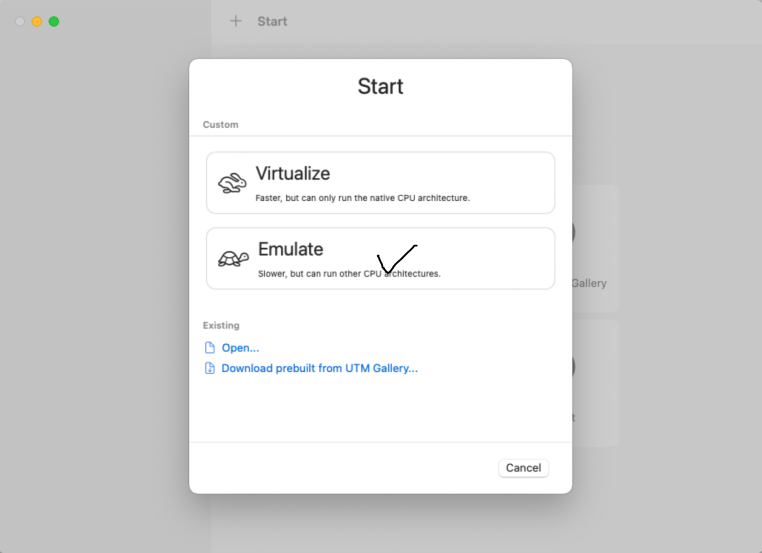
In UTM choose Create a New Virtual Machine (or use File | New from the UTM menu or click the plus-sign next to existing VMs) and then choose Emulate (the M1 chip can't virtualize this Ubuntu architecture).

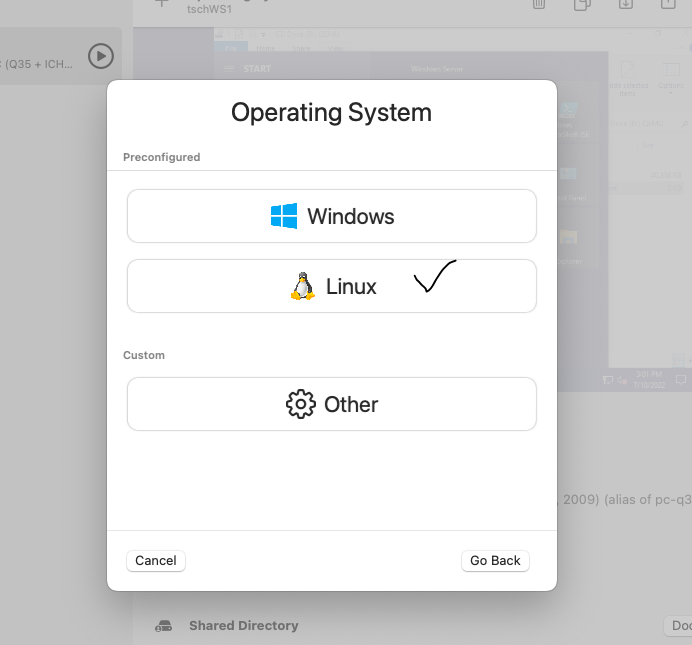
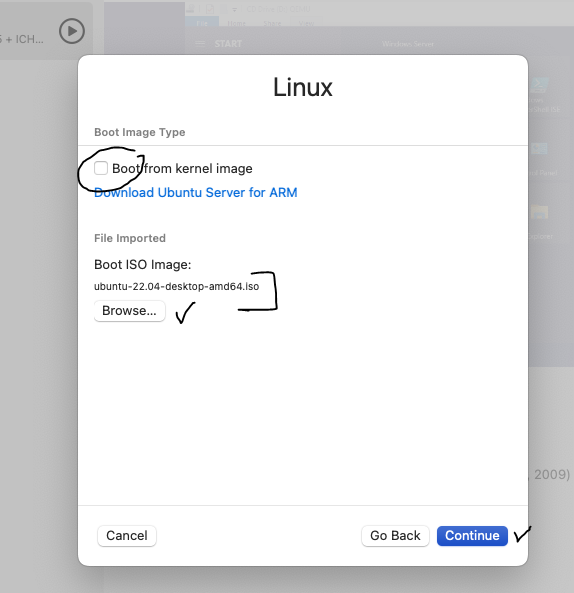
Choose Linux and on the next dialog leave Boot from kernal image unchecked and click Browse to find the Ubuntu Desktop installer .iso. Click Continue..
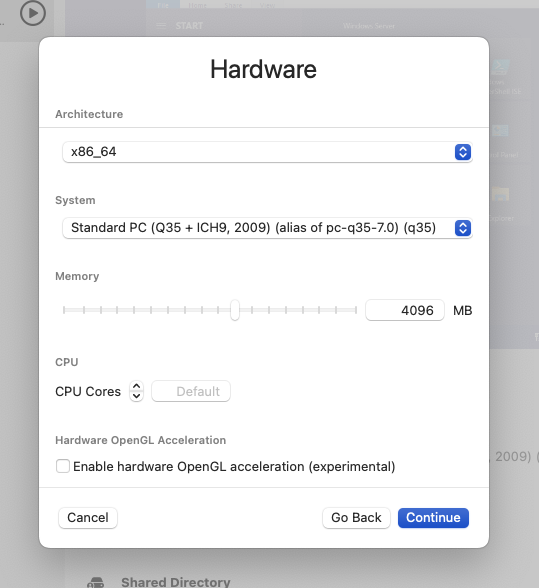
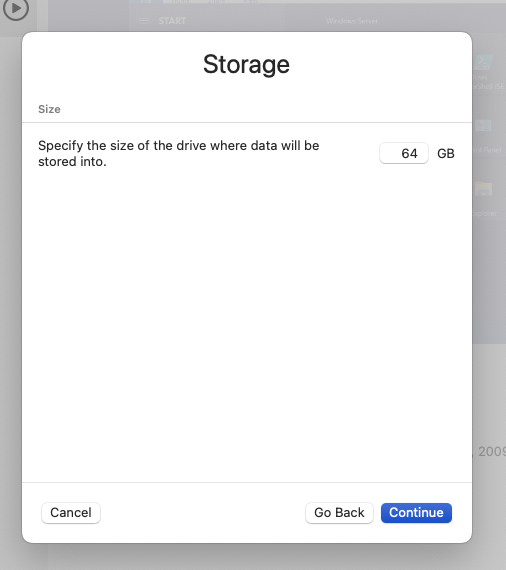
Accept defaults for Hardware and Storage (suggested). Click Continue each time
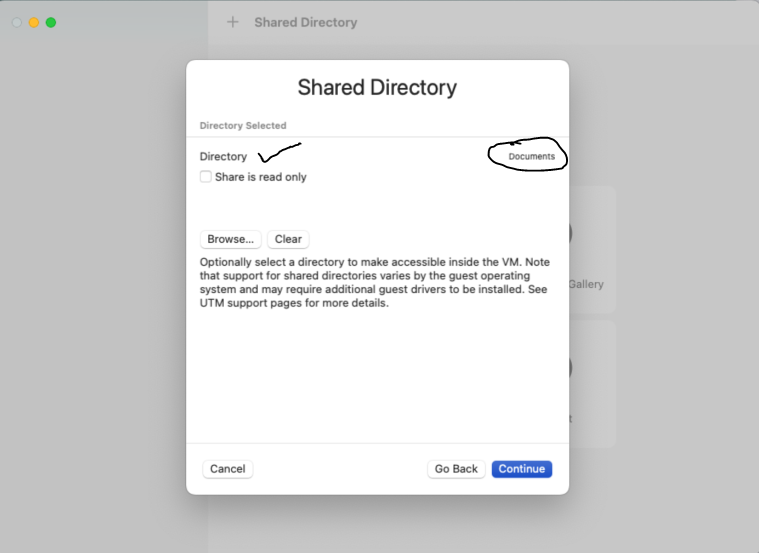
A Shared Directory is a folder on your Mac which will also be available in your emulated Ubuntu Desktoprver. In the example below the Mac's Documents folder is being shared but a different folder can be used or the option ignored (a Shared Directory can be established later if needed). Use the Browse button to identify and open a folder to share, if desired. Click Continue
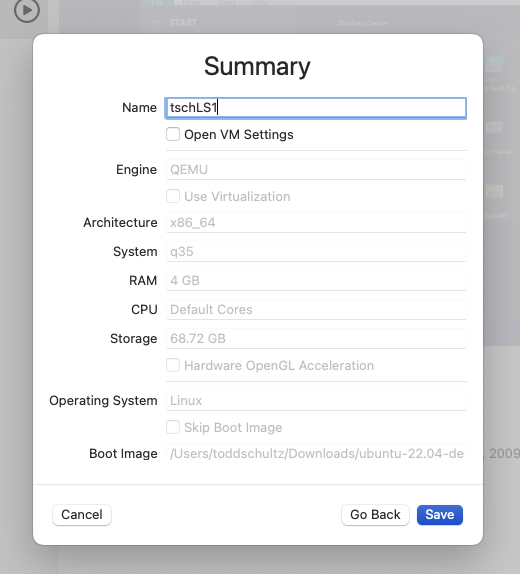
On the Summary it will help to change the Name of this VM to xxxxLS1 (where xxxx is the first four characters of you campus login) since that's how we refer to it in class and this will become its host name. The name established here refers to the files created on the Mac to support the VM. Click Save.
Start the Install
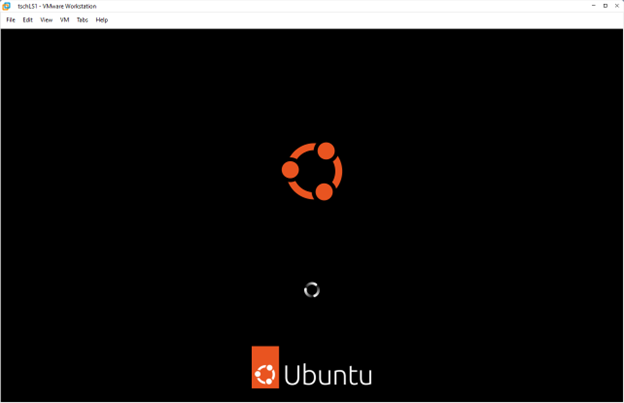
Click the Play button to start the VM (or right-click the VM and choose Run). Note that the installation will be a bit slow; this is due to emulating the VM at the default settings. Once the VM is created we can change settings to get a bit more performance. After a bit your VM will show the following; click in the window, select the first option and press Enter.

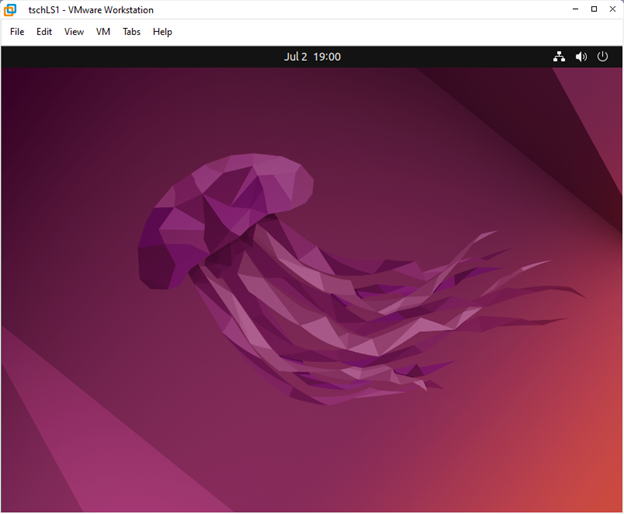
Some text will flash across the console, then the following graphic, then the the VM screen will be blank for a bit, then another graphic (e.g., the jelly fish). Just be patient.
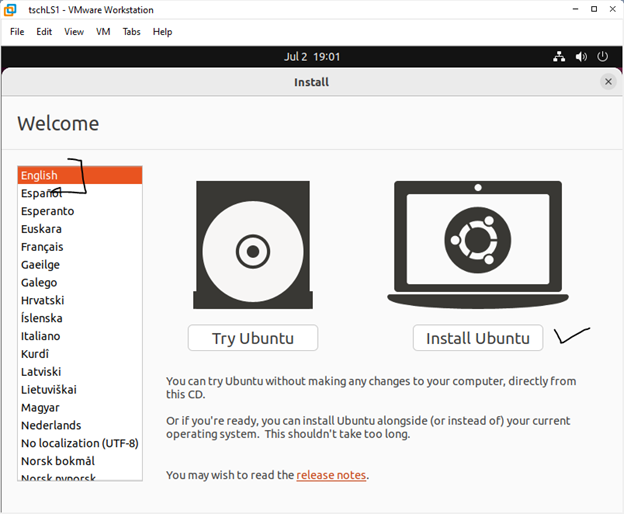
Begin the install by selecting a language (for install guidance) and then clicking Install Ubuntu.
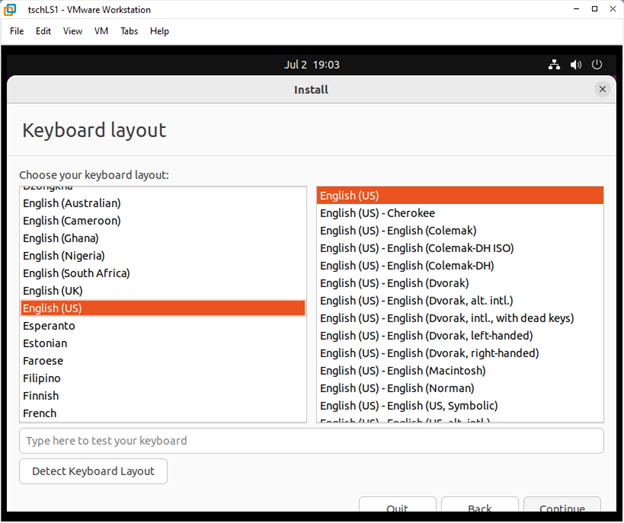
Choose a keyboard and language for the VM and then click Continue.
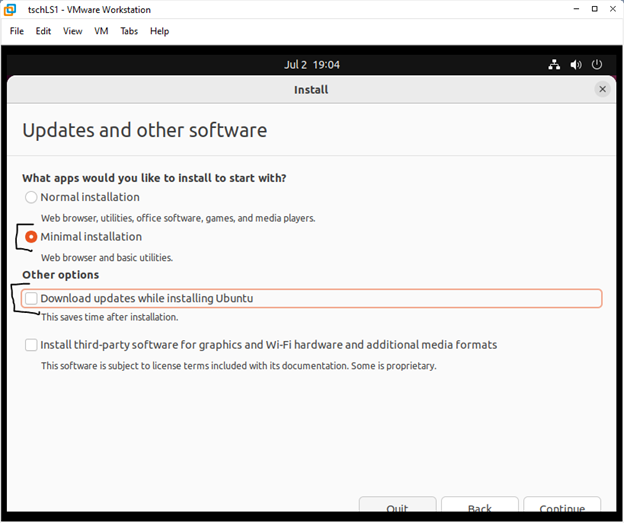
For AIST3720 I recommend the minimal installation and to not download updates with the install.
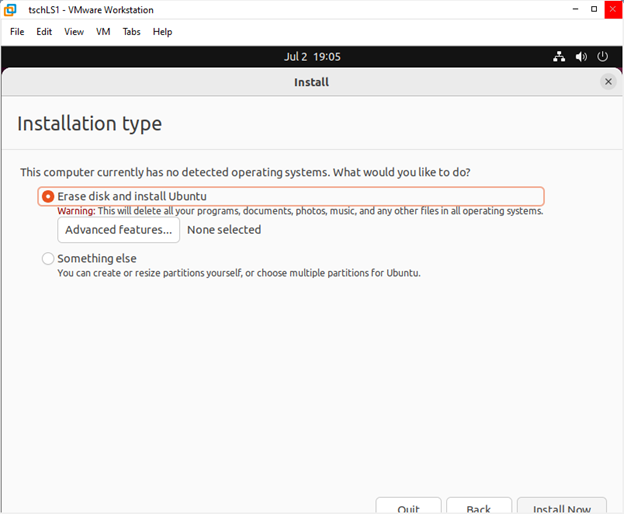
Keep Erase disk and install Ubuntu (there really is nothing on our virtual disk yet so nothing will really be erased). Click Install Now.

Click Continue at the 'are you sure' dialog. Keep in mind that if we were installing on an existing computer these warnings help to keep from accidentally overwriting an existing OS.
Select / accept a time zone.

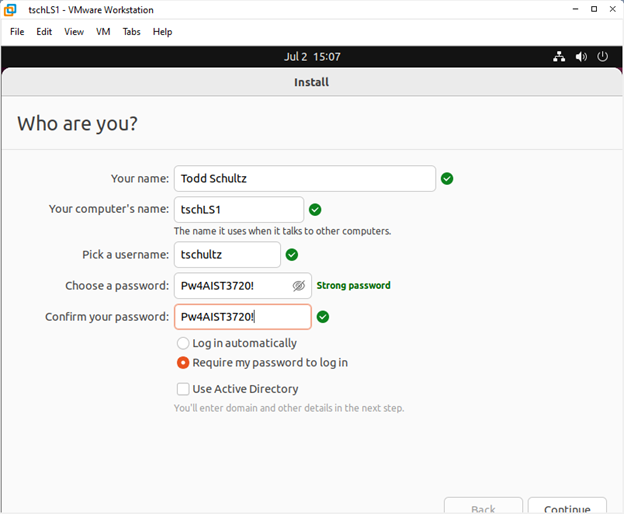
Fill in your name. For AIST3720 the computer's name (i.e., the server host name) should be the first four characters of your AU login followed by LS1 and your username should be your AU login (i.e., AU email without the @augusta.edu). The password Pw4AIST3720! is what I use for all my class oriented VMs -- it passes all the complexity rules I've run into -- but please make this something you can remember; I am not sure this could be reset but it probably isn't easy.
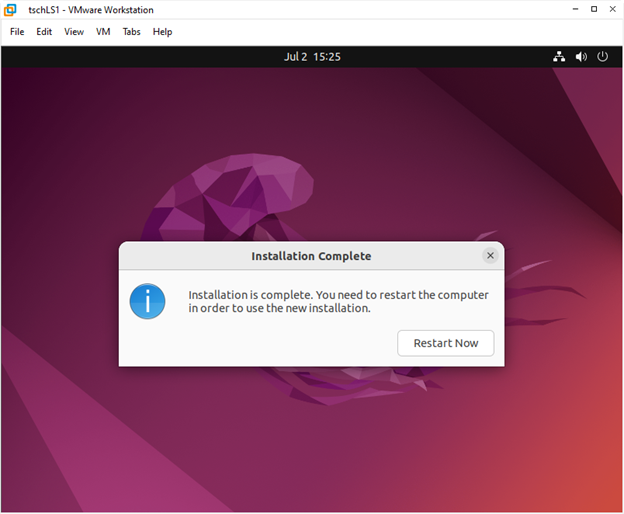
The installation starts. It'll take awhile but go get a coffee or do other things with your computer. This is not a good time to put your PC to sleep.

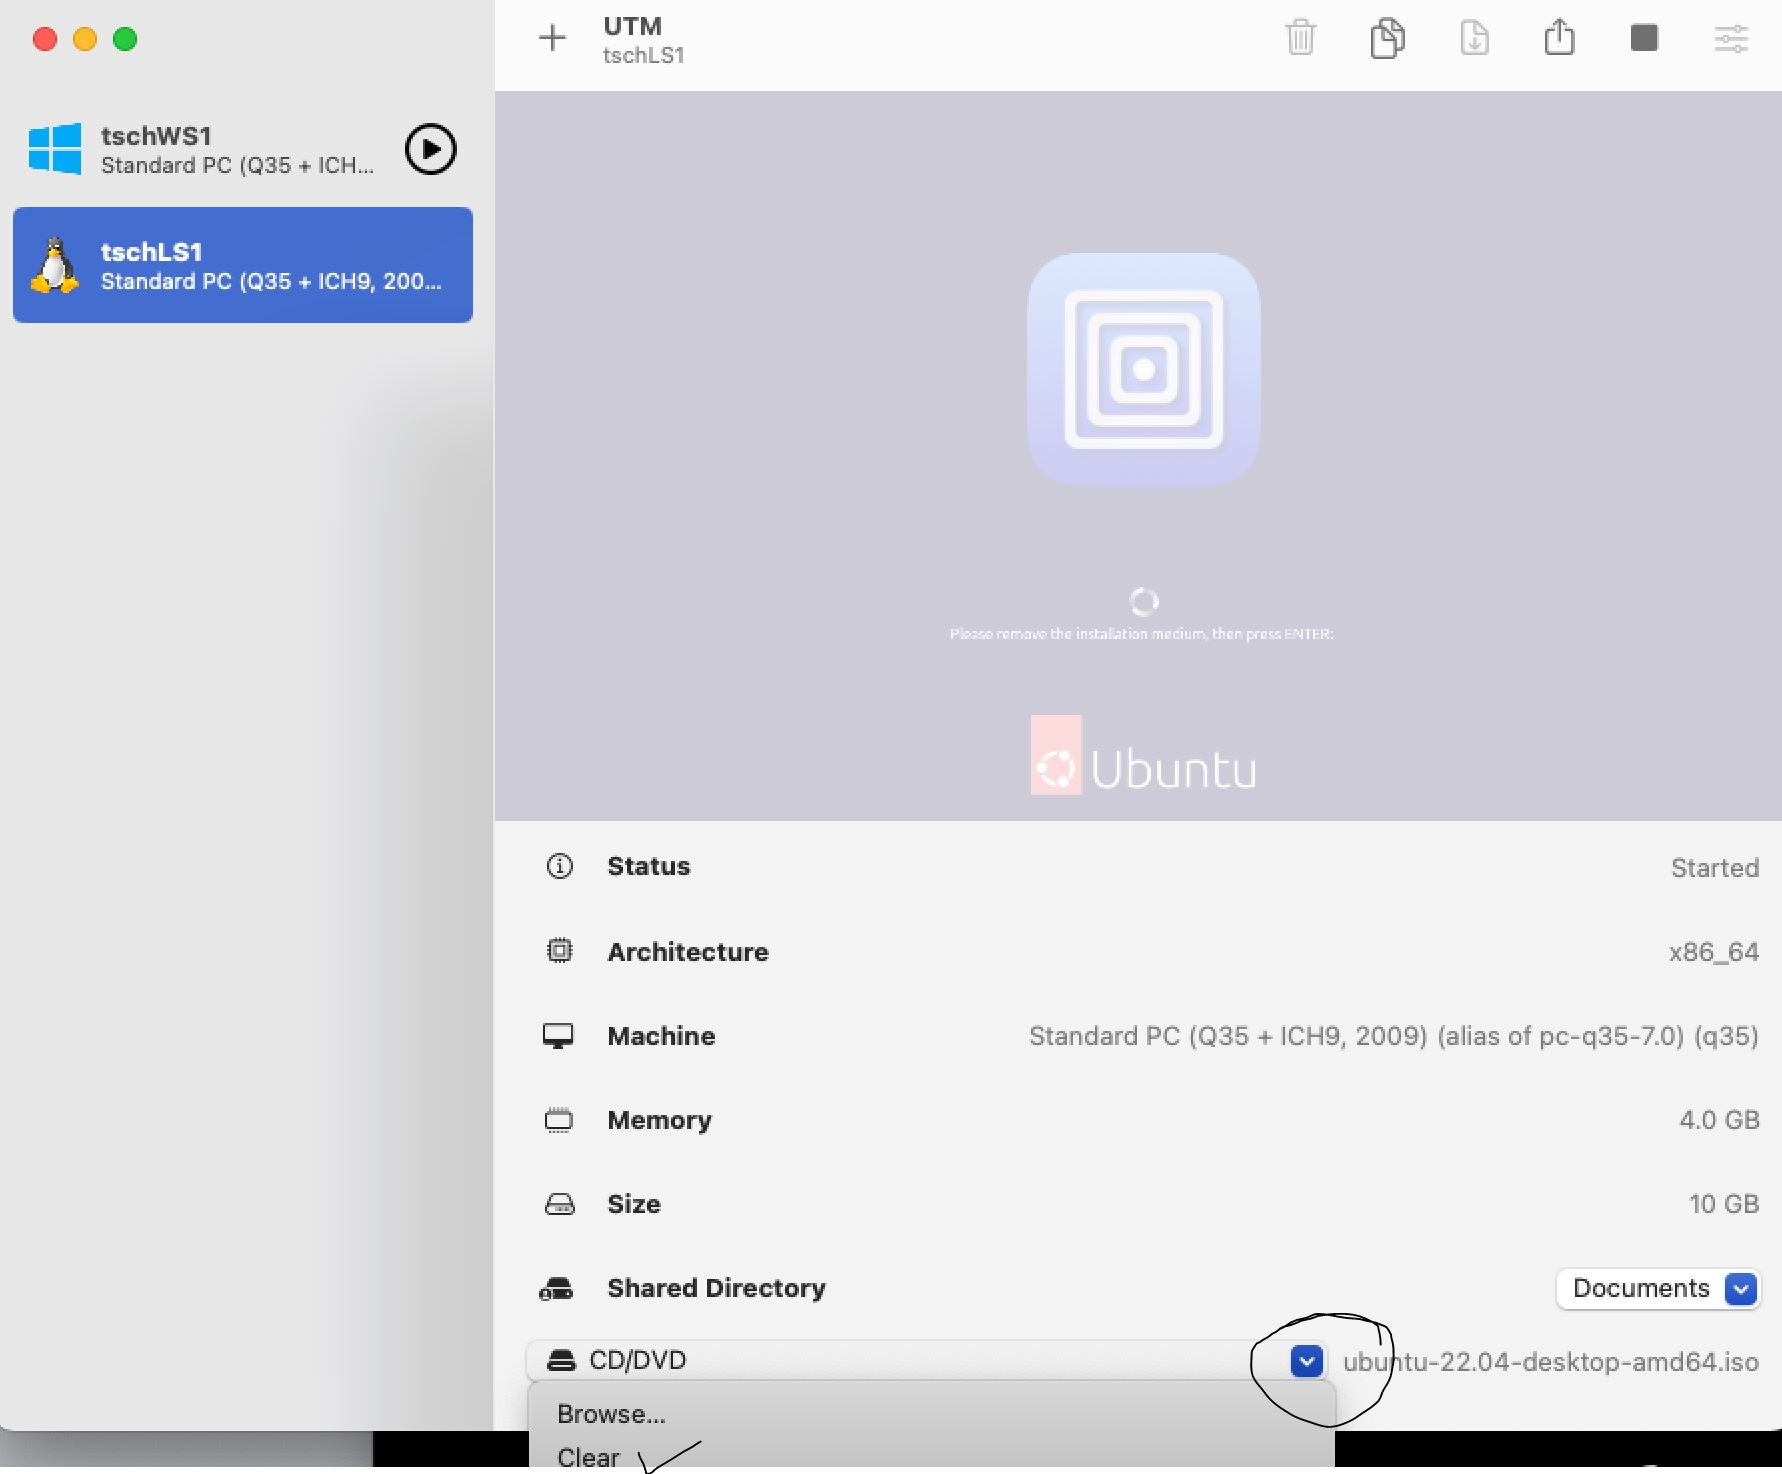
Eventually the install finishes and a restart is required. If you simply click Restart Now your VM will try to boot from the still connected install DVD image (e.g., see second screen cap below). Easiest way to move forward is to get to the VM's settings, use the CD/DVD pull-down and select Clear (3rd screen cap following) and then click Restart Now (if you haven't already) or press ENTER (if you have).

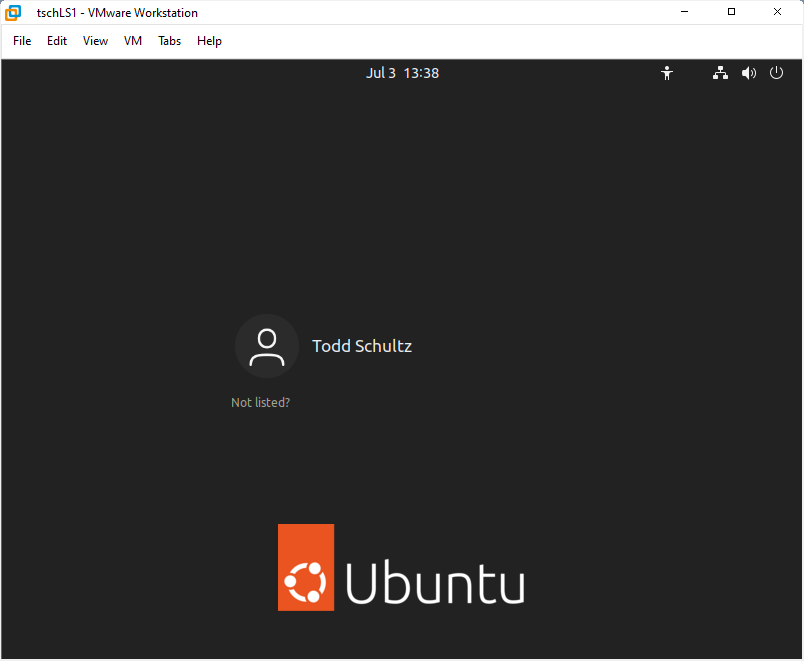
This should get you to your new VM's login screen showing your full name. Click on your name but before entering your password click the 'settings gear' that appears on the bottom right (2nd screen cap) and be sure Ubuntu on Xorg is selected); then type in the password you set up for the VM and press Enter to login. If you return to the first login screen after entering the correct password double check that Ubuntu on Xorg has been selected.

Some First Steps
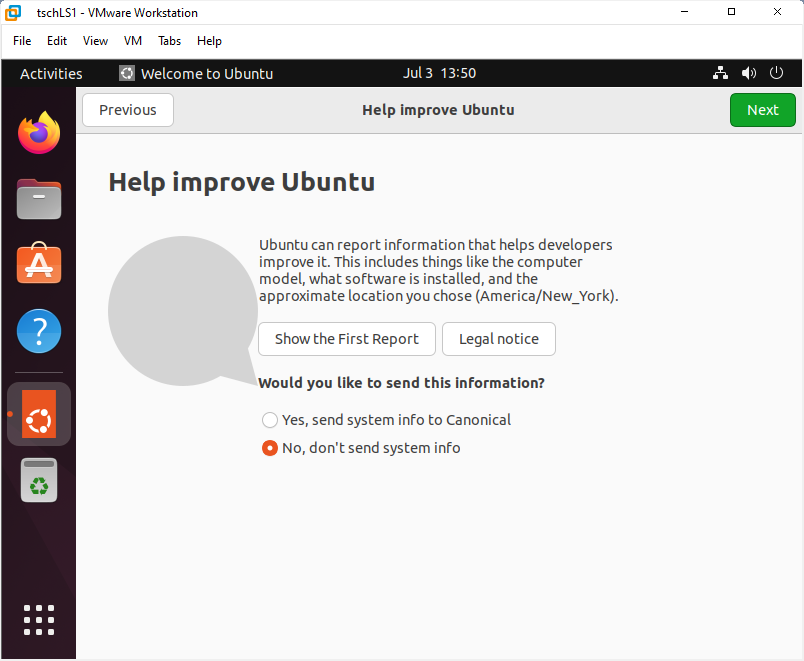
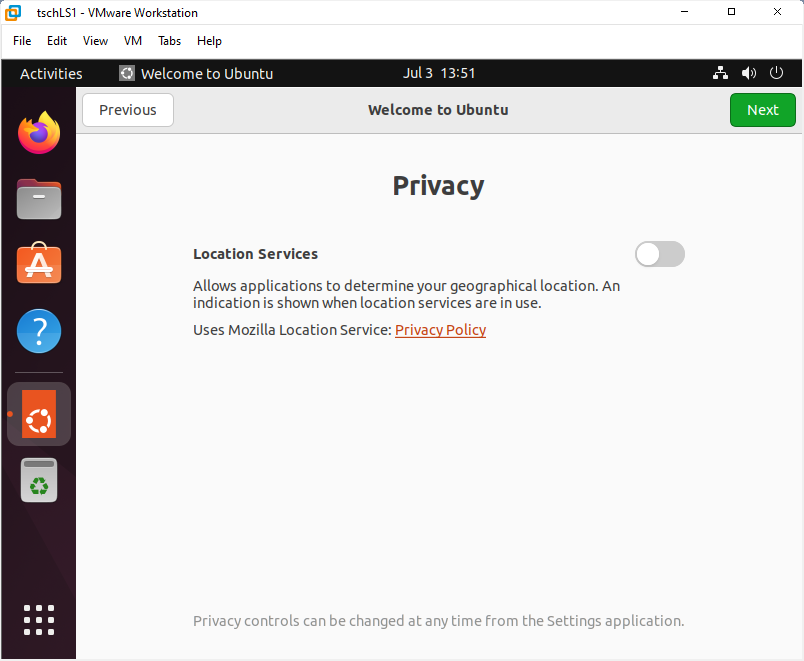
Since this is a Desktop version of Ubuntu, on your first login you will several first-time use prompts. For our purposes, I would use Skip or opt-out and Next and, finally, Done; please see below for guidance on what to do when Software Updater pops up.


Important: As you get started Software Updater will let you know there are updates to be installed. For our use it is better to manually manage updates at the command line using APT (or Aptitude for Advanced Packaging Tool) and not rely on the updater. When you see the following pop up, choose Settings
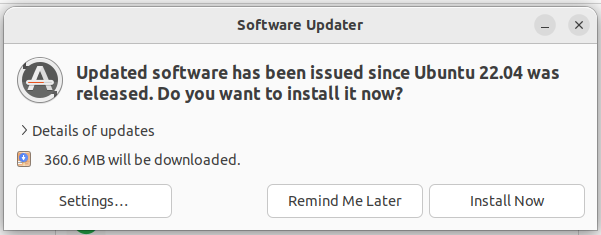
and on the Updates tab set Automatically check for updates to Never; you will be challenged to enter your password for authentication. When done, click Close at the bottom right of the Software & Updates screen and click Remind Me Later when returned to the Software Updater dialog.

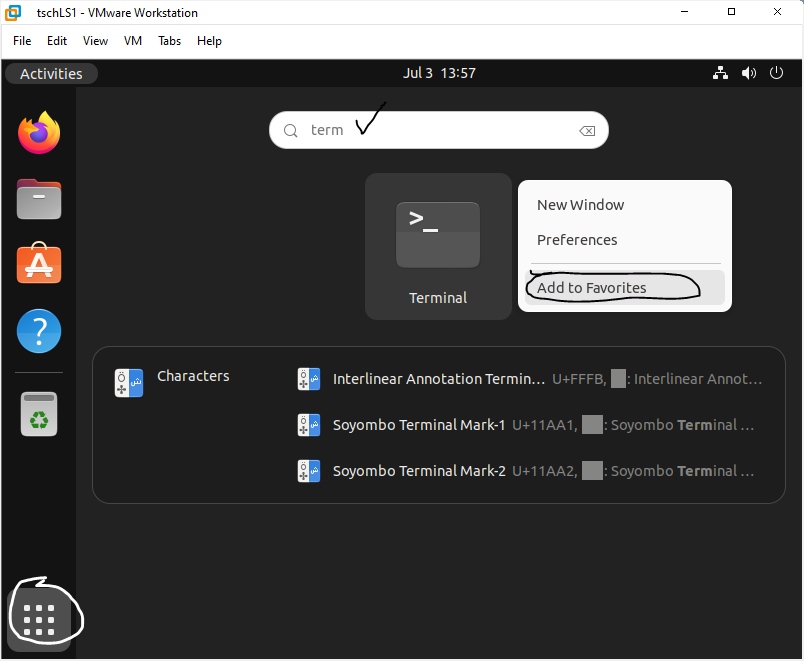
At the login landing page (which will now come up first thing after login) I'd click Show Applications (the grid at the bottom of the left menu of icons), begin typing Terminal, right-click the Terminal icon when it pops up, and choose Add to Favorites. This will make it easy to open a terminal (where we do most of our work) moving forward.
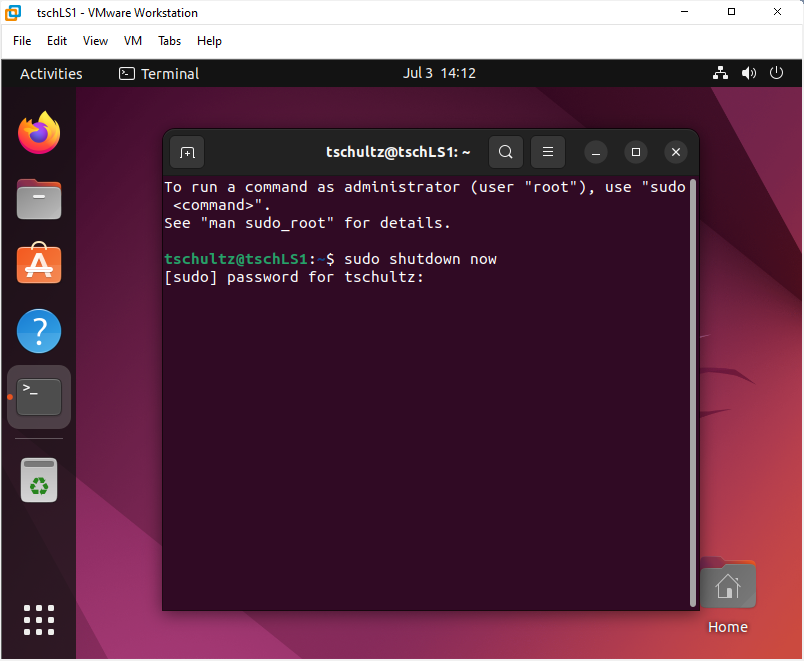
Press escape a couple of times to exit Show Applications and open a terminal. You should see a prompt which contains your login ID (e.g., tschultz for me) @ host name (e.g., tschLS1 for me). Plenty more to do with our server moving forward but for now I suggest shutting it down by using
sudo shutdown now
at the prompt. You will be challenged for your password; type it in -- but note that no dots or asterisks appear in Terminal while typing a password -- and press Enter to safely stop your VM and power off.
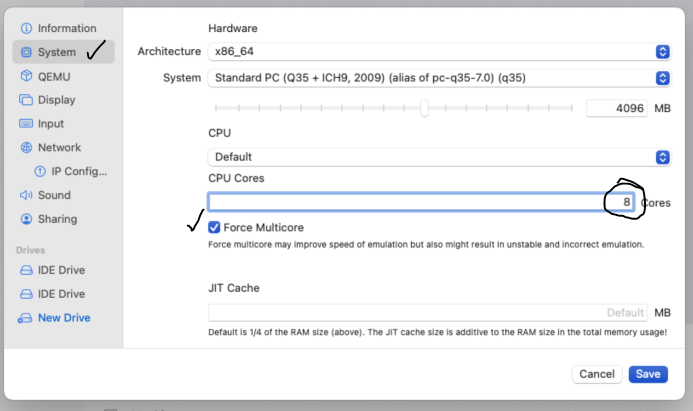
Helping Performance
Emulation using UTM on an M1 Mac can be slow. I have found that re-configuring the VM settings before starting helps with the speed. Right-click your newly created VM and choose Edit. On the System tab change CPU Cores to 8 and click the Force Multicore check box. Then click Save.