Ubuntu Desktop VM on an Intel Mac
Note: If you have an M1 Mac (e.g., see How to check if your Mac has an M1 chip) then use Ubuntu Desktop VM on an M1 Mac instead of this guidance.
Prerequisites:
- Your Mac can host a Ubuntu VM (e.g., see Local VM Hosting) and VMware Fusion has been installed.
- You have access to an Ubuntu install .iso.
Configure the VM
Start VMware Fusion and use File | New, select Create a custom virtual machine, and then click Continue.

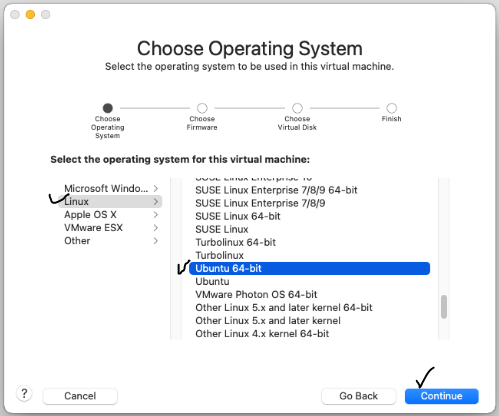
Choose Linux and Ubuntu 64-bit; click Continue.
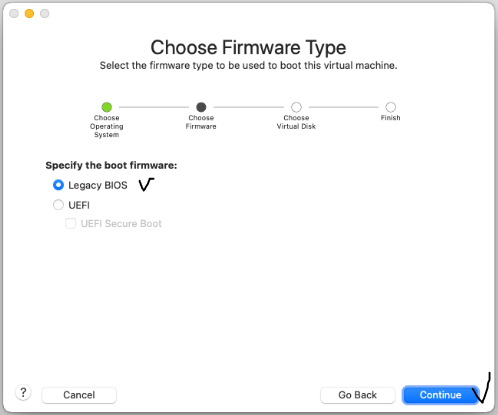
Leave the Firmware option Legacy BIOS (this can be changed later if needed); click Continue.
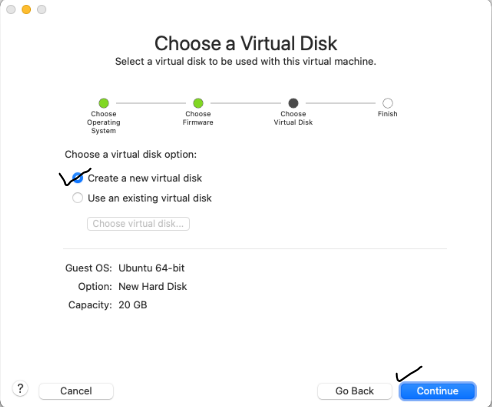
Leave Create a new virtual disk (of 20 GB) selected; click Continue.
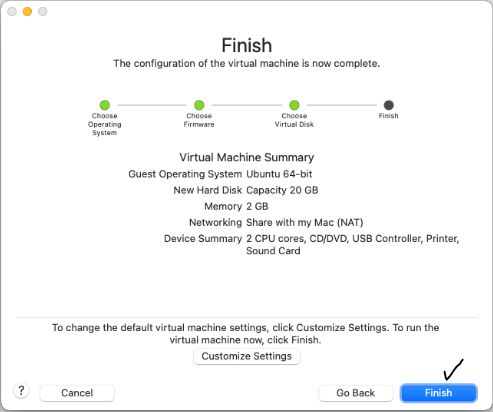
The default setting are typically fine to get started so click Finish to create the VM support files.
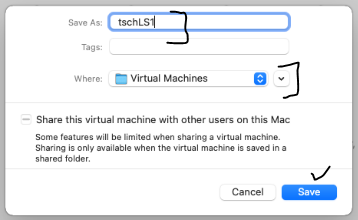
You will need to come up with a name for the VM support files on your Mac. For AIST3720 I recommend the first four characters of your AU login followed by LS1 (for Linux Server One). I'd also leave the files created in the Virtual Machines folder on the Mac but if your Mac is low on disk space, changing this to a folder on an external USB drive might be a good idea. Click Save.
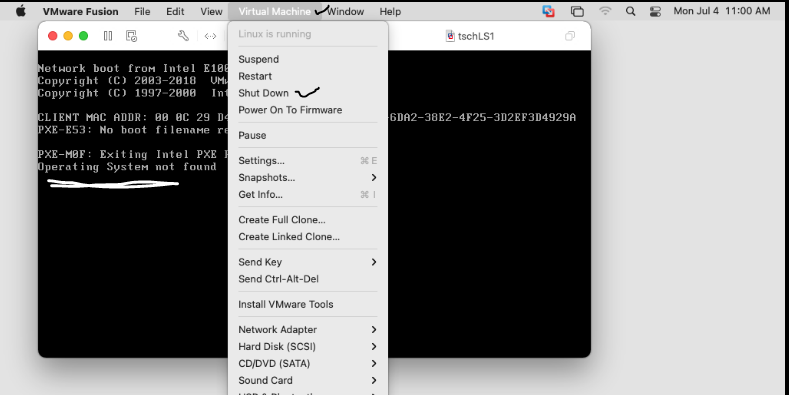
If your VM powers up immediately then probably best to power it off since we need to connect the Ubuntu install .iso. In the VMware Fusion menu use Virtual Machine | Shut Down and then confirm the shut down.
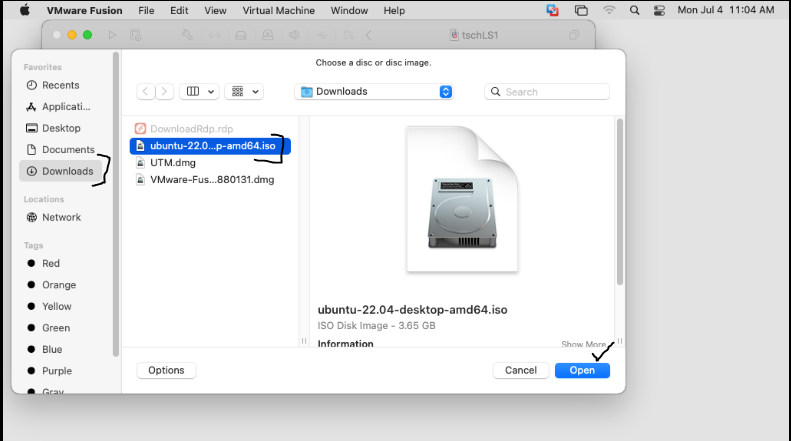
With the VM off use Virtual Machine | CD/DVD | Choose Disc or Disc Image
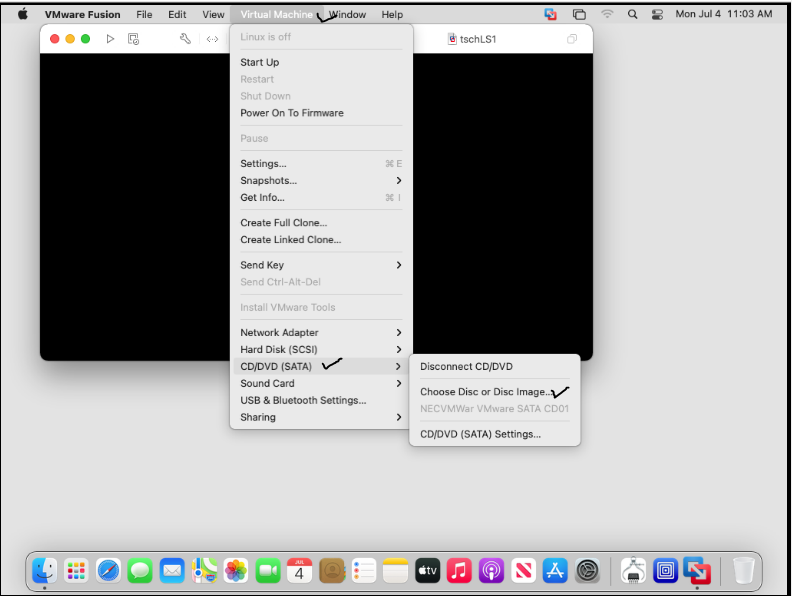
then find the install image in you Mac's file system (e.g., it's in the Downloads folder in the example), highlight it and click Open. This is akin to inserting an install DVD in the drive of a physical computer.
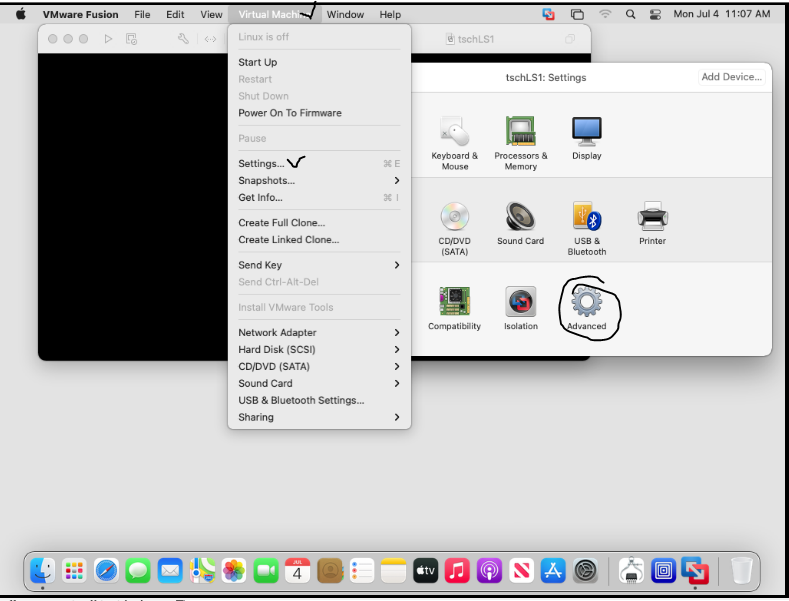
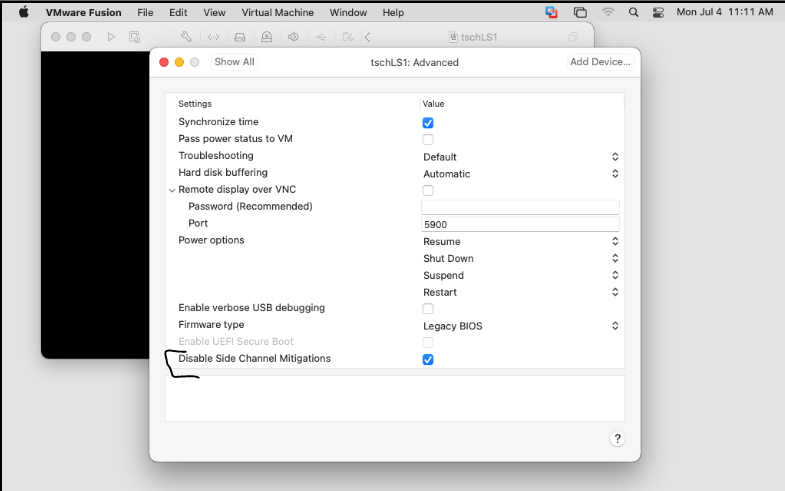
I suggest disabling side-channel mitigations to get better performance; we aren't too concerned about the security issues since we aren't running multiple VMs for clients in our hypervisor; if you don't you will get a notice when you start your VM like that below. Having mitigations enabled is not a problem but the setting needs to be changed while the VM is off Use Virtual Machine | Settings and select Advanced.
Then check Disable Side Channel Mitigations; this will be saved when you close the window (e.g., using X in the upper left corner).
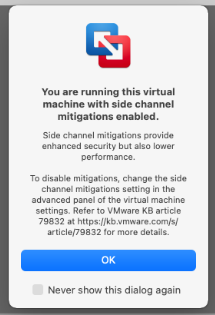
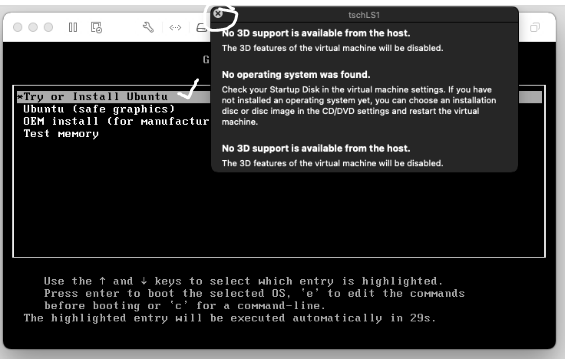
If you get the following when starting your VM it means side channel mitigations are still enabled. Your VM will run fine, just a bit slower. Perhaps disable mitigations when you next turn off your VM.
Start the Install
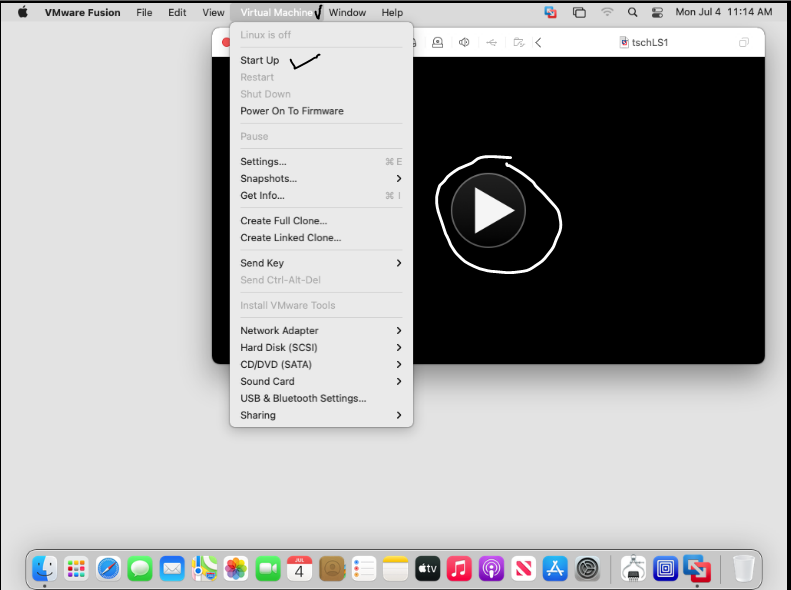
Pressing the Play button or using Virtual Machine | Start Up will power on the VM which will boot from the install .iso we've set up.
Any warnings that pop up can be dismissed. Click in the window, select Try or Install Ubuntu, and press Enter.
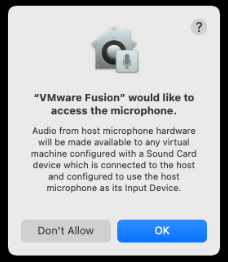
VMware Fusion might request access to devices on your Mac to make them available within the VM. I usually select Don't Allow since for AIST3720 we are standing up an independent server but no harm if you connect the devices.
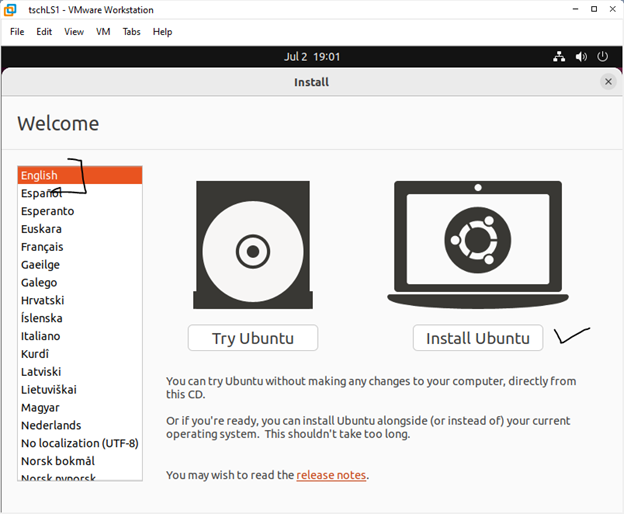
Begin the install by selecting a language (for install guidance) and then clicking Install Ubuntu.
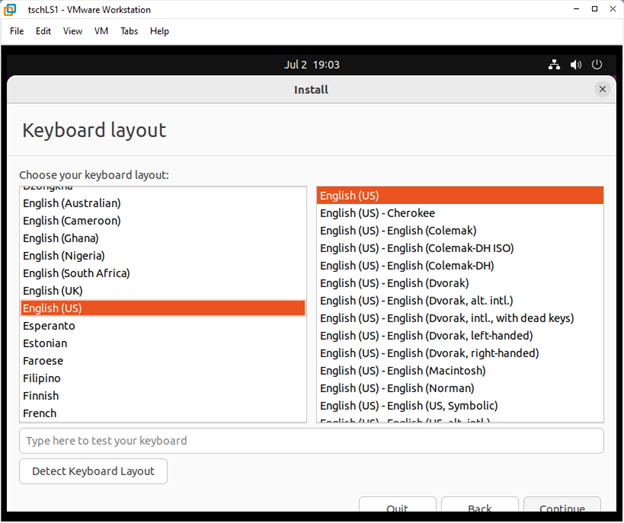
Choose a keyboard and language for the VM and then click Continue.
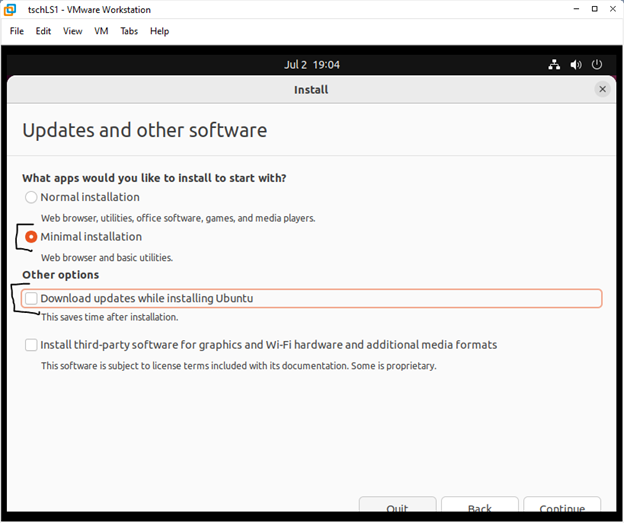
For AIST3720 I recommend the minimal installation and to not download updates with the install.
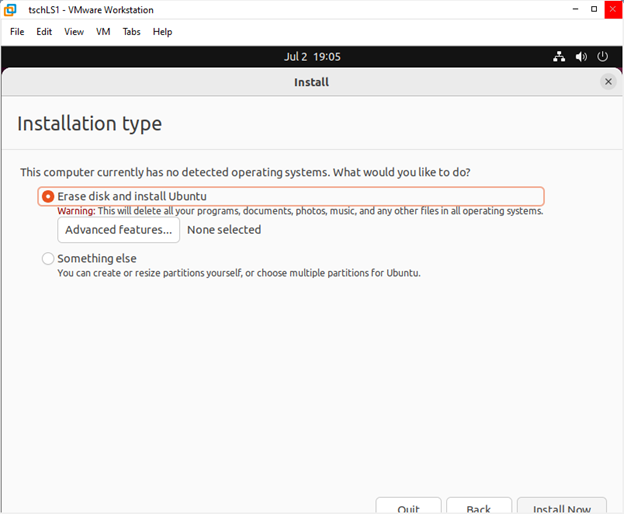
Keep Erase disk and install Ubuntu (there really is nothing on our virtual disk yet so nothing will really be erased). Click Install Now.

Click Continue at the 'are you sure' dialog. Keep in mind that if we were installing on an existing computer these warnings help to keep from accidentally overwriting an existing OS.
Select / accept a time zone.

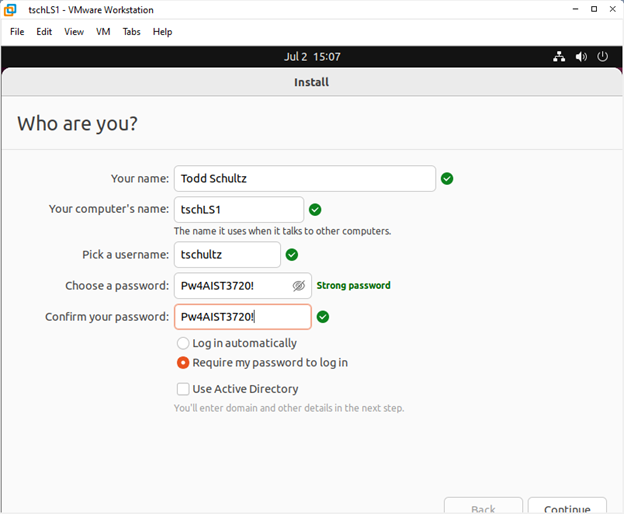
Fill in your name. For AIST3720 the computer's name (i.e., the server host name) should be the first four characters of your AU login followed by LS1 and your username should be your AU login (i.e., AU email without the @augusta.edu). The password Pw4AIST3720! is what I use for all my class oriented VMs -- it passes all the complexity rules I've run into -- but please make this something you can remember; I am not sure this could be reset but it probably isn't easy.
The installation starts. It'll take awhile but go get a coffee or do other things with your computer. This is not a good time to put your PC to sleep.

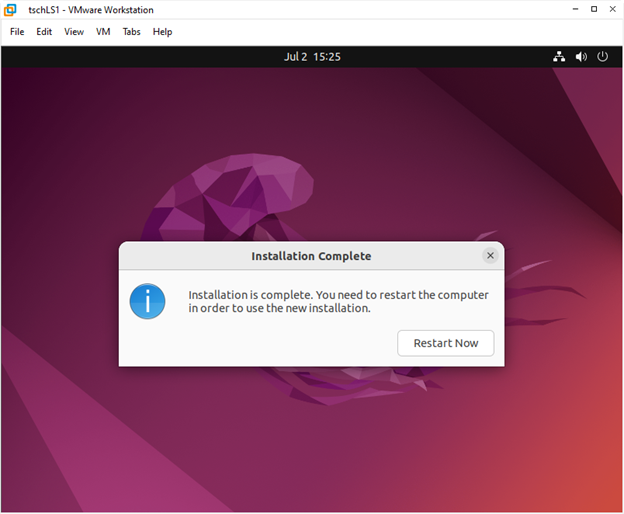
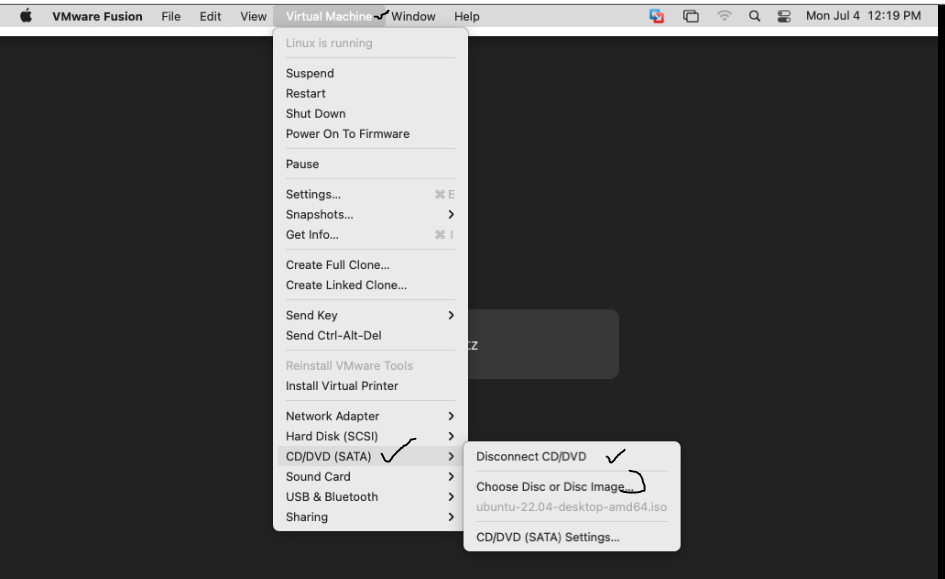
Eventually the install finishes and a restart is required. If you simply click Restart Now your VM will try to boot from the still connected install DVD image (e.g., see second screen cap below). Easiest way to move forward is to use Virtual Machine | CD/DVD and disconnect it or change the image (3rd screen cap following) and then click Restart Now (if you haven't already) or press ENTER (if you have).

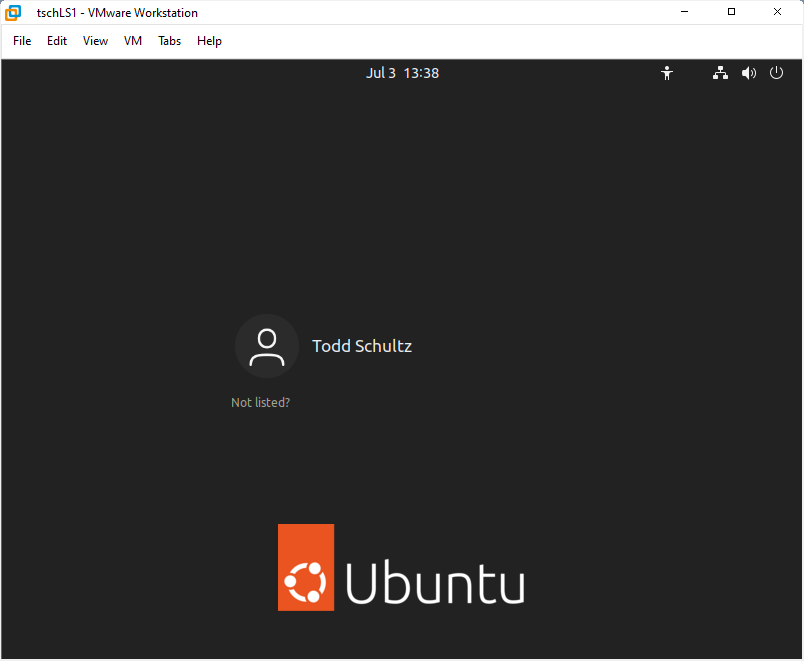
This should get you to your new VM's login screen showing your full name. Click on your name, type in the password you set up for the VM and press Enter to login.
Some First Steps
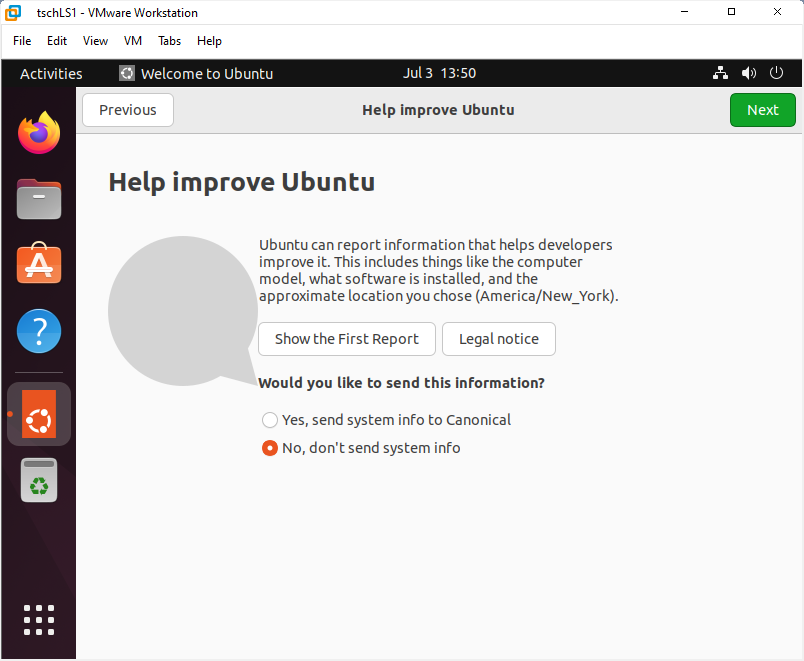
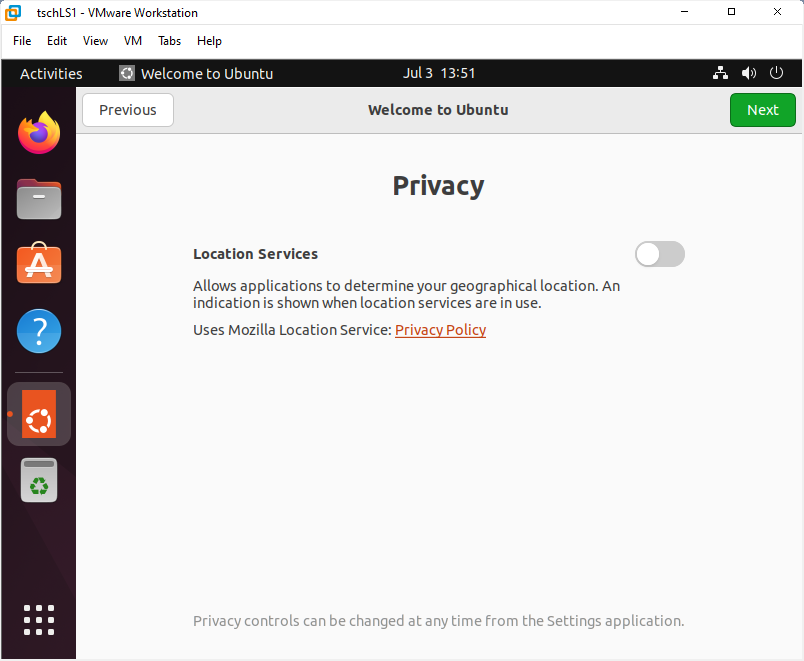
Since this is a Desktop version of Ubuntu, on your first login you will several first-time use prompts. For our purposes, I would use Skip or opt-out and Next and, finally, Done; please see below for guidance on what to do when Software Updater pops up.


Important: As you get started Software Updater will let you know there are updates to be installed. For our use it is better to manually manage updates at the command line using APT (or Aptitude for Advanced Packaging Tool) and not rely on the updater. When you see the following pop up, choose Settings
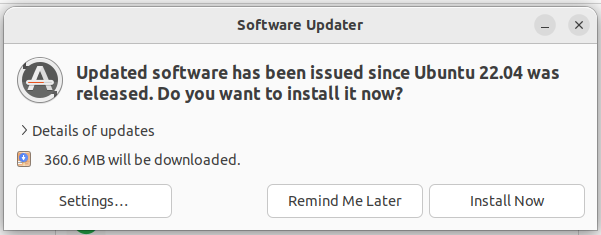
and on the Updates tab set Automatically check for updates to Never; you will be challenged to enter your password for authentication. When done, click Close at the bottom right of the Software & Updates screen and click Remind Me Later when returned to the Software Updater dialog.

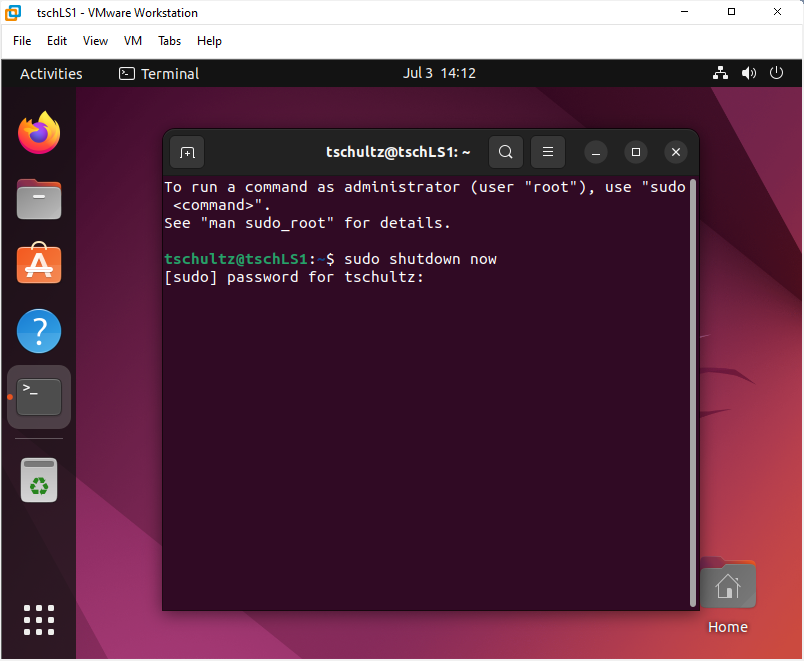
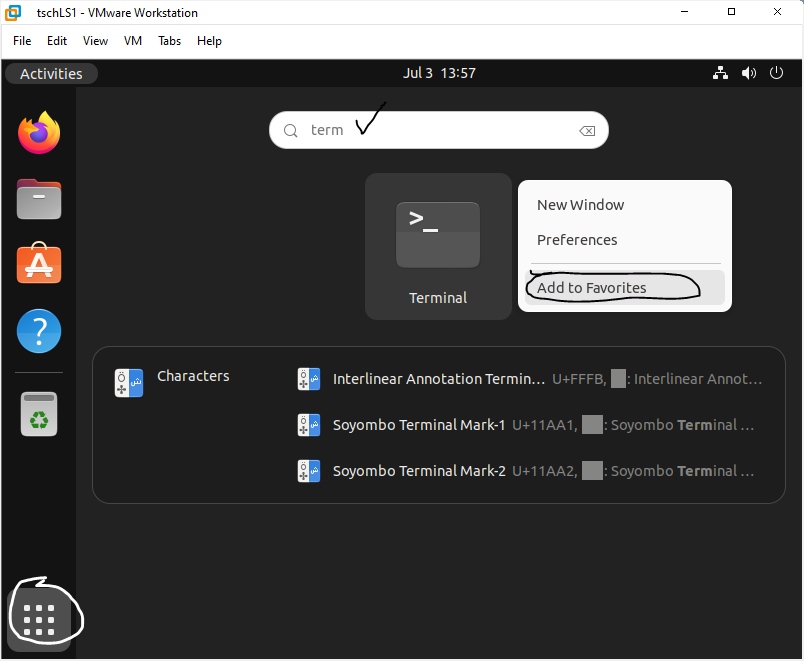
At the login landing page (which will now come up first thing after login) I'd click Show Applications (the grid at the bottom of the left menu of icons), begin typing Terminal, right-click the Terminal icon when it pops up, and choose Add to Favorites. This will make it easy to open a terminal (where we do most of our work) moving forward.
Press escape a couple of times to exit Show Applications and open a terminal. You should see a prompt which contains your login ID (e.g., tschultz for me) @ host name (e.g., tschLS1 for me). Plenty more to do with our server moving forward but for now I suggest shutting it down by using
sudo shutdown now
at the prompt. You will be challenged for your password; type it in -- but note that no dots or asterisks appear in Terminal while typing a password -- and press Enter to safely stop your VM and power off.