Install VMware Fusion on an Intel Mac
Note: If your Mac has an M1 chip (e.g., see How to check if your Mac has an M1 chip) then it can't create the Windows and Linux VMs we will be using.UTM will be used instead to emulate these operating systems (e.g., see Install UTM on a Mac with M1).
You must first have established a VMware subscription on Brightspace D2L, using it to download the VMware Fusion install disk image and get a registration key (e.g., see VMware on Brightspace).
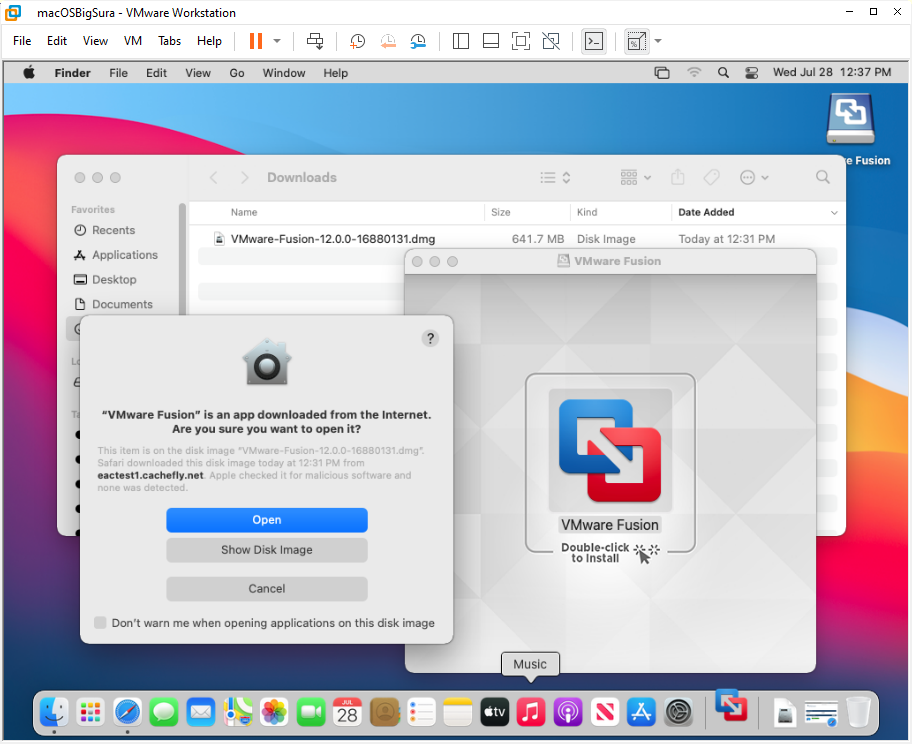
Find the disk image, right-click it and choose Open. Double-click on the VMware Fusion popup to install and click Open to agree to open a file from the internet. During the install you will need to authenticate with your Mac credentials a couple of times, agree to a license agreement and enter your Serial Number as a License Key. Click Done after the install.
VMware Fusion will need some permissions to run. Click OK on both the pop ups.
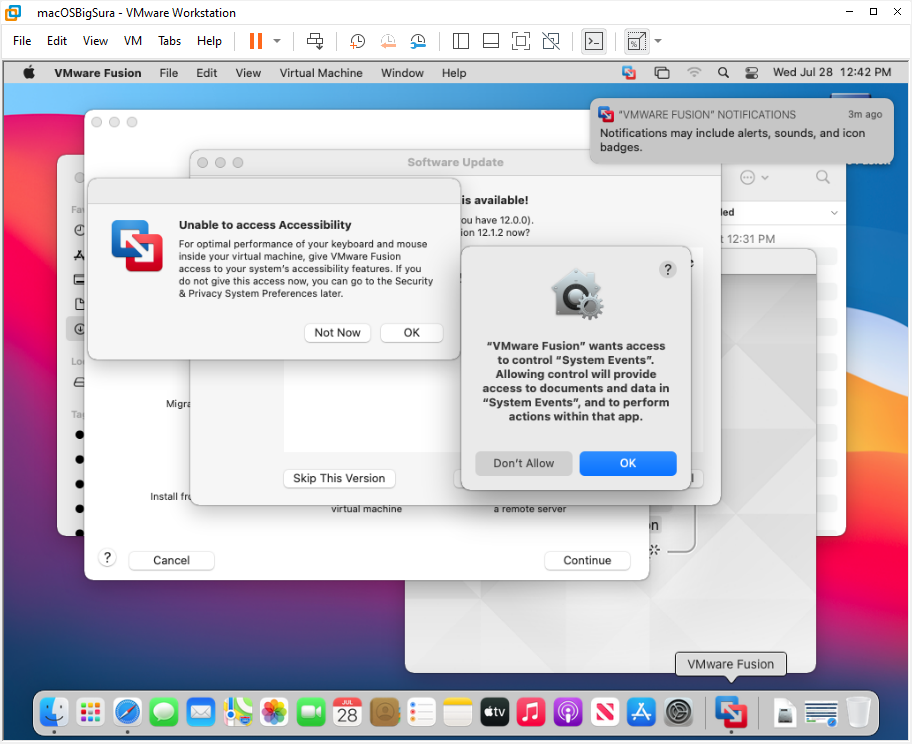
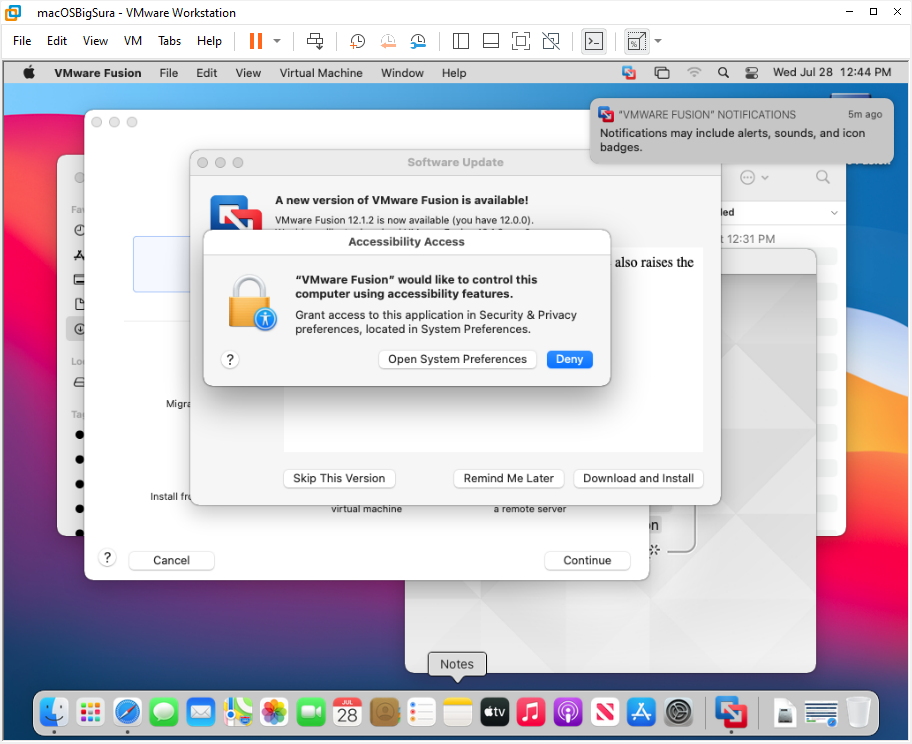
At the Accessibility Access dialog click Open System Preferences.
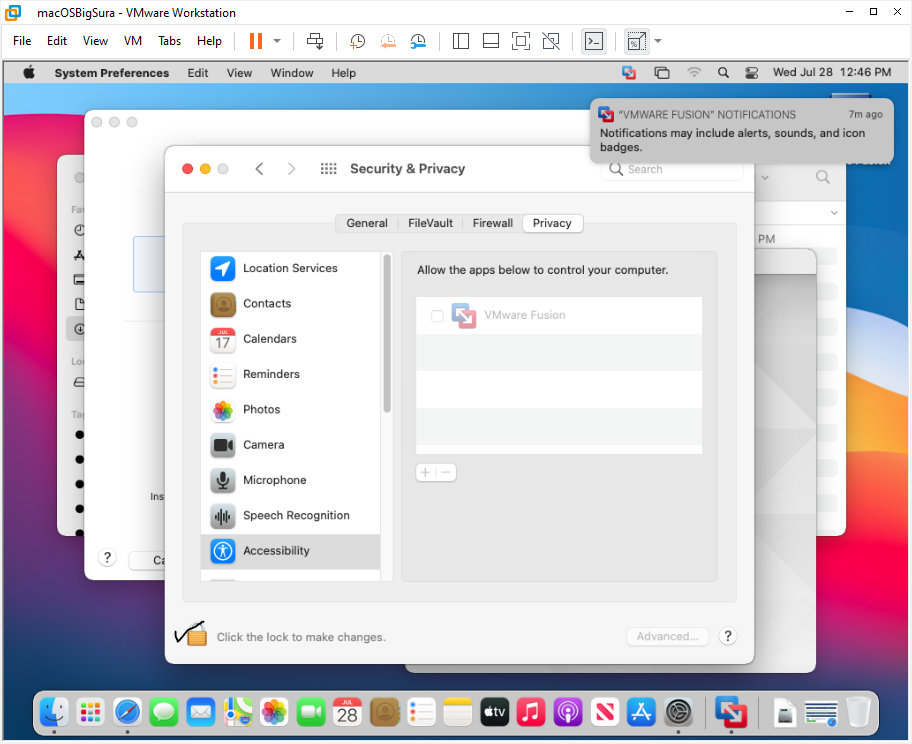
In Security & Privacy | Accessibility click the lock to make changes and authenticate with your Mac credentials, click unlock, click the checkbox next to VMware Fusion and -- if or when it appears -- vmware-tools-daemon, click the lock again to re-lock and exit Security & Privacy.
 -
-
Installing updates is up to you; I suggest it after a first install but ignore other updates during the term unless the update is required. After a successful install the disk image .dmg file can be unmounted; you can delete this file but I might keep it around for a bit in case a re-install is needed. VMware Fusion can now be started like any other application; if it started as part of the install and you aren't ready to build or open a VM just cancel the dialog and exit VMware Fusion.