Deploy Simple .Net App
Synopsis: Your TechCats Dev Tools subscription includes a public facing web site which you can administer via IIS, including the ability to deploy applications. In this exercise you create and publish a trivial ASP.Net application. This is primarily about handling the mechanics of publishing and managing web applications than it is about web development or coding.
Prerequisites:
- Access to a Dev Tools subscription from TechCats (you can do this 'in principle' on any ASP.Net server with Visual Studio available but the mechanics would likely be different) and knowledge of your VM's computer name and your login ID on the remote desktop. Note: A TechCats Power User Tools subscription does not include a hosted website on the remote server.
- Familiarity with how to use remote desktop (e.g., see Managing a Remote Desktop).
- Some familiarity with basics of writing web pages, developing C# code, using Visual Studio, and working in Windows and its file system.
Notes:
- You have full access to a web site served by the remote VM. This document describes the naming and conventions used on the server for you to work with the site. Server level and domain questions (e.g., applying SSL certificates, getting a different URL) are beyond the scope here.
- In the guidance below substitute your login ID when you see {LoginID} and VM computer name when you see {Computer}. In videos and examples you will often see tschultz and vm-1 for these values.
- You can find the name of your computer after remoting in by clicking Start and typing Computer Name (there are probably a hundred other ways).
- Many of the specifics of site names, folder names, etc. applied aren't necessarily requirements for establishing web sites (e.g., there is no requirement that the computer name be part of the url or that web directories be in a folder named DevWebs); they are simply way we have configured things to get you moving forward with developing web sites.
- How and why this works (e.g., what is an application pool? how / why would I set IP and domain restrictions?) are not addressed here; this walk thru just stands up a simple app.
- There are a 1000 ways to do much of this so these steps are illustrative examples; feel free to use your own approaches when you are sure they are accomplishing what you want.
The video provides some "look and feel" for the detailed exercise guidance below where we create and deploy a generic http handler.
SimpleASP dotNet App
- Access your web site's root
- From a web browser visit http://{LoginID}.{Computer}.techcats.solutions (e.g., http://tschultz.vm-1.techcats.solutions) to validate your default web site is active. Note that -- at this writing -- access via https instead of http will look insecure since a TechCats Solutions certificate is covering the web server has gotten expensive. (https helps authenticate the website and encrypts traffic between the server and browser).
- Log into the remote desktop VM and use File Explorer (or use some other method) to visit the folder C:\DevWebs\{LoginID} (e.g., C:\DevWebs\tschultz). This folder is the root of your web site so anything placed in this folder will be available via the public internet. The Default.htm file found in C:\DevWebs\{LoginID} was the response to the http://{LoginID}.{Computer}.techcats.solutions request because of how IIS and your site were configured..
- For the fun of it, edit the Default.htm file found in C:\DevWebs\{LoginID} (e.g., using NotePad or Visual Studio Code) and change something (e.g., change your name in the first <h2> tag to some avatar nickname or do something more substantial). Save your changes, return to the browser from I.A. above, refresh the page, and you should see the change reflected. Nothing new if you are used to posting to web sites but validation that what you place in C:\DevWebs\{LoginID} is available on the wild-world-of-web.
- Close Default.htm (suggested; having it open doesn't hurt anything).
- Develop an ASP.Net app
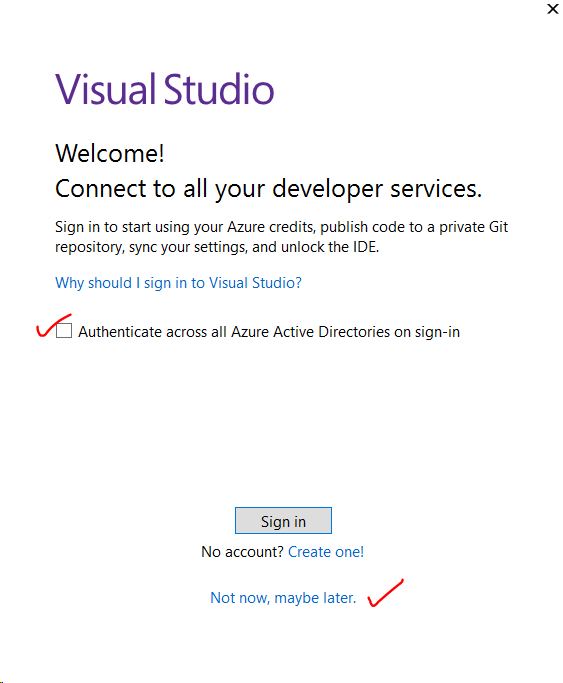
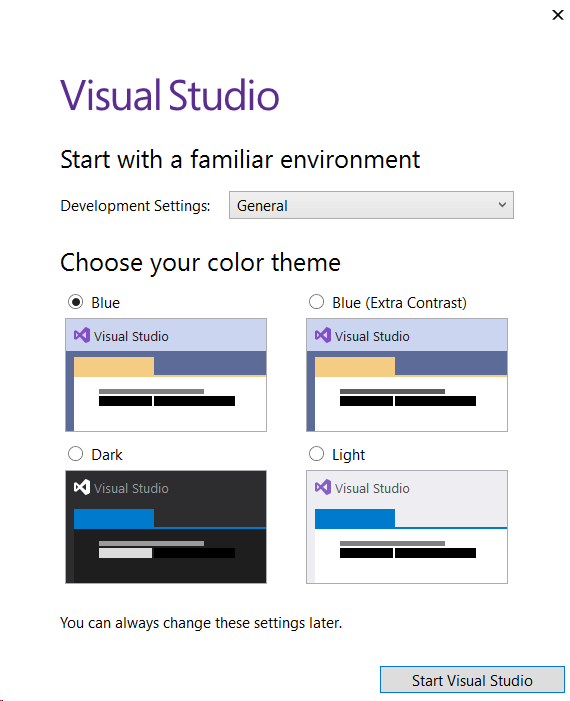
- While on the remote desktop VM open Visual Studio 2019 (not VS Code or VS Blend). If you get a pop-up like the following uncheck the box and choose Not now, maybe later (unless you have a Microsoft account you'd like to use while you develop). You may also get to choose your development environment look & feel but Start Visual Studio when done. There may be a little delay the first time into the product using this logon ID.
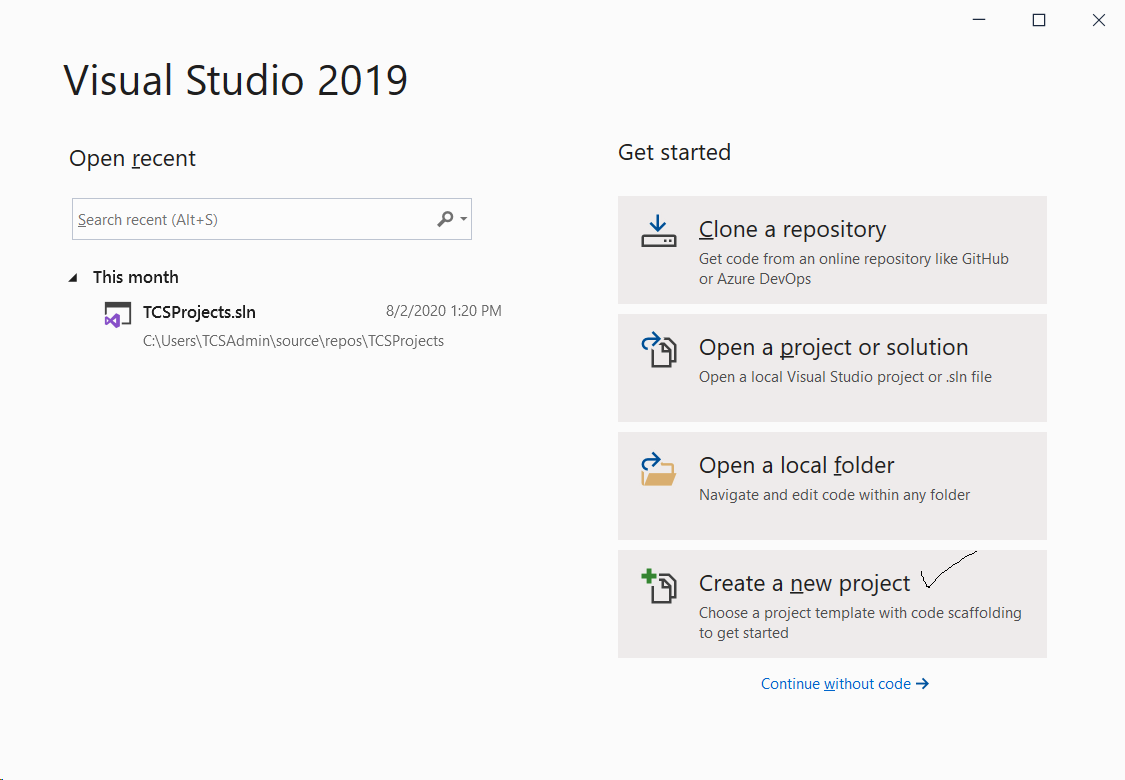
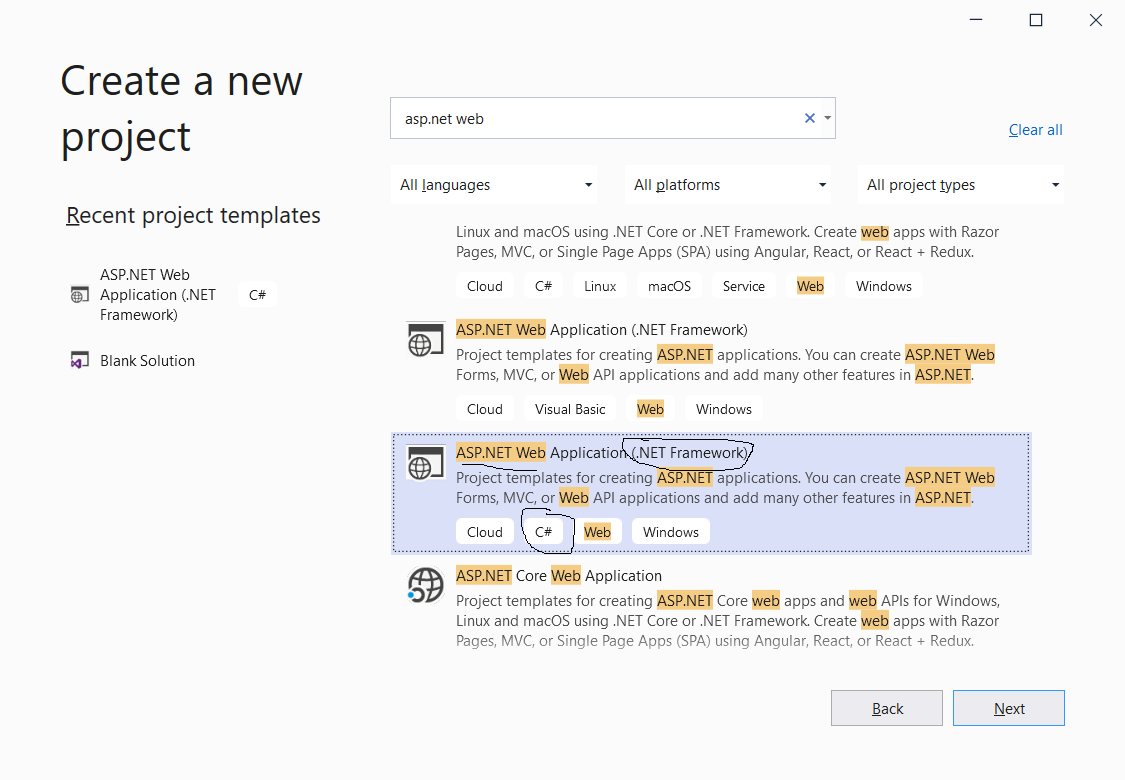
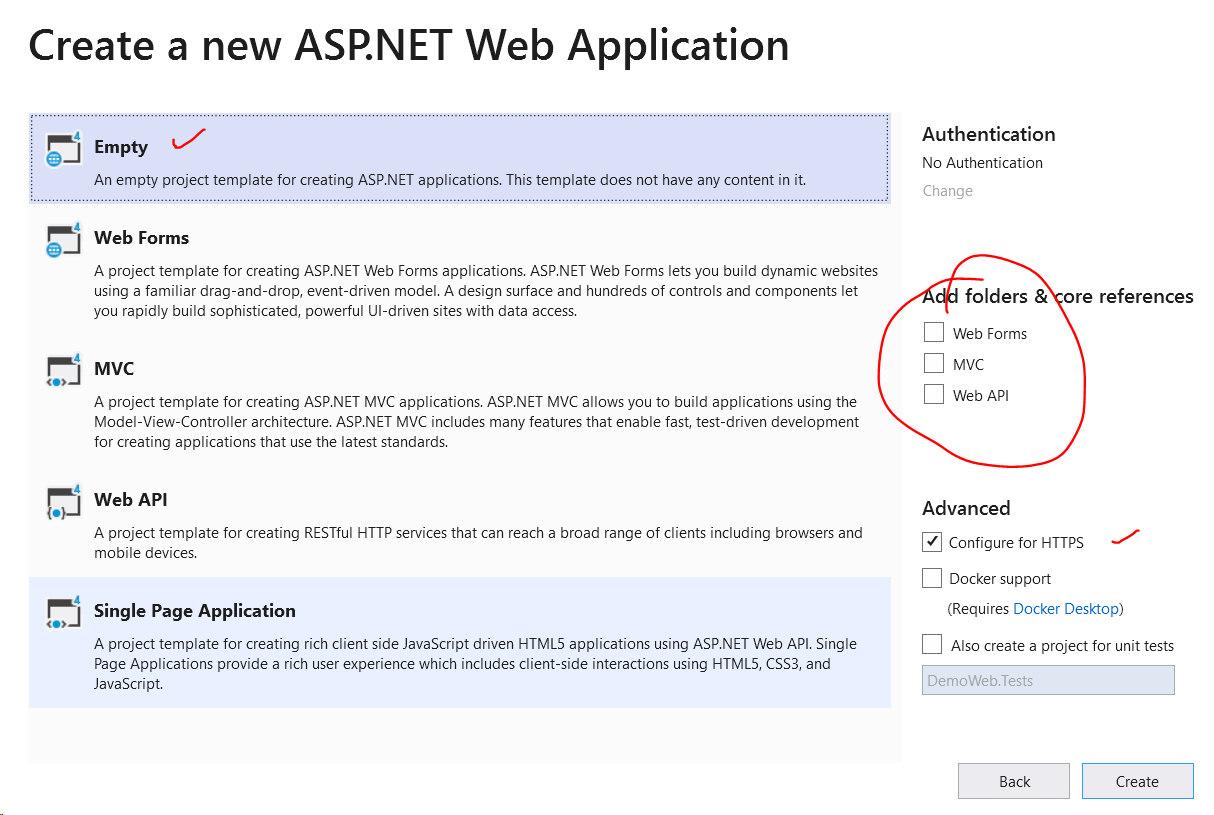
- Choose Create a new project then search for asp.net web, select ASP.NET Web Application (.NET Framework) using C# and click Next. Name the Project DemoWeb noting that a solution of the same name will be created and the solution / project assets will be placed in a folder named DemoWeb within the source\repos folder within your C:\users\{LoginID} folder -- click Create. Choose and Empty project template with no added folders & core references but OK to leave Configure for HTTPS checked -- click Create.

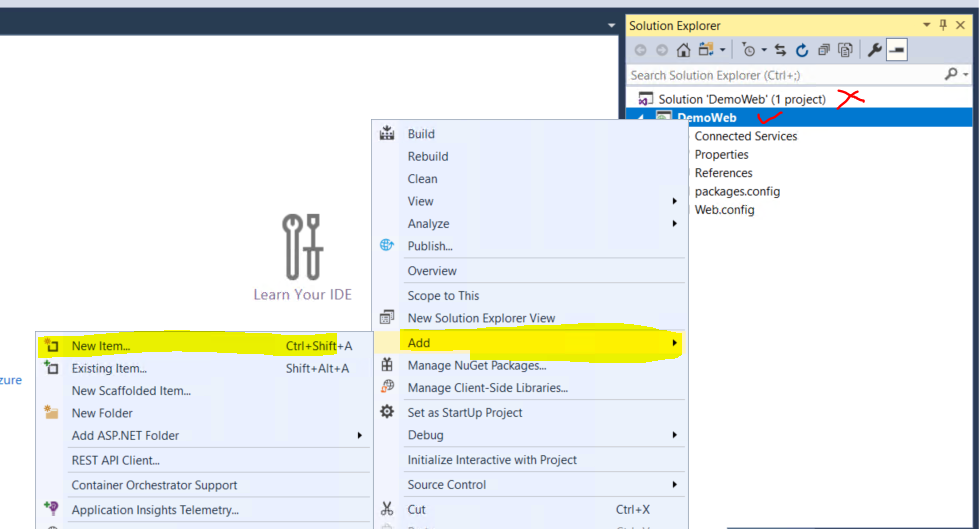
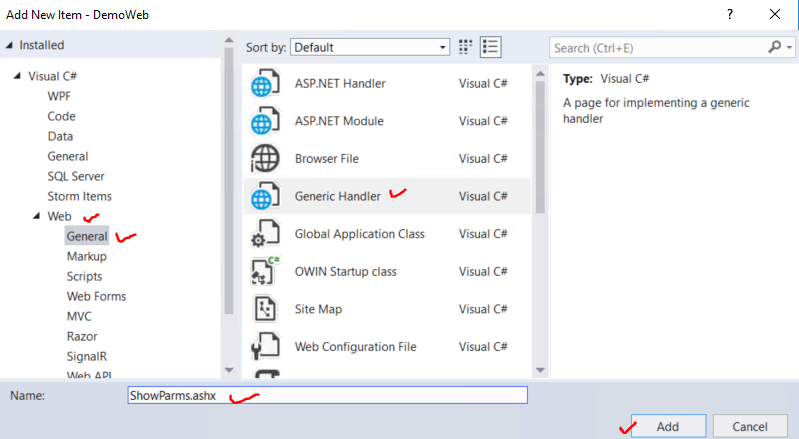
- Using Solution Explorer (which should appear on the right; if it does not use View | Solutions Explorer or Ctrl + Alt + L) right-click the DemoWeb project (not solution) and choose Add | New Item. Then on the Add New Item dialog choose Web | General | Generic Handler naming it ShowParms.ashx and then click Add.
- Replace the default ProcessRequest method with the following code (which writes an html response containing a list of all the parameters found in the request that triggered the response):
public void ProcessRequest(HttpContext context)
{
context.Response.ContentType = "text/html";
context.Response.Write("<html><head><title>Hello from Todd</title></head><body>");
context.Response.Write("<p>Hello World from Todd</p>");
context.Response.Write("<p>Here is a list of the params I got:</p>");
foreach (string pKey in context.Request.Params.Keys)
{
context.Response.Write(string.Format("<p>{0} = {1}</p>", pKey, context.Request.Params[pKey]));
}
context.Response.Write("<p><strong>That's all folks!</strong></p></body></html>");
context.Response.End();
}
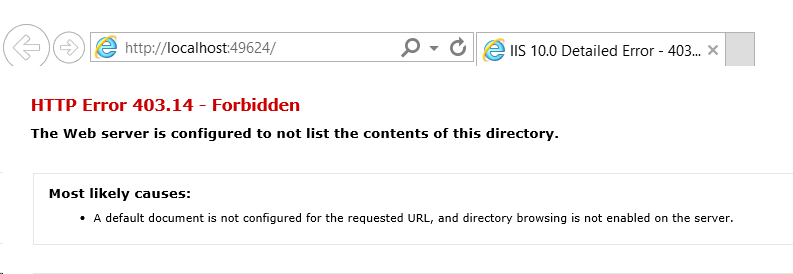
- Press F5 to test the application. You will get a 403.14 error since no file name was supplied in your request, we haven't set up a default documents, and we haven't allowed listing of directory contents. Add ShowParms.ashx to the end of the URL and press enter and you should get a response similar that that shown. You may get some dialogs about using the IISExpress Server for SSL and just agree that it's ok and that you'll accept the certificate. You should get a browser window that opens to localhost and a web page showing the text you created. As you probably know this isn't on the web, it's just running in a temporary server for development and testing.

- Close the browser window and if debugging doesn't stop then use Debug | Stop Debugging to stop your temp server and page. Of course fix any errors / issues before publishing the app.
- Publish the app
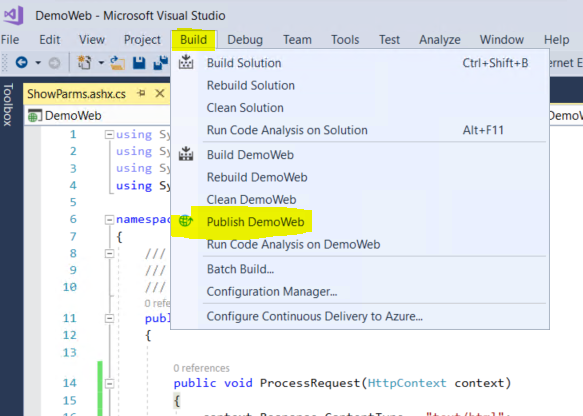
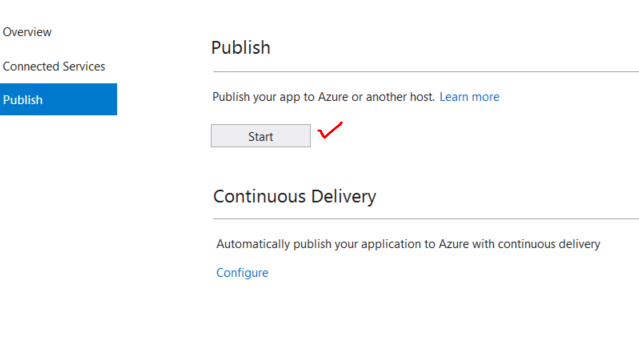
- While in Visual Studio with the DemoWeb project open select Build | Publish DemoWeb. On the first screen of the Publish dialog click Start.
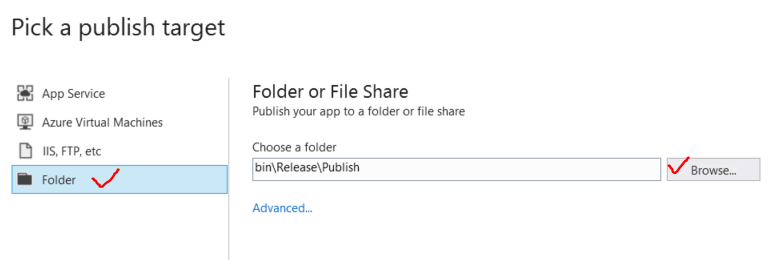
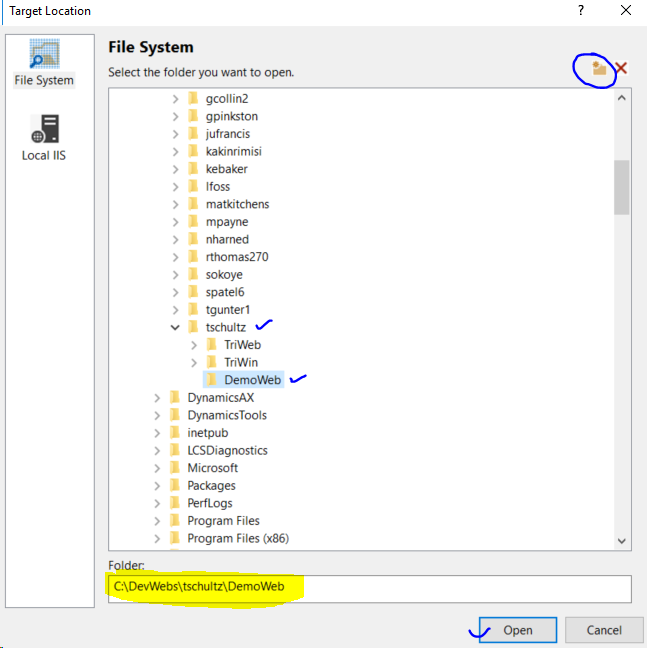
- Choose Folder as the publish target and use Browse to identify where you intend to publish the application.
- Find the folder C:\DevWebs\{LoginID} and use the new folder button and create a folder named DemoWeb (don't worry if you don't have other folders the same as the example); highlight the folder and click Open. Back on the publish target dialog make sure that's the folder targeted for publishing and then click Publish. Visual Studio should indicate a successful Build & Publish in the Output window (not shown).

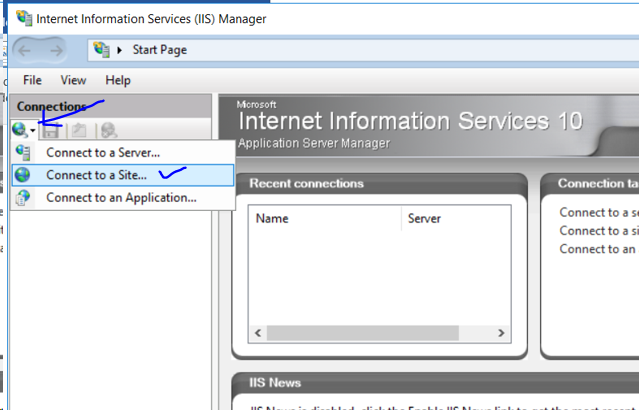
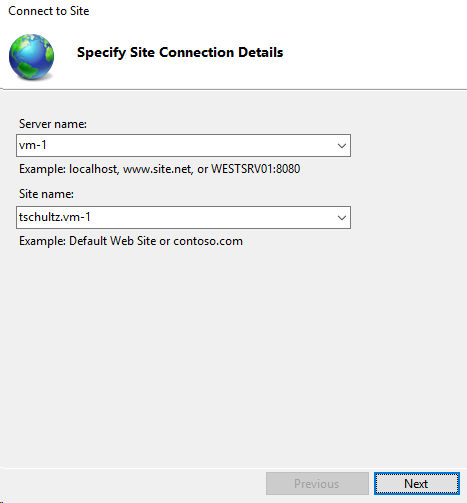
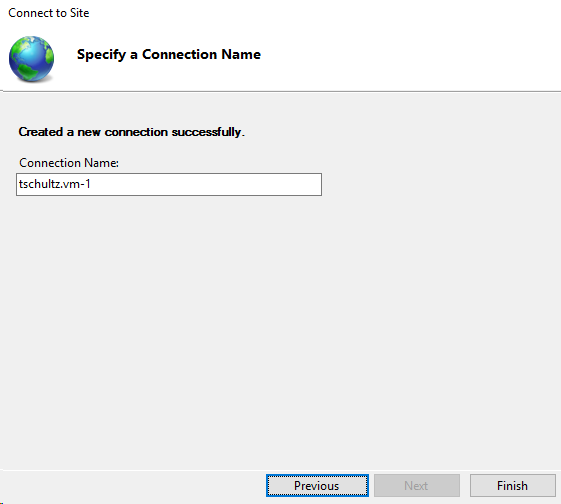
- Since this is our first publish of this application it needs some setup in Internet Information Services (IIS, Microsoft's web server). It's up to you whether you stay in Visual Studio but click the Start button, type inetmgr, and press enter. Use the Connections pulldown and select Connect to a Site. The Server name will be {Computer} and Site name will be {LoginID}.{Computer} for this connection; then click Next
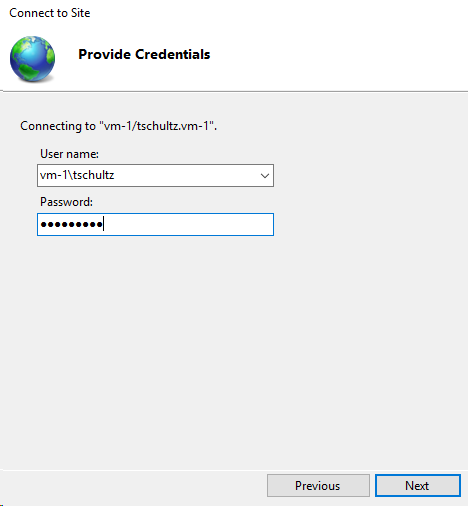
- Your User name is {Computer}\{LoginID} and password is the same as that for accessing the VM. A name will be generated for the connection (you can change it if you want); the connection settings (Server, Site, and User name but not password) can be saved so they need not be entered again (you can click the save button to save this connection after you have entered them or when you exit you will be asked if you want to save them). Click Finish to, well, finish.
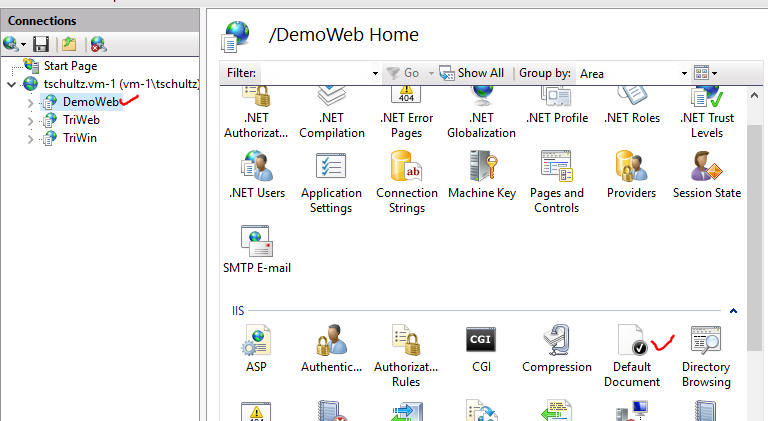
- Use the pulldown next to your site name. You should see DemoWeb (don't worry about others) but notice in the screen cap below DemoWeb has a folder icon where others have an icon that means it's an application and not just a folder. If someone were to make a request to http://{LoginID}.{Computer}.techcats.solutions/DemoWeb/ShowParms.ashx now they'd get an error because that folder isn't set up to process applications, just to deliver files (e.g., like plain old html). Right-click on DemoWeb and choose Deploy | Convert to Application. The icon will change to application and Bob's your uncle (i.e., the icon should change and IIS knows to treat this folder as an application, providing ASP.Net server-side support).

- The application is now accessible on the public internet at http://{LoginID}.{Computer}.techcats.solutions/DemoWeb/ShowParms.ashx for the world to consume. A few notes:
- If you look in the folder C:\WebSites\{LoginID} you will see the DemoWeb folder and some files within; these were published by Visual Studio.
- If the application were re-published (e.g., because changes were made), there would not be the need to use IIS to make it an application (again).
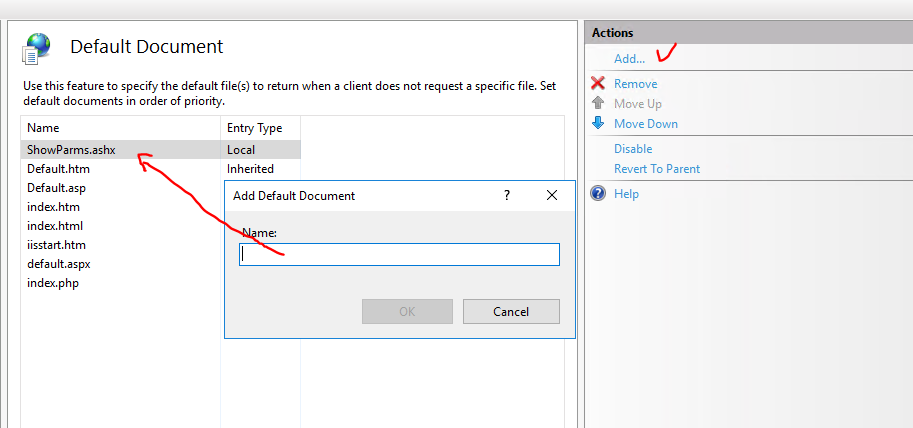
- The features provided by IIS (e.g., at right when you click on your site or application(s)) can be administered by you to adjust deployment. In particular you can use Default Document for the site to add ShowParms.ashx so when someone visits http://{LoginID}.{Computer}.techcats.solutions/DemoWeb (without /ShowParms.ashx at the end) then they will get the default page you've set up.
- To save the connection parameters from D and E above use File | Save Connections or agree to save connections when exiting IIS.
- If you publish an application or make some other changes while in IIS and the new application doesn't appear, right-click your site name and choose refresh.
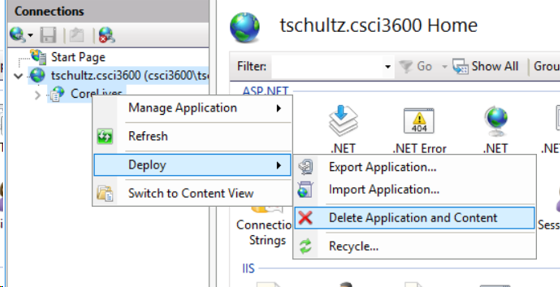
- Removing an application: Right-click the application and choose Deploy | Delete Application and Content (left screen cap below). This will remove the deployed application and its folder but, naturally, will not do anything to the development copy. If you delete an application and re-publish you will need to make the folder an application (again) as in F above. If the application won't delete because it is reported as 'in use' when you try then right-click the application and choose Deploy | Recycle (Recycle is below Delete ... on the left screen cap); then select Recycle application pool and click OK and try again to delete the application.