A peek at IIS management
Preface This is a quick peek at web site management using IIS (Microsoft's Internet Information Services) intended for AIST 2220 students. We adjust some 'server side' aspects of our course web sites to get a sense of how a web server mediates client to web site interaction.
Note The guidance below shows a user name tstudent but you should use your own remote desktop login ID instead.
Prereq You can log into the course remote desktop, can administer files in your AIST 2220 web site and your web site directory and the web site file and directory structure contains at least the following (though don't worry if you deleted Default.htm from your web site)
C:\AIST2220SITES\TSTUDENT
│ AboutMe.htm
│ Default.htm
│
└───Synopses
HTMLBibleCh01.htm
Using IIS to connect to your web site
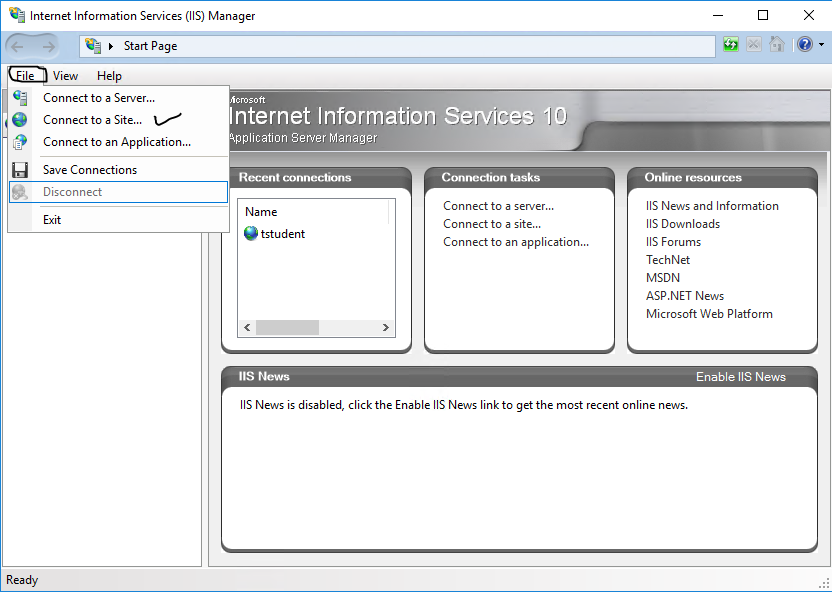
Login to the remote desktop, click the Windows (Start) button and type IIS. Select (click) the IIS Manager from the search results.

Use File | Connect to a Site to start the connection process
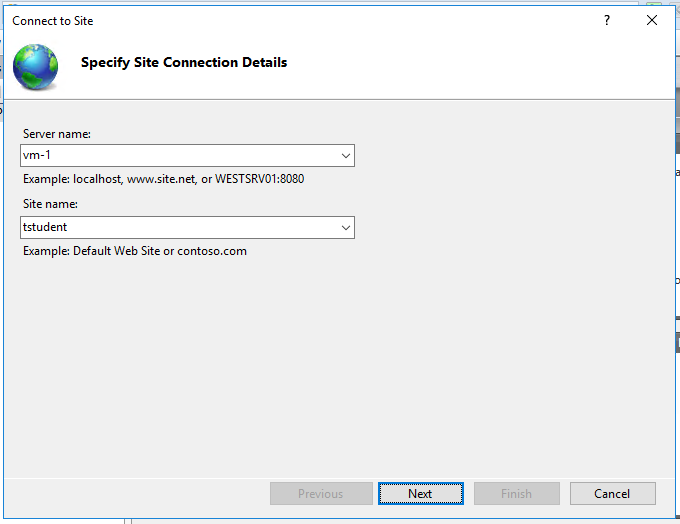
Your Sever name is vm-1 and Site name is the same as your remote desktop login ID. Enter them and press Next.
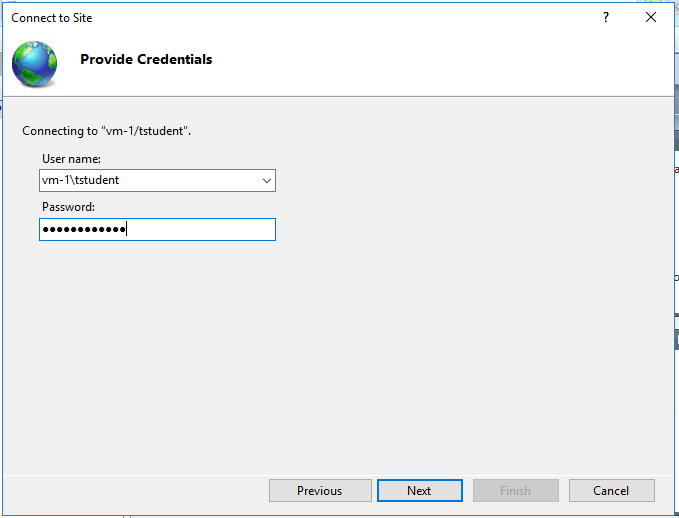
Your User name is your login ID preceded with vm-1\ and for password use your remote desktop password (i.e., we are authenticating based on our Windows Server login). Enter them and press Next.
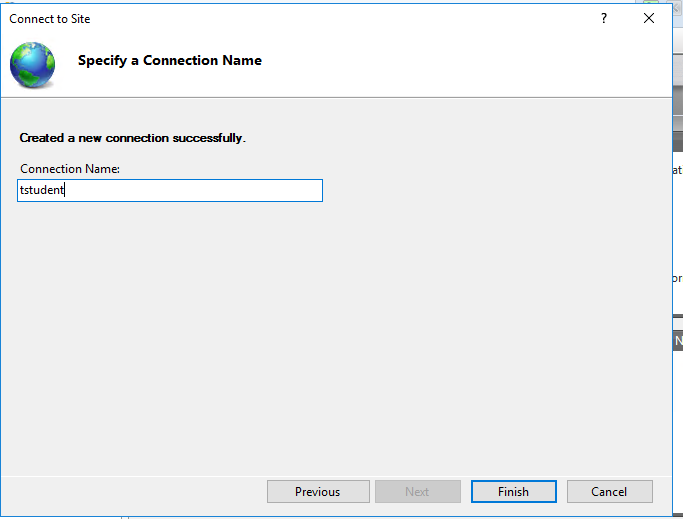
You will be asked to name this connection so in future you will only need to supply your password; it will default to your site name / login ID which is a good name to keep but enter another name if you want. Then click Finish.
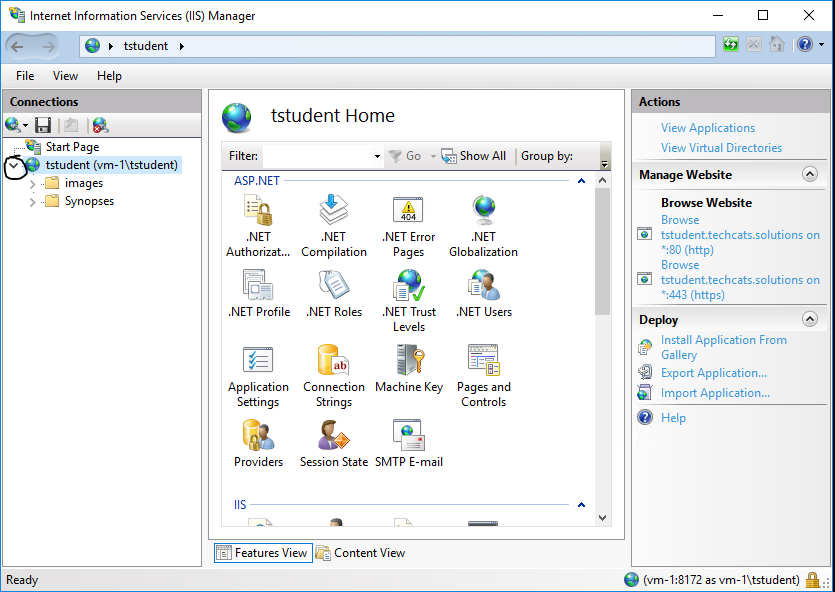
You are now connected to your site where your login ID has IIS management privilege. You might open the site (i.e., click the caret next to your site name) to see the directory / application structure of the site.
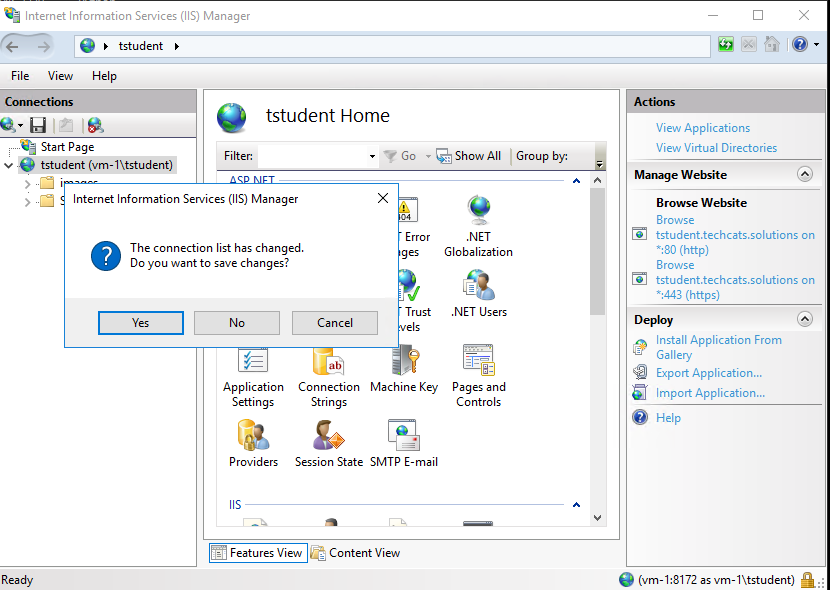
To exit use File | Exit or simply close the application (X in upper right-hand corner). Since you just added this connection you are asked if you want to save it; Yes is the suggested response (or you will need to reconnect completely on your next IIS session). When you start IIS in later sessions, just click the connection in the left panel, enter your password and click next to reconnect to your web site.
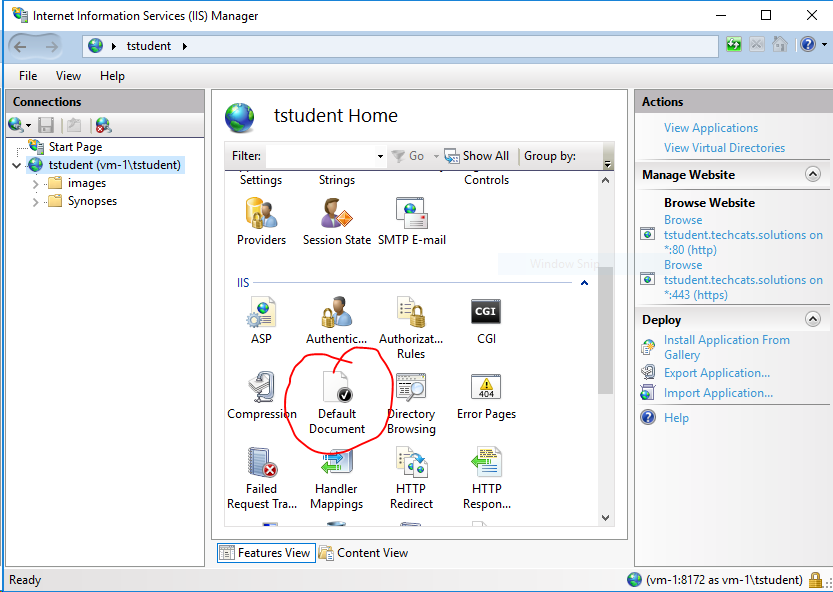
Task 1 - Change the default landing page
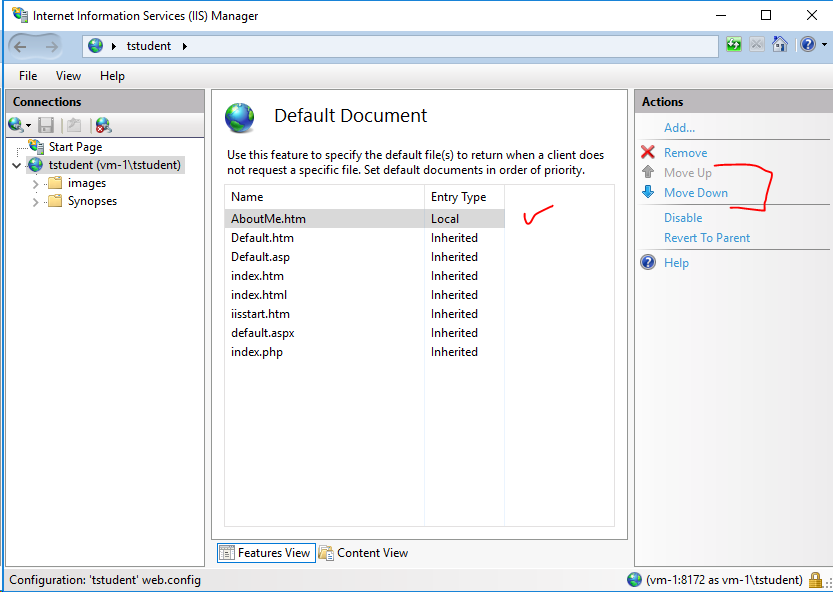
As initially set up, when someone visits your web site using an URL like https://tstudent.techcats.solutions (without specifying a specific path) the server will respond with the Default.htm file that was originally placed in your site. We want our server to default to AboutMe.htm instead. In IIS double-click on the Default Document icon in the IIS section ...
... click Add and enter AboutMe.htm in the dialog and then click OK.
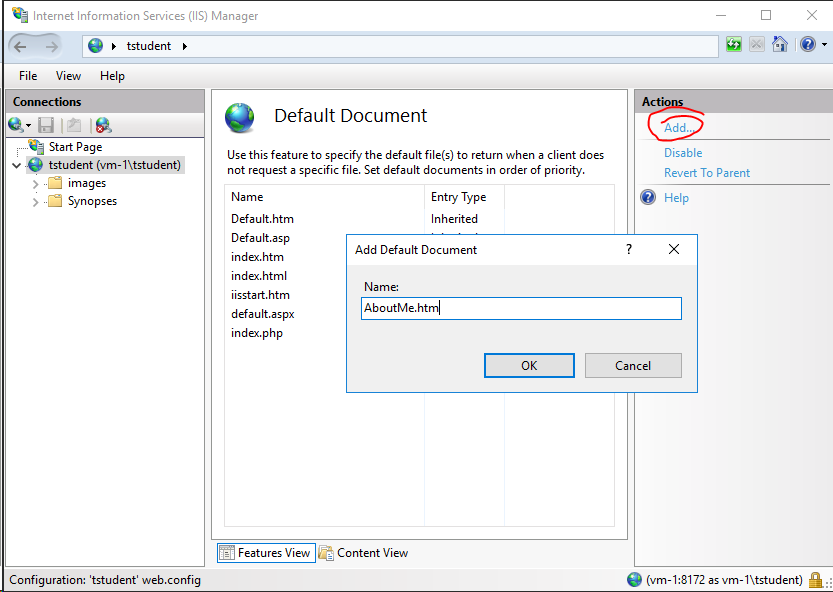
This should move AboutMe.htm to the top of this list (i.e., it will be the first document IIS looks for when no specific document is in the HTTP request). You can rearrange the search order for the documents or remove files from consideration as default document by using the Actions panel on the right. This will 'save' automatically and you can return to the IIS site view by clicking your site name in the left panel. You should test the effect by visiting your web site in a browser without specifying a specific file (you may have to refresh the browser).
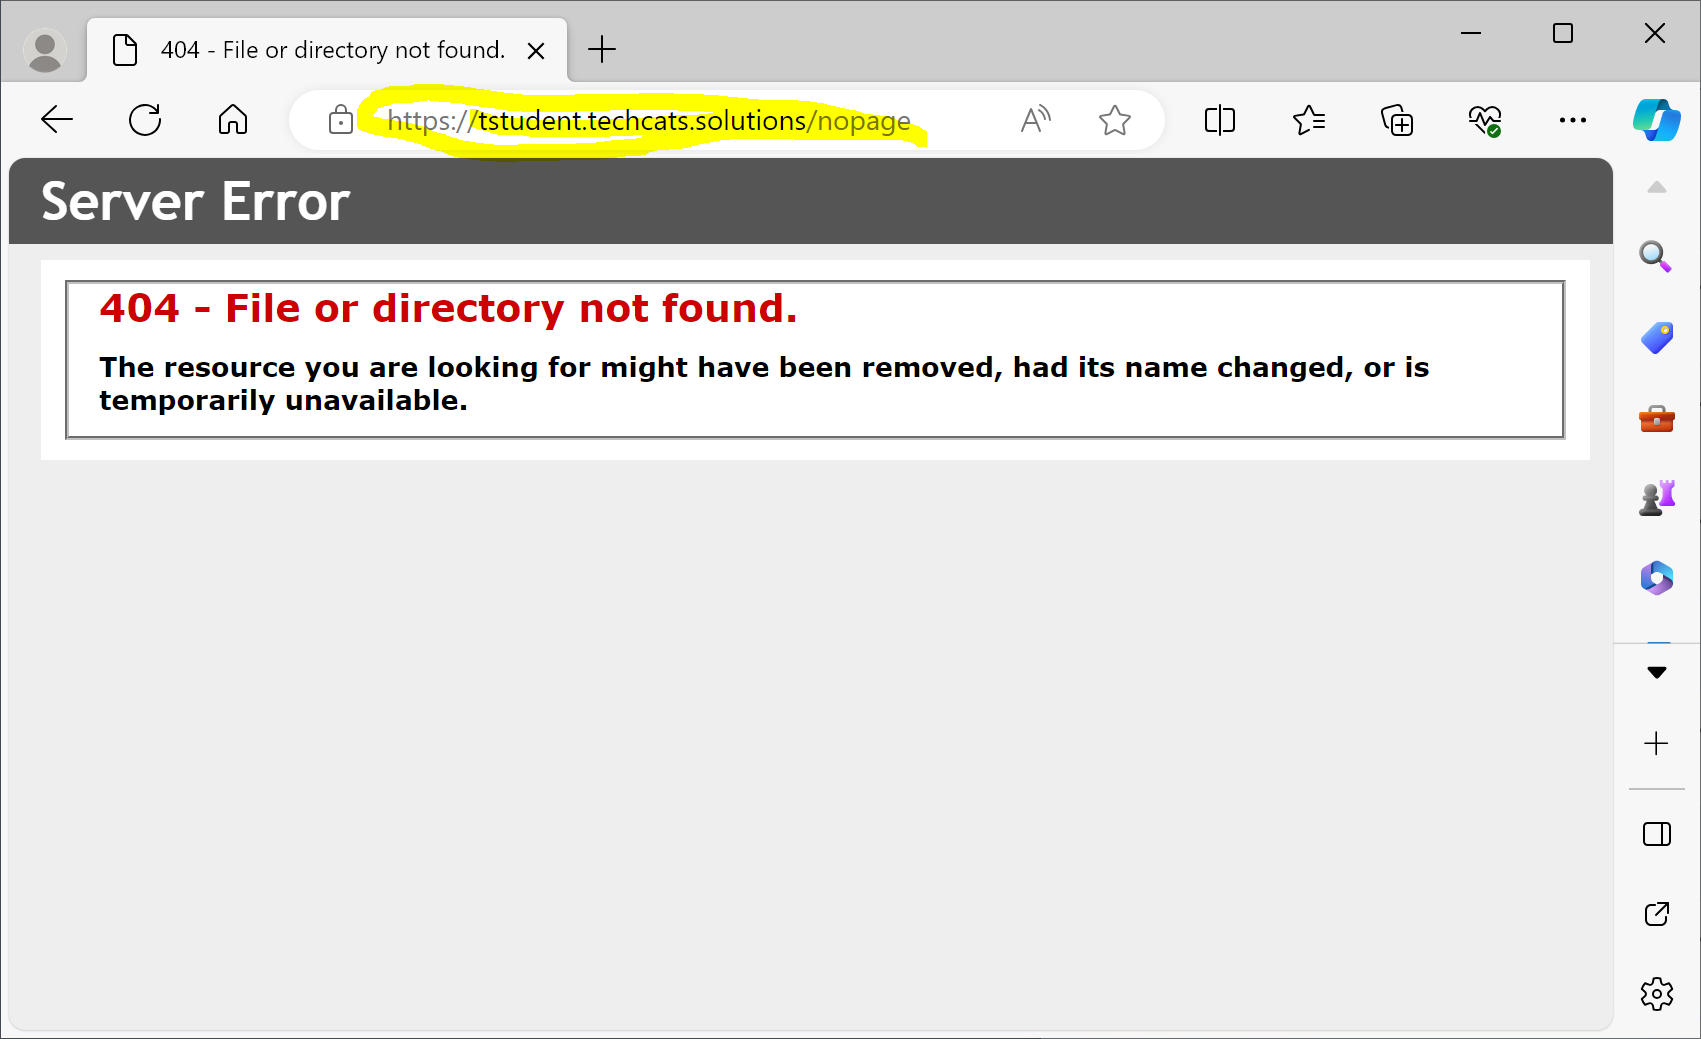
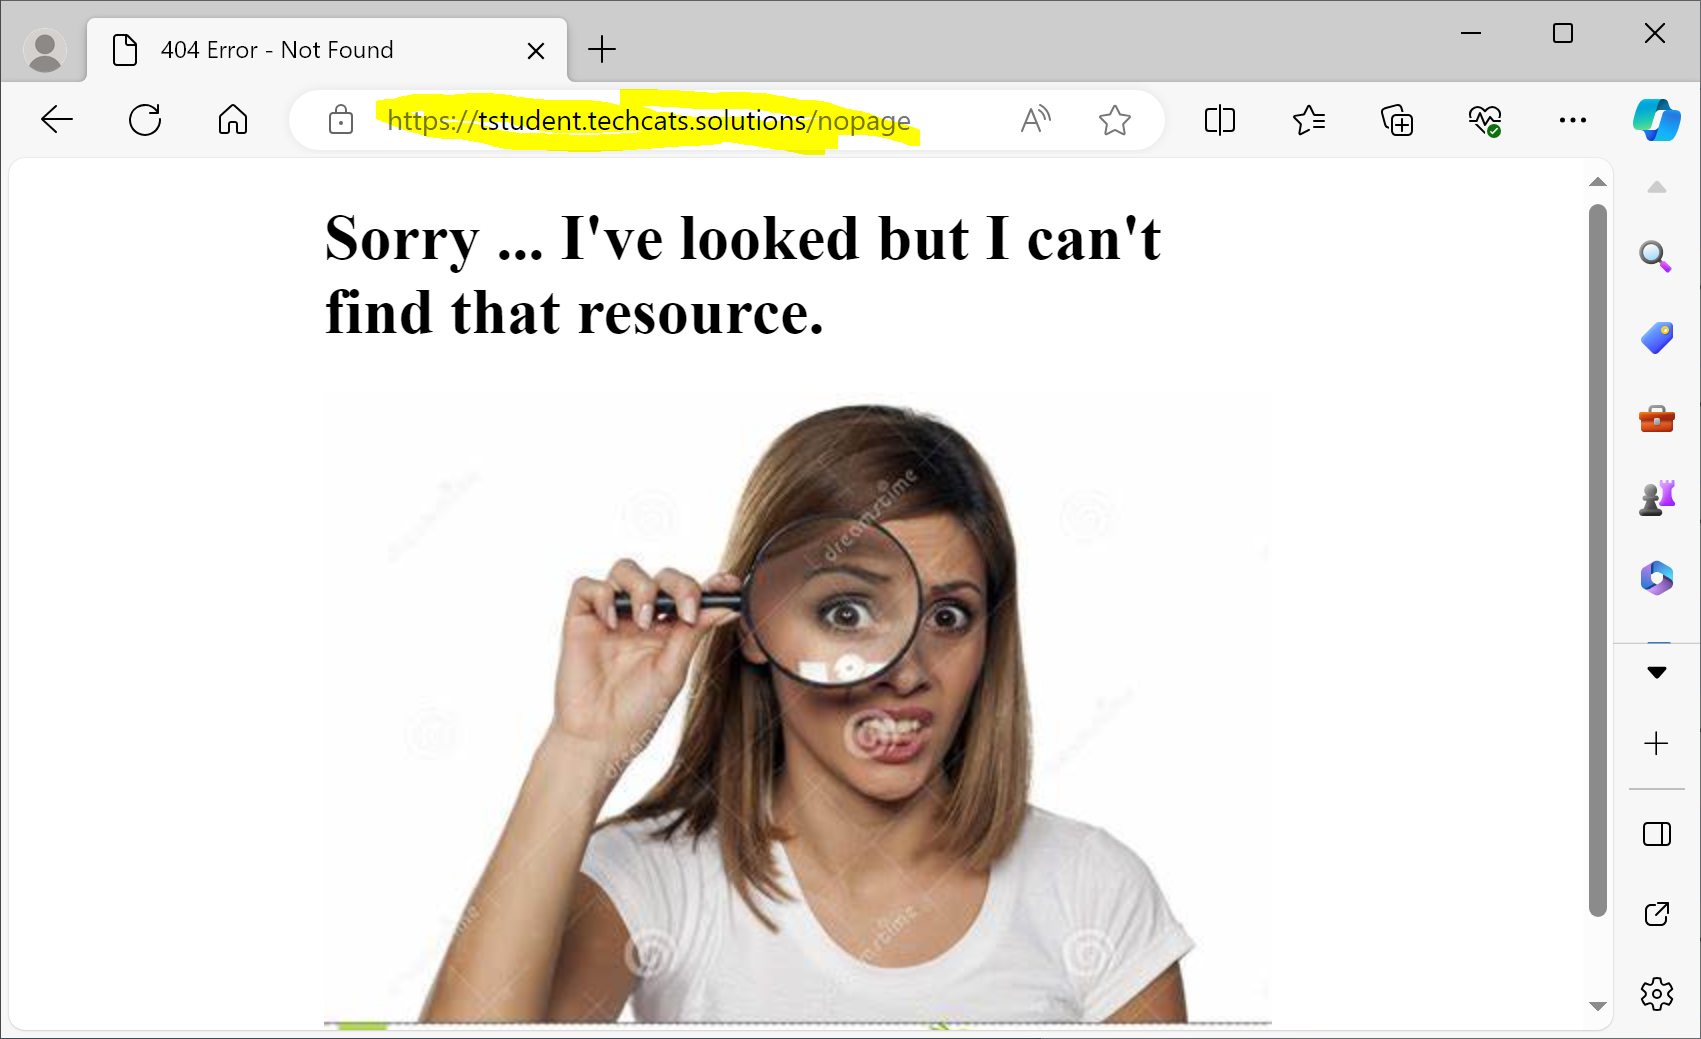
Task 2 - Change the 404 error page
As a default, when a web request asks for a page that can't be found on your site, the user gets a generic 404 error page (404 is the error code for resource not found).
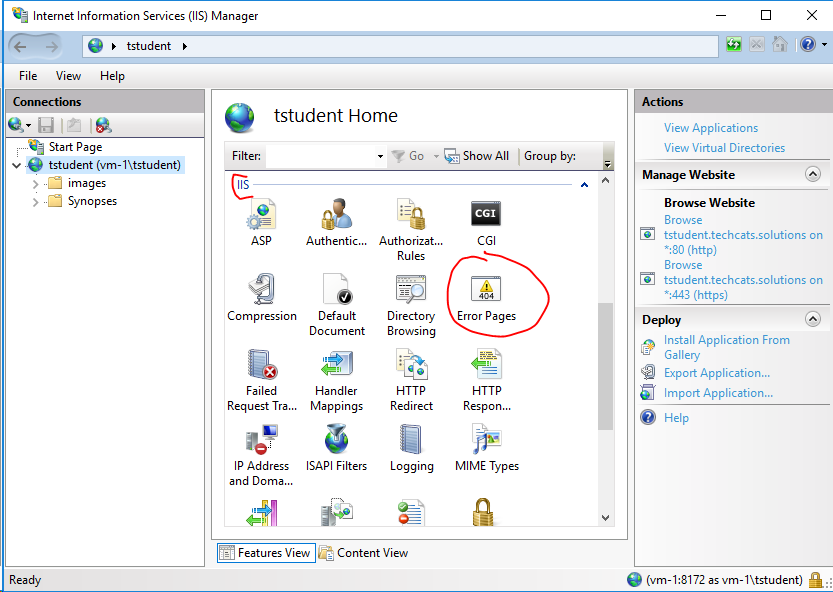
To customize the result (and in more advanced situations, log that a page wasn't found for further investigation or take other action), first create the HTML page you'd prefer users to see. In this case we've created an HTML page named Error404.htm that we stored in the root folder of our web site (a better practice might be to put error pages and similar artifacts in a separate folder but this will work for now). Then double-click Error Pages in the IIS section of IIS Manager ...
... highlight the error code you want to customize and click edit ...
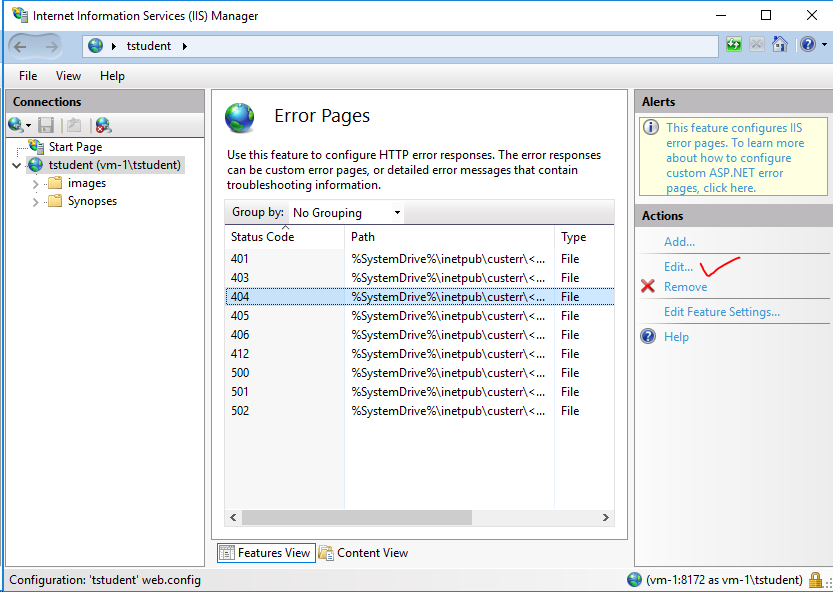
... choose Execute a URL on this site and enter the error file you'd like instead (you need to begin with / for site root and then provide the path to the file -- since our file is in the site root we have just the /). Then click OK.
Now a 404 error returns a less stern result.
Task 3 - Require SSL
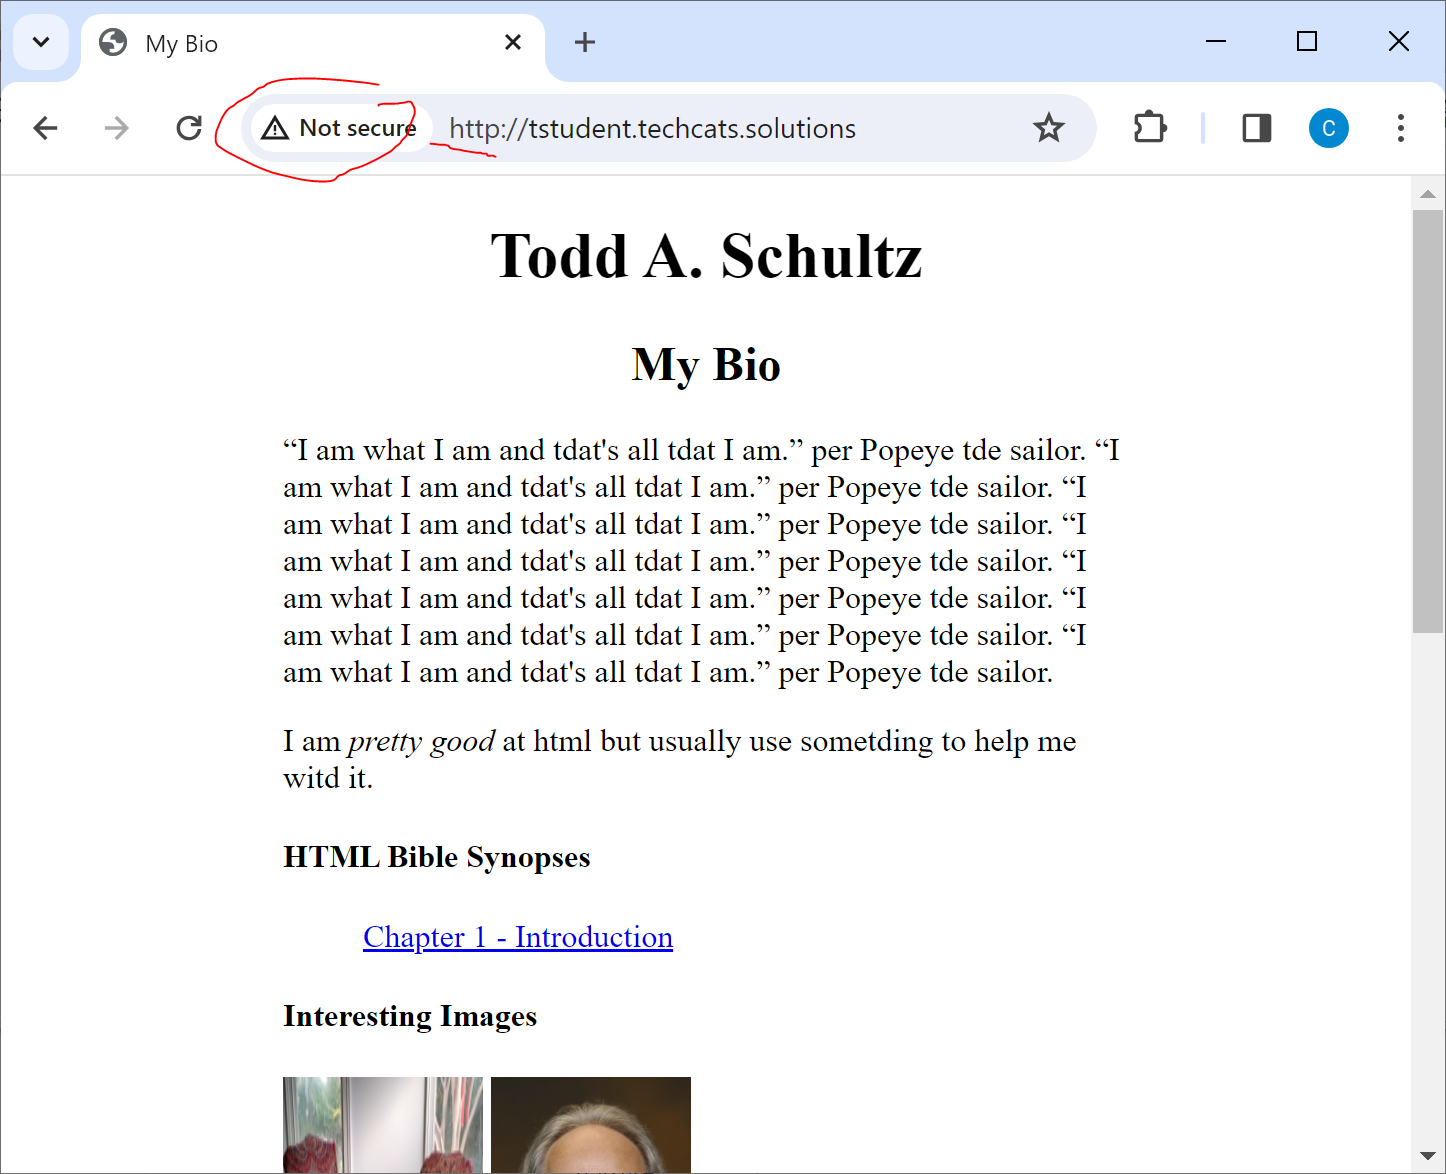
When a web site is visited using HTTP rather than HTTPS protocol, there is a worrisome looking "Not secure" message put up by most browsers, even if the page is innocous and there is nothing insecure about accessing it. As you should know, HTTPS means the page contents are encrypted between sender and receiver so someone 'sniffing' the packets in transit can't tell what data are transferring (without cracking the encryption). On a bank site, you definitely want this to protect your information and any credentials being passed back and forth. On something like AboutMe, not so much, but it might make the user worry something can go wrong (i.e., there is really nothing 'Not secure' about the page below ).
There is an SSL (Secure Sockets Layer) certificate installed on our server and your web sites are 'protected' by it when someone uses HTTPS. We can require that only HTTPS visits be allowed to our web site using the IIS Manager: Double-click SSL Settings in the IIS secton of IIS Manager ...
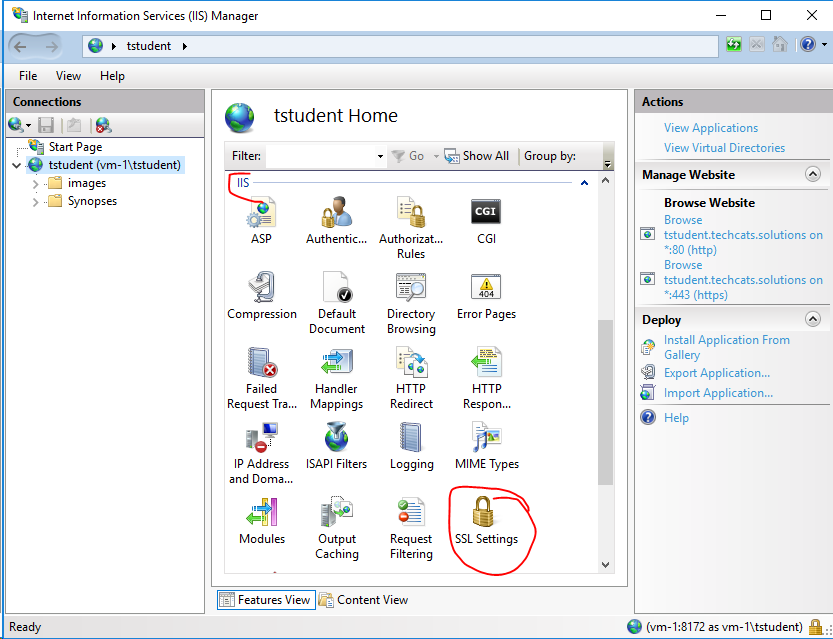
... then check Require SSL and then click Apply.
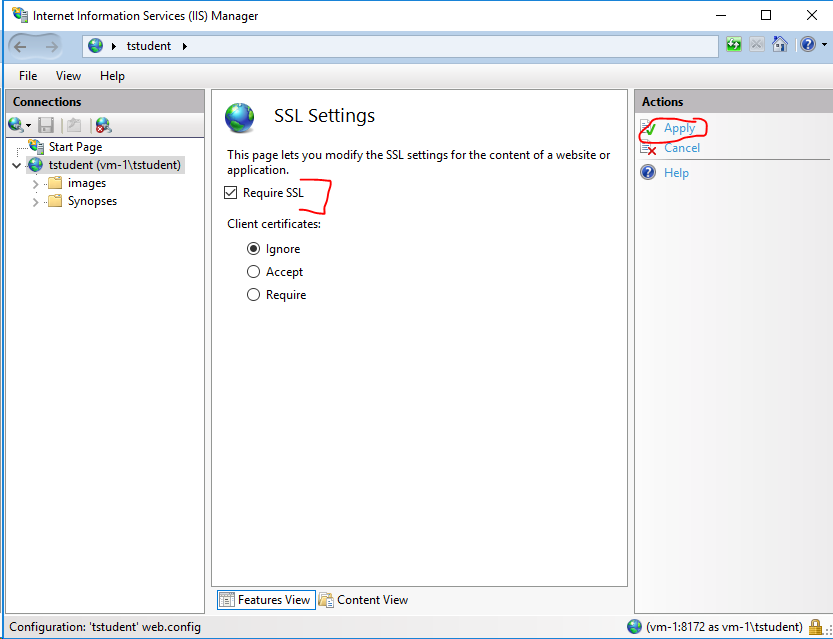
Now and HTTP visit gets a 403 Server Error (perhaps even more forbidding and potentially concerning that the original 'Not secure' warning only). There are ways to automatically change HTTP requests to HTTPS so the user doesn't even see it but it's a little more advanced than our intent now. But we have guaranteed that if a user looks at a page on our site, it will have been encrypted for transit.
