Hands-on SSIS Quick Start
Preamble Microsoft's SQL Server Integration Services (SSIS) -- a component of SQL Server DBMS -- provide tools and scaffolding for ETL (extract-transform-load) operations. ETL is fundamental to creating, maintaining and migrating data assets. ETL can be accomplished in a variety of ways, often applying a hodgepodge of techniques, but SSIS provides a 'one stop shop' for building packages for well documented repeatable ETL. SSIS doesn't have the frisson of magic that analysis services or artificial intelligence brings, but it can be very helpful for the 'role your sleeves up' basics of operational data management. This guide provides an exposure to SSIS by walking you trough using SSIS for some basic ETL activities with the Northwind database.
Prerequisites Access to SQL Server and a copy of the Northwind database where you have data write authority. Also, a recent version of Visual Studio available with the SSIS workload installed.
Scenario The Northwind (NW) database includes a Products table with a column UnitPrice for the current price of each product. Over time, product suppliers change their prices and these updates need to be propagated back into the NW DB. Our mechanism for doing this will be to create a SSIS package with two 'data flows': one which extracts the current product prices for a given supplier to a comma separated values (CSV) file; this file can be updated as needed to indicate new supplier prices for any products (e.g., a user presumably calls the supplier or checks a web site or catalog); and another which uses the updated CSV file to make the price changes in the NW Products table.
Note In the development below, tstudent is the login ID of the developer user. For your development you will see or use your own login ID instead.
Start VS and create the project
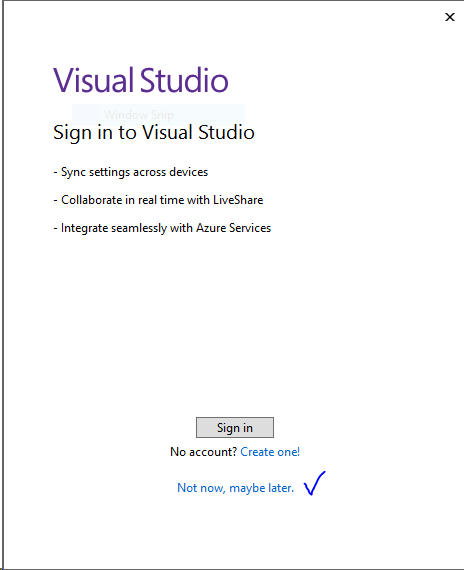
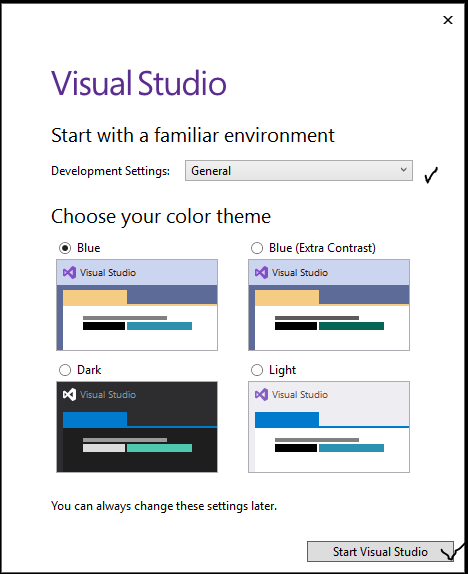
Start Visual Studio (e.g., double-click the  icon. If you get a dialog about signing into Visual Studio (VS), clicking 'Not now, maybe later' is suggested for our purposes. If this is your first time using VS then choose a color theme you like, leave Development Settings General and then click Start Visual Studio -- it may take a little time for your initial setup in VS.
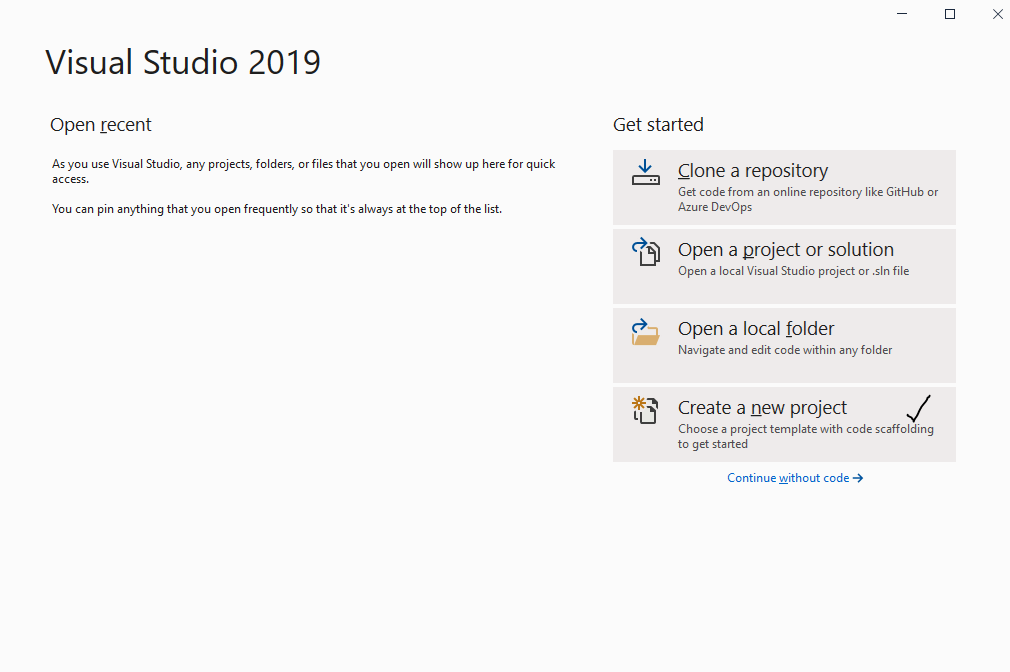
This is the start of a new dev, so click 'Create a new project' ...
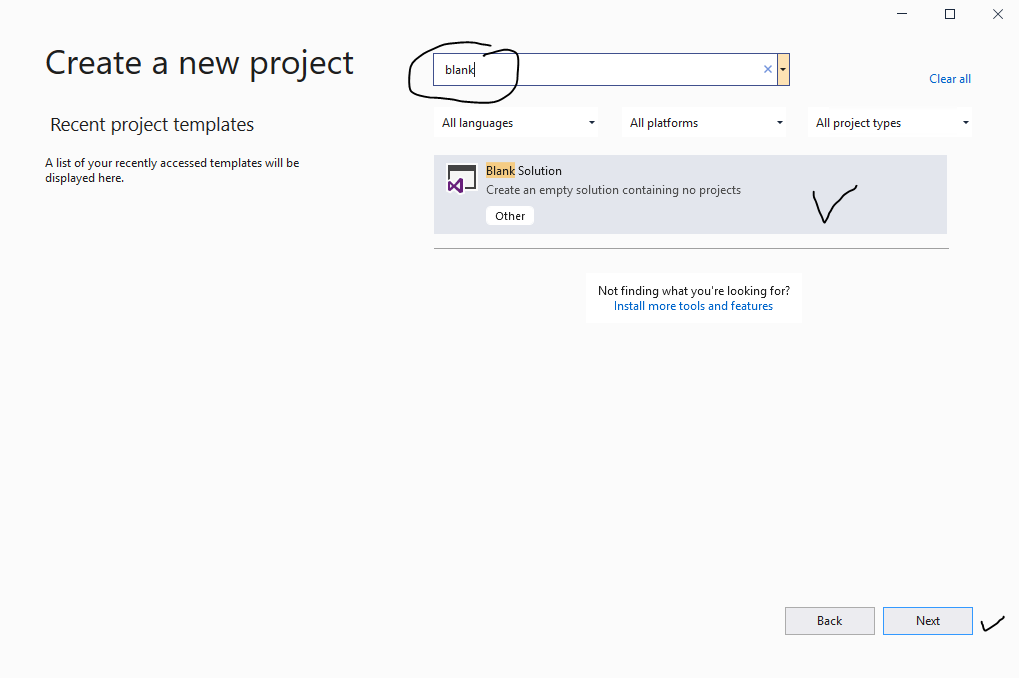
... and then (recommended) search for blank, select Blank Solution and click Next.
Name your solution (recommended) NWSSIS and note (but don't change) the folder where your developed packages and code will be stored; click Create.
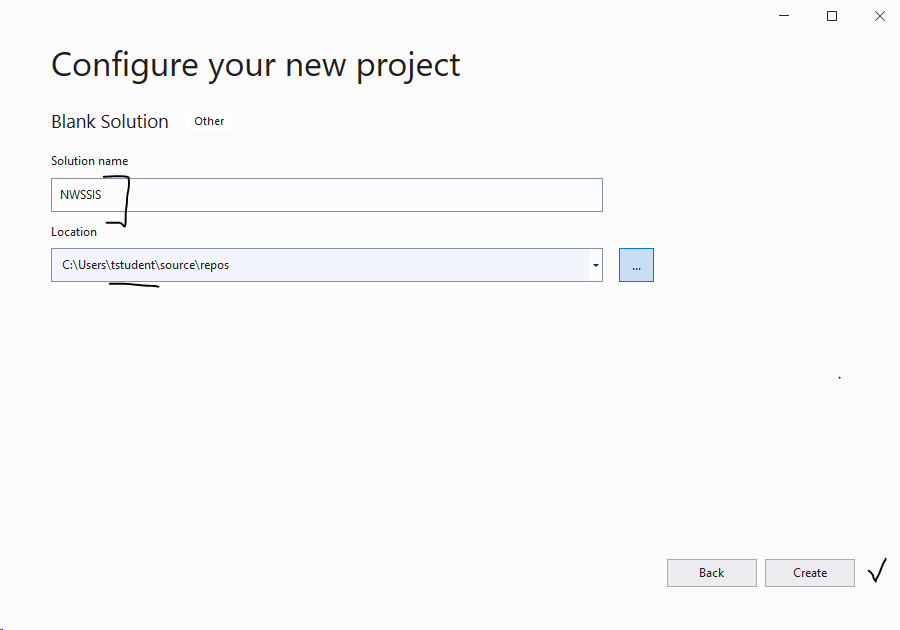
Note A Visual Studio solution is a container that contains one or more Visual Studio projects. We will add a project to the NWSSIS solution shortly.
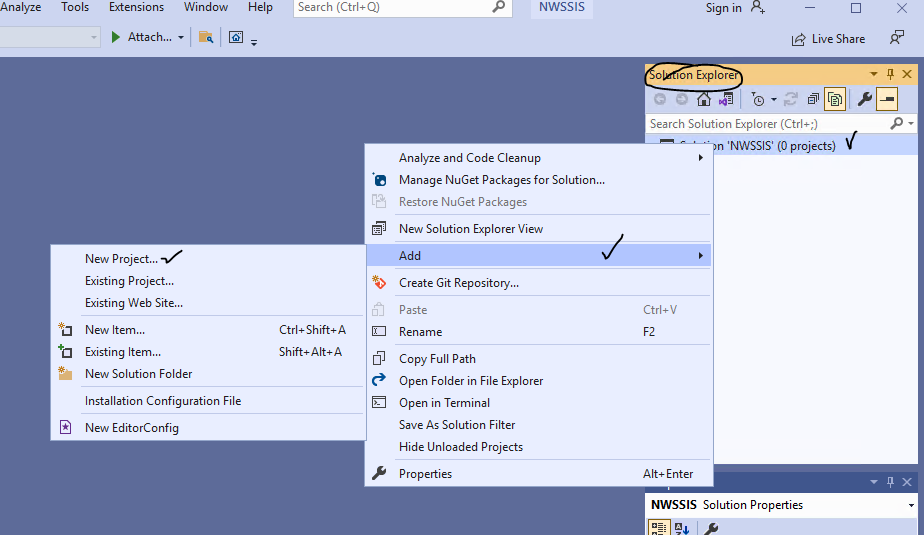
Visual Studio is a comprehensive IDE (integrated development environment) for projects of all kinds. It can be a little overwhelming on a first exposure but VS is engineered to make developers productive. Once in VS, right click on the NWSSIS solution in Solution Explorer (if Solution Explorer is missing use View | Solution Explorer from the menu or Ctrl+Alt+L) then choose Add | New Project
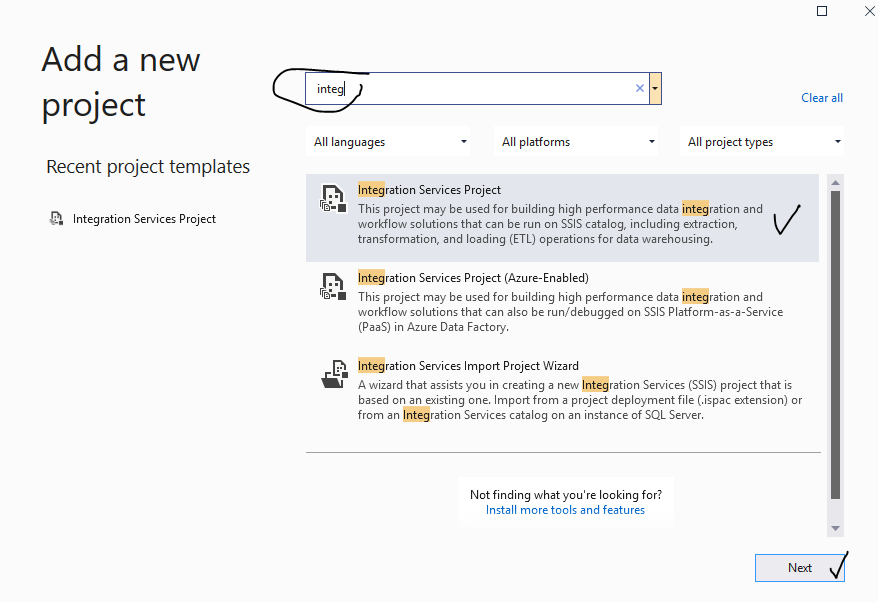
search for and select Integration Services Project and click Next.
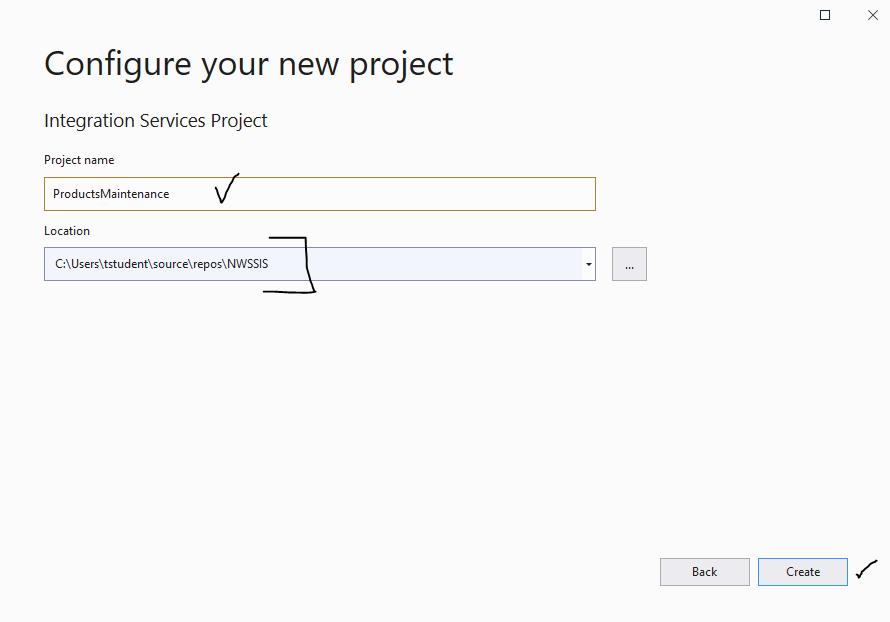
Name the project (recommended) ProductsMaintenance, leave Location alone and click Create.
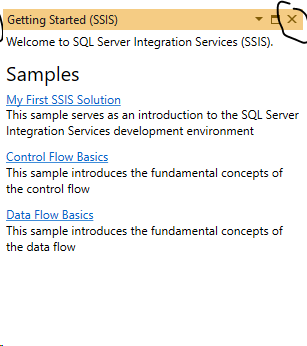
You can dismiss the Getting Started (SSIS) popup but the references are great background for SSIS for later viewing.
Create the GeneratePriceList Data Flow Task
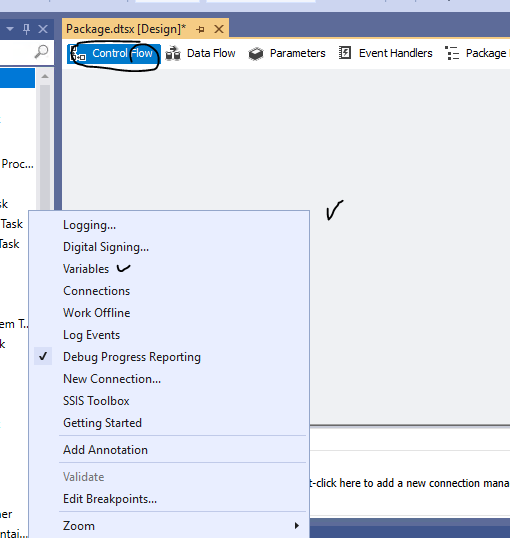
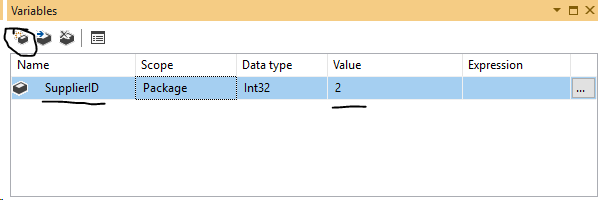
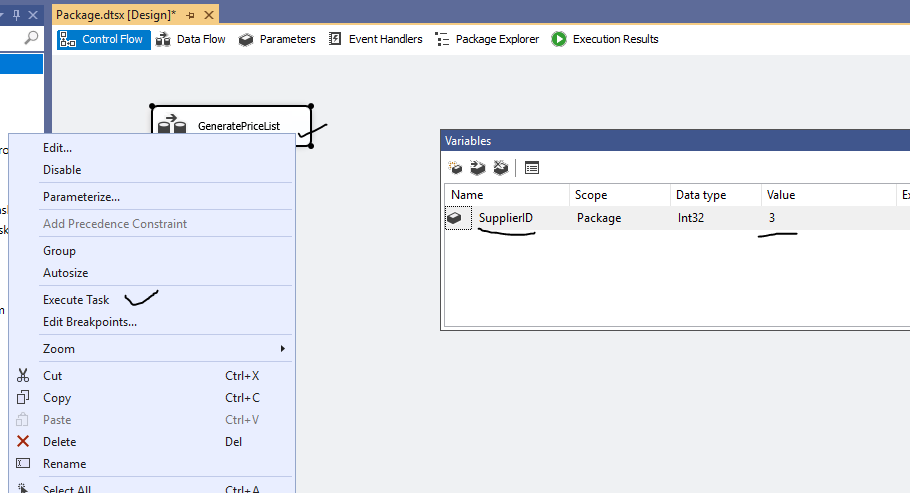
Our first item will be a data flow task that will extract a current price list for Products records belonging to a particular supplier. We will make the SupplierID we want to extract a variable in this SSIS package so we can just change the variable value to get prices for a different supplier when we rerun the task. To add a variable, be sure the designer is on the Control Flow tab, right-click on the design canvas, and select Variables; then click the add variable icon and create a variable SupplierID with (provisionally for testing) the value 2; closing the Variables dialog will save this definition.
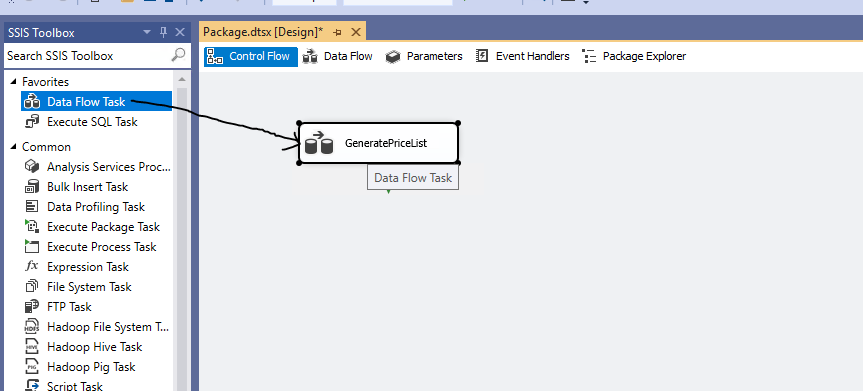
Drag a Data Flow Task from the SSIS Toolbox onto the design canvas; right-click on the DF task and choose Rename to name the task GeneratePriceList (if the SSIS Toolbox is or goes missing, right-click on the Control Flow design canvas and choose SSIS Toolbox from the menu).
Double-click the GeneratePriceList task in the Control Flow canvas to open this task up in the Data Flow definition tab. A data flow task typically has one or more data sources, some (but not always) transformations, and then data destination(s). To access data in a SQL Server database, drag the OLE DB Source tool onto the Data Flow design canvas and rename the task (recommended) ExtractProductPrices.

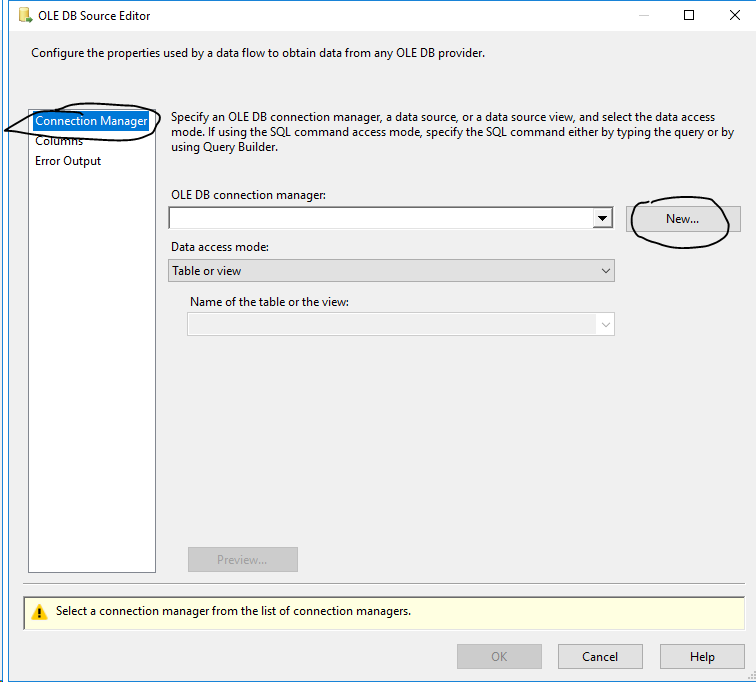
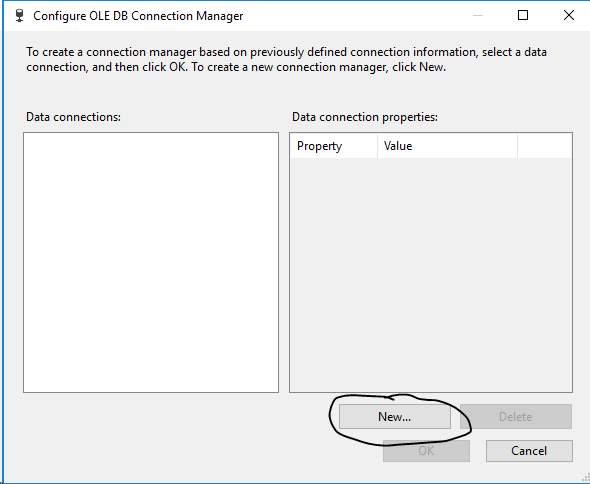
Double-click the task icon to edit its properties. Since the connection to our NW database hasn't been defined in this project yet, we will need to create a new one. Be sure you are editing Connection Manager and click New and then click New on the Connection Manager popup.
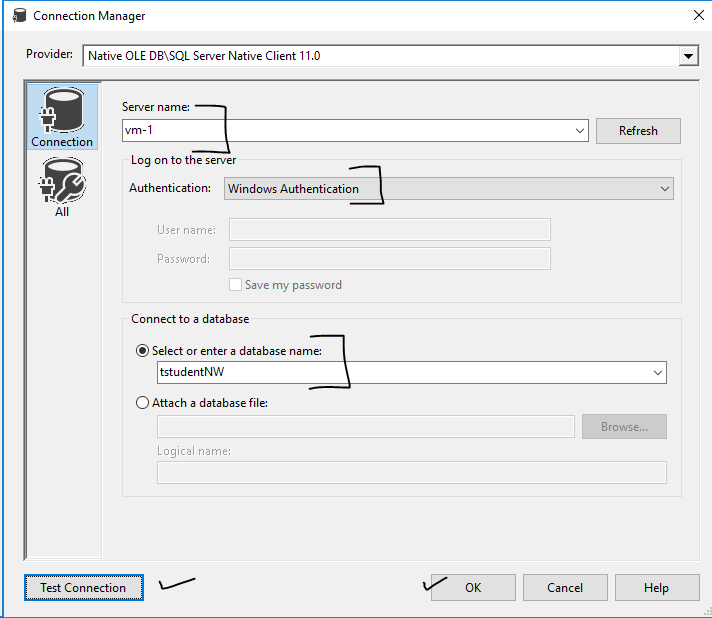
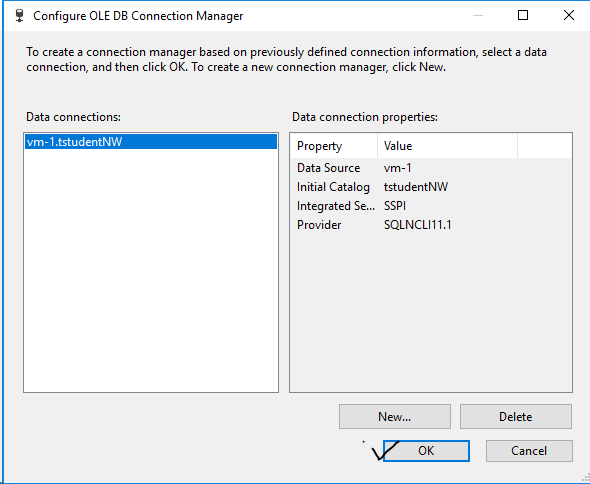
Define your connection using the guidance below, though your database name will be the Northwind database you created yourself. You might Test Connection to see that it works. Click OK when done. This returns you to the Connection Manager so just click OK there too.
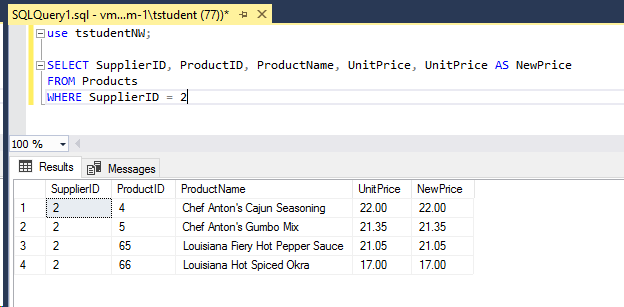
Back in the OLE DB Source Editor, choose SQL command for Data access mode and use (recommended) the following script to extract price information. Note that this query defines a NewPrice column which is the same as the UnitPrice ... this is the column that will be updated if needed in the CSV file we generate. Also note that where we will use a SQL parameter to identify which SupplierID we want to extract, the value in the query is given as ? which is simply the SSIS approach to indicating a parameterized value.
SELECT SupplierID, ProductID, ProductName, UnitPrice, UnitPrice AS NewPrice
FROM Products
WHERE SupplierID = ?
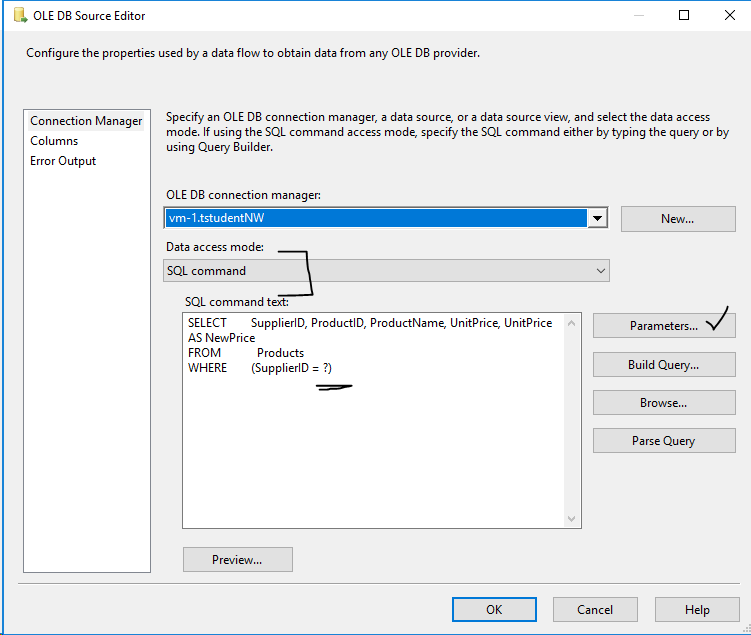
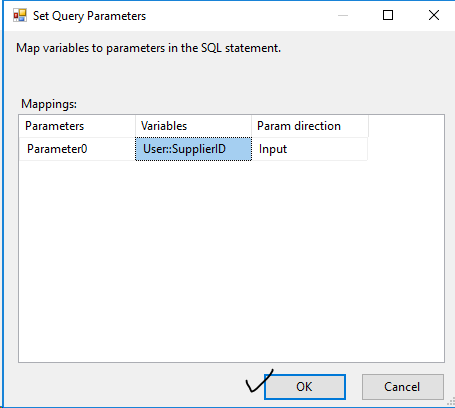
After pasting or typing the SQL script (or using Build Query), click Parameters. SSIS names parameters for you and Parameter0 is the first and only parameter it sees in the SQL statement. Leave the name and Param direction alone but select our SupplierID variable (called User::SupplierID in SSIS) to indicate where the parameter will get its value. Click OK when done. Back in the OLE DB Source Editor click Columns and verify that all the input columns (from the SQL query) get transferred as output columns form the OLE DB Source task. Click OK when done.
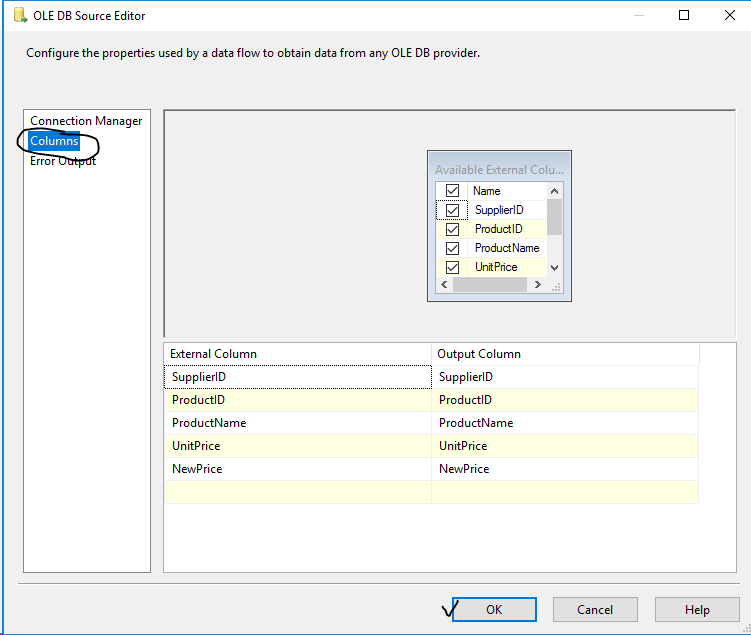
Back in the OLE DB Source Editor click Columns and verify that all the input columns (from the SQL query) get transferred as output columns form the OLE DB Source task. Click OK when done to return to the Data Flow design canvas having defined how data for this task will be sourced from your NW database.
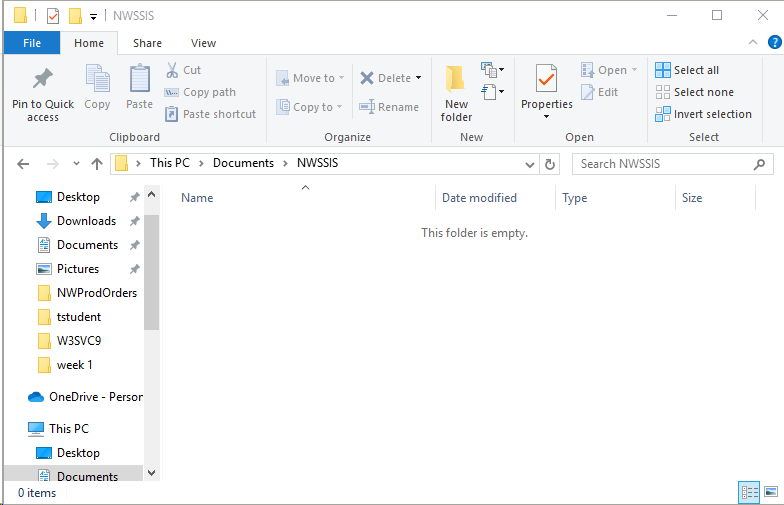
We will load the prices extracted by the OLE DB Source SQL query into a 'Flat File Destination', just a normal, CSV text file stored in the file system. As a destination (and later, source) directory for our flat files now is a good time to create it as (recommended) Documents\NWSSIS (the directory doesn't need to be named the same as the SSIS solution, but just a convenient name to use).
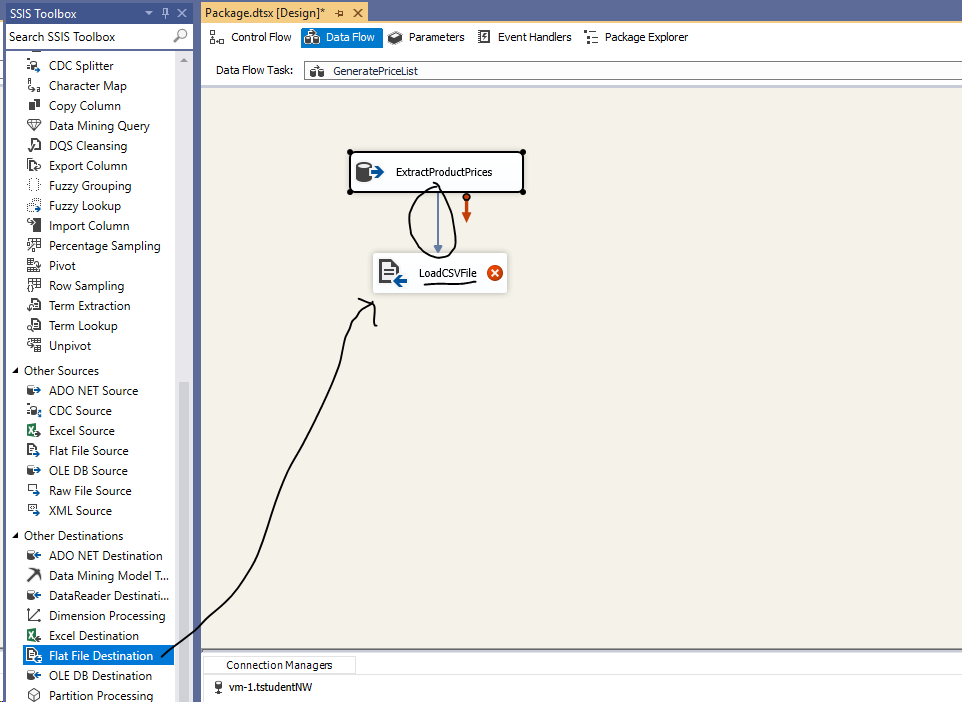
Back in Visual Studio on the Data Flow tab for GeneratePriceList, drag a Flat File Destination onto the canvas (placing it a little belo ExtractProductPrices), rename it LoadCSVFile and, importantly, connect the green arrow out f ExtractProductPrices (the arrows appear when you click on ExtractProductPrices) to LoadCSVFile. A key tenet of SSIS data flows is that, well, the data flows ... output of one tool becomes input for another tool. Green arrows carry good records and red arrows carry any error records (which we are ignoring here ... handling error output is an epic for another demo).
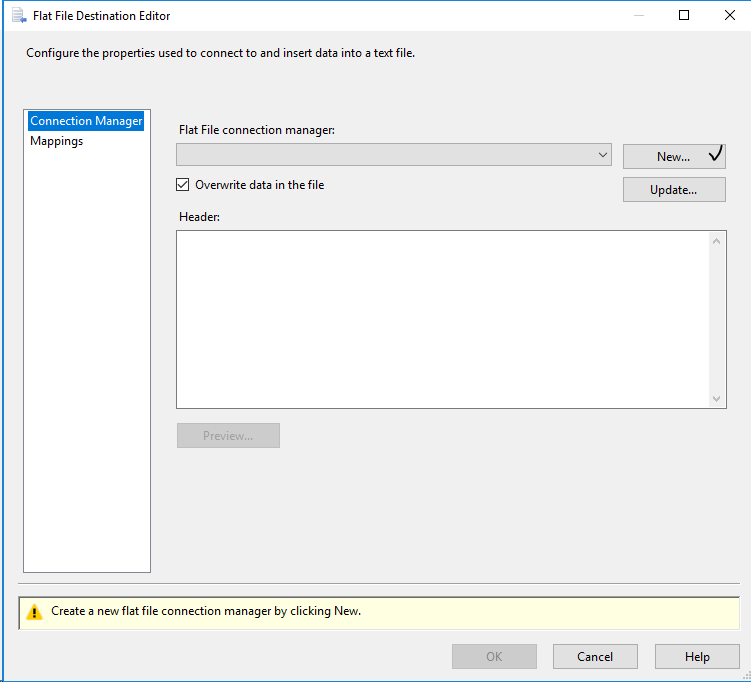
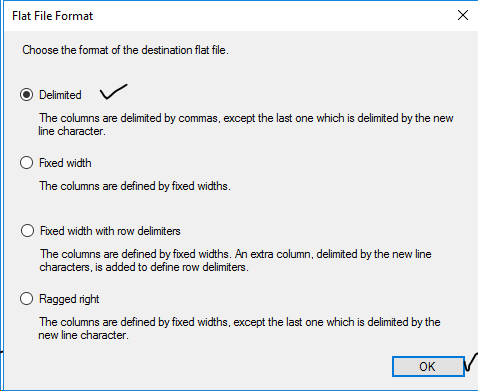
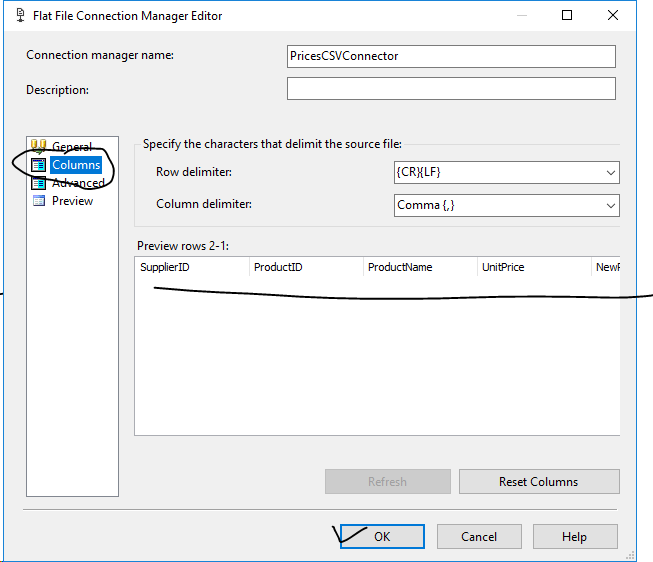
Double-click LoadCSVFile to edit its definition. For our purposes we want Overwrite data in the file checked (so a new file is created when we run the task, vs. adding new records to an existing CSV file). Since we don't yet have a flat file connection in the project, click New to create one. For our purposes, choose Delimited for Flat File Format then click OK.
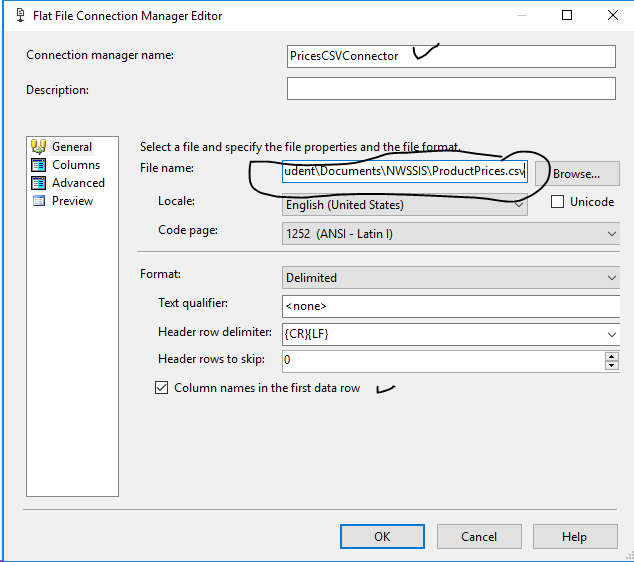
Give the connection a useful name (e.g., PricesCSVConnector), make the file name something like ProductPrices.csv located in the NWSSIS folder just created (note that this file isn't there yet, this is just the name that will be used when it's created), and check the box for Column names in the first data row (so we get column headers in our file).
Click Columns to verify the columns from our SQL query made it through to the CSV file definition; then click OK.
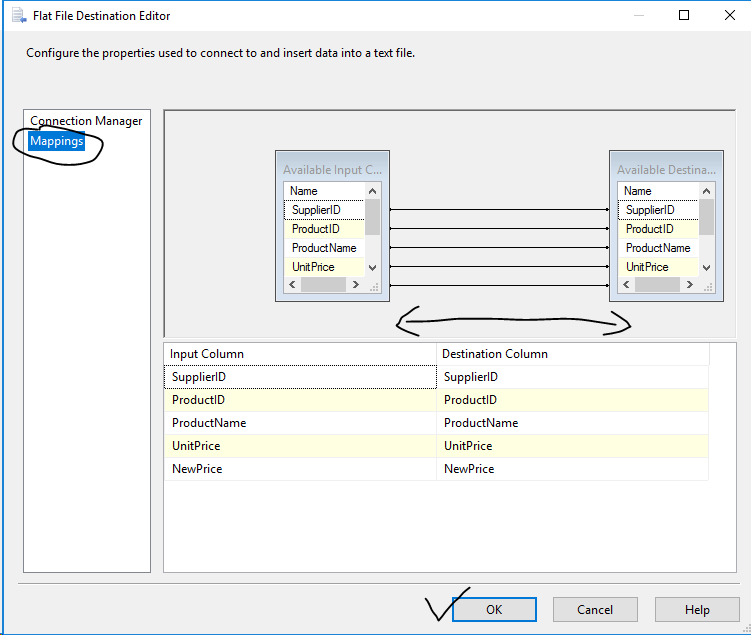
Back in the Flat File Destination Editor click Mappings to double-check inputs flow thru to outputs as expected (our transformation is very simple). Then click OK.
Be sure to save all project artifacts if you haven't already. We can run this task from the Data Flow canvas by right-clicking and choosing Execute Task

VS will trundle a little, show some text output at the bottom of the screen but if all went well, show that the process completed without issues. Click on the 'Package execution completed.' line to stop the debug process and return to the designer. If you had issues the Output window at the bottom will provide some help in troubleshooting.
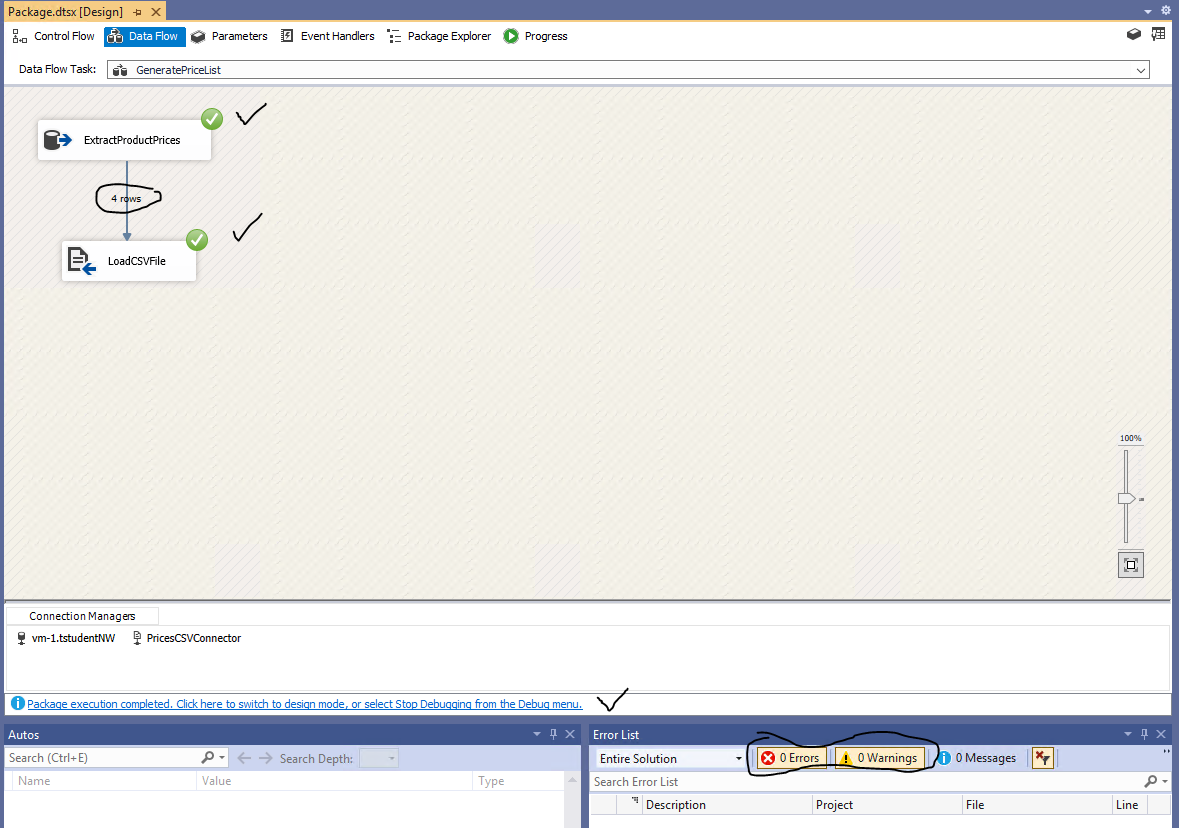
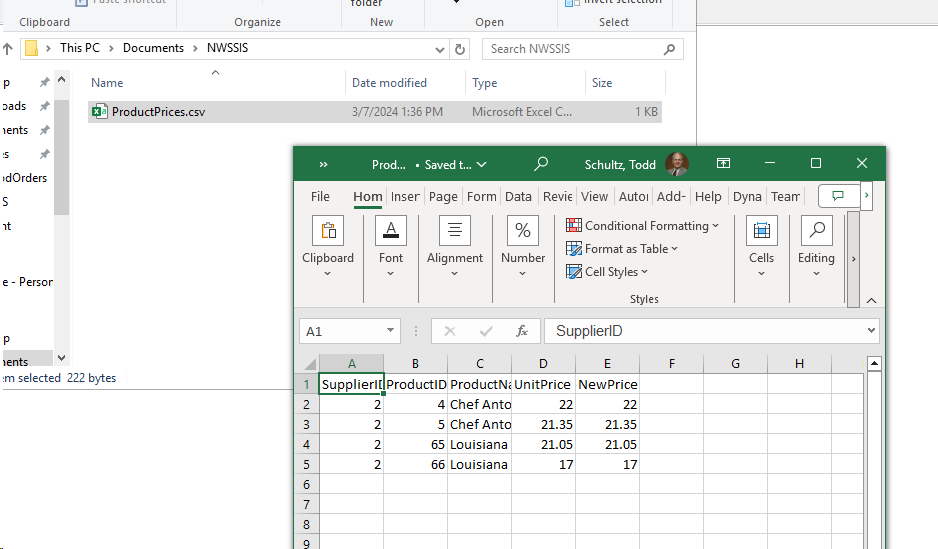
Always, always, always check that this actually did what was expected. A quick query in SSMS shows the following four records for SupplierID = 2 and the output above said four records passed to LoadCSVFile. And a peek at the newly created ProductPrices.csv file in Documents\NWSSIS shows the expected result. Cheers!
As a further test, consider returning to the Control Flow tab and changing the SupplierID variable to 3. You can right-click the GeneratPriceList task and choose to Execute Task from there. Be sure you have closed the .csv file in Excel before re-executing the task or you will run into a 'file in use' error. I leave it to you to verify that the ProductPrices.csv now contains the correct prices for a different supplier.
Generate the UpdateProductPrices data flow
In this workflow scenario, someone presumably takes the extracted .csv file, does some research or calling, and changes NewPrice to the, well, new price of any products from the supplier where prices have changed, levaing other prices unchanged. So for testing, make some hypothetical adjustments to the prices being sure to save the updates and get out of Excel before testing the new data flow. In the example below the price for Gumbo Mix has risen to $24 and for Pepper Sauce, fallen to $18.

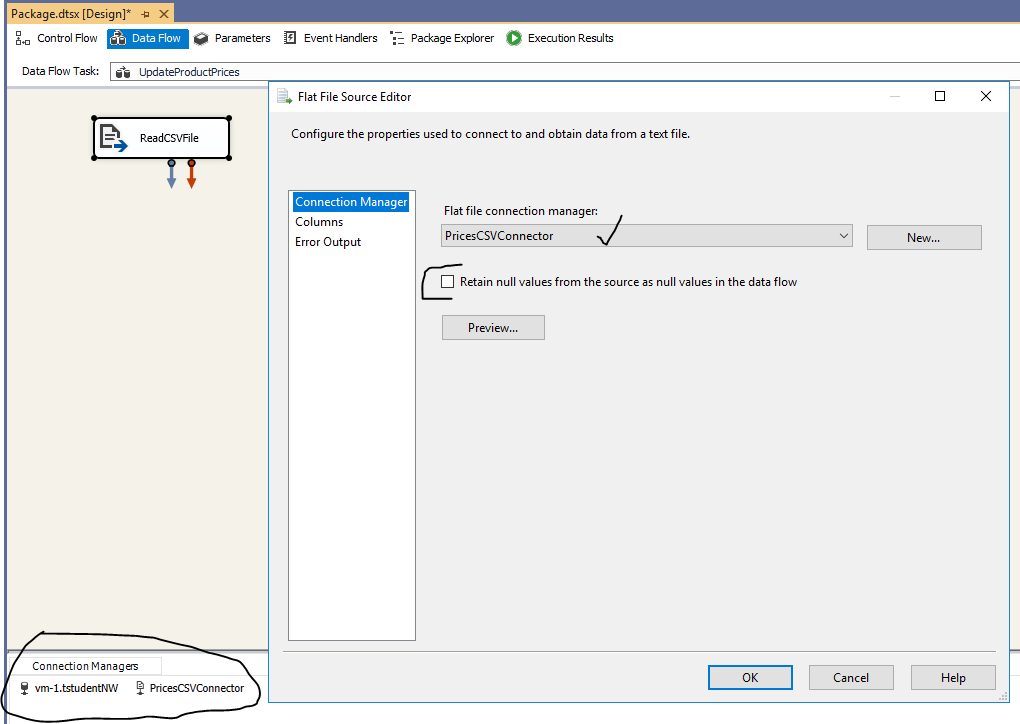
Back in Visual Studio, get to the Control Flow tab, drag a Data Flow Task onto the canvas, rename it UpdateProductPrices and double-click it to get to its definition on the Data Flow tab. Drag a Flat File Source onto the Data Flow canvas, rename it ReadCSVFile and double click it to edit the definition. SSIS will probably intuit the right things: You want to use the PricesCSVConnector already defined and (recommended) leave Retain null values unchecked. Note that any connection managers we have defined for the package are lurking below left of the design canvas.
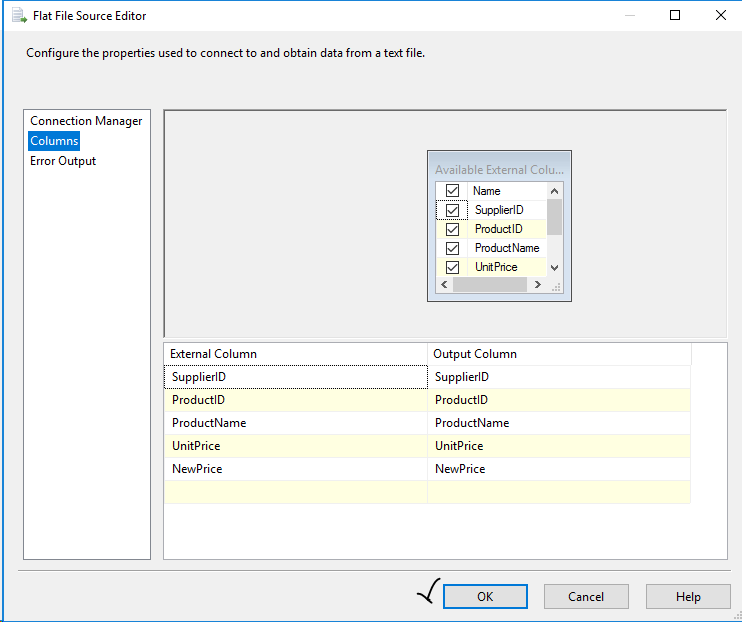
Double check Columns to ensure we are getting the expected, simple, one-to-one mapping and then click OK.
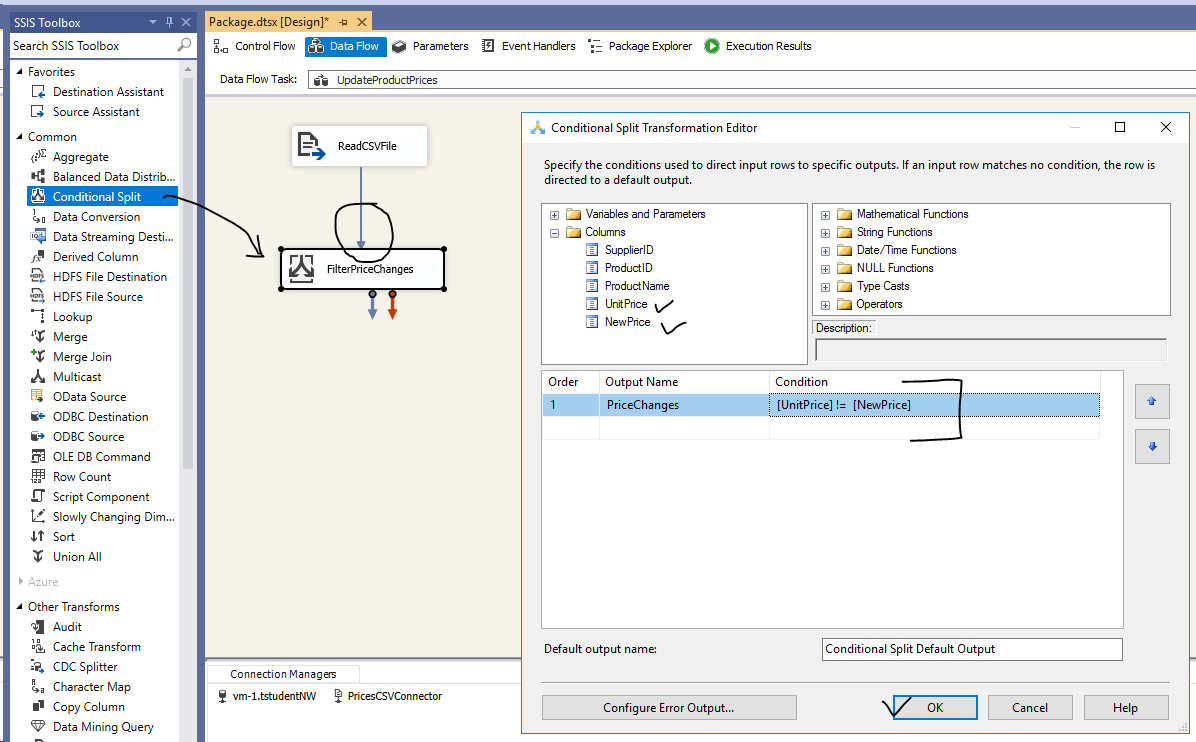
Next, we'll want to filter only the records in the CSV file where prices have actually changed ... they are the only records needing updating. So drag a Conditional Split onto the Data Flow design canvas, change its name to FilterPriceChanges, hook up the green output from ReadCSVFile as its input, and then double-click it to edit the conditional splitting of the file. We have one splitting rule: Create an output named PriceChanges (recommended) where the [UnitPrice] and [NewPrice] aren't equal. Then click OK. Note: Since our input column names don't contain spaces the use of the square brackets [ ] around the column names isn't required; you will find them removed if you go back and re-edit this control.
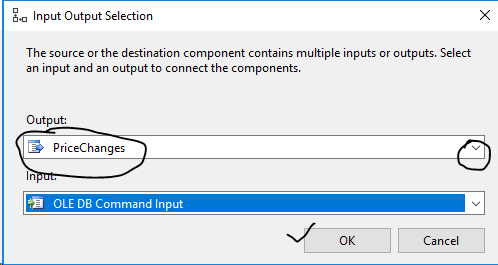
Still on the UpdateProductPrices Data Flow design canvas, drag on OLE DB Command onto the canvas and rename it update prices. Then connect the green arrow from FilterPriceChanges to UpdatePrices. A popup will appear asking which output from the splitter you want as input to the OLE DB Comand so choose PriceChanges from the pulldown and click OK. The red circle X next to UpdatePrices just means we haven't defined it yet.

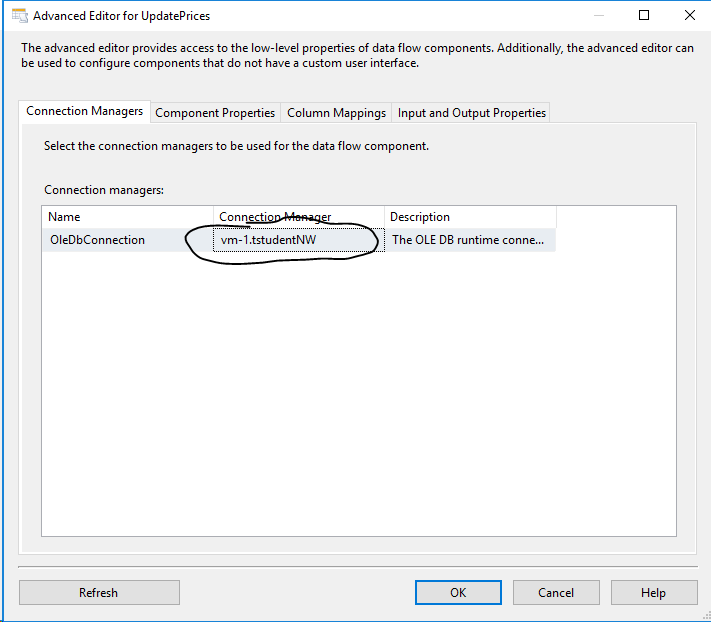
Double-click UpdatePrices. On the Connection Managers tab select the existing connection to your NW database.
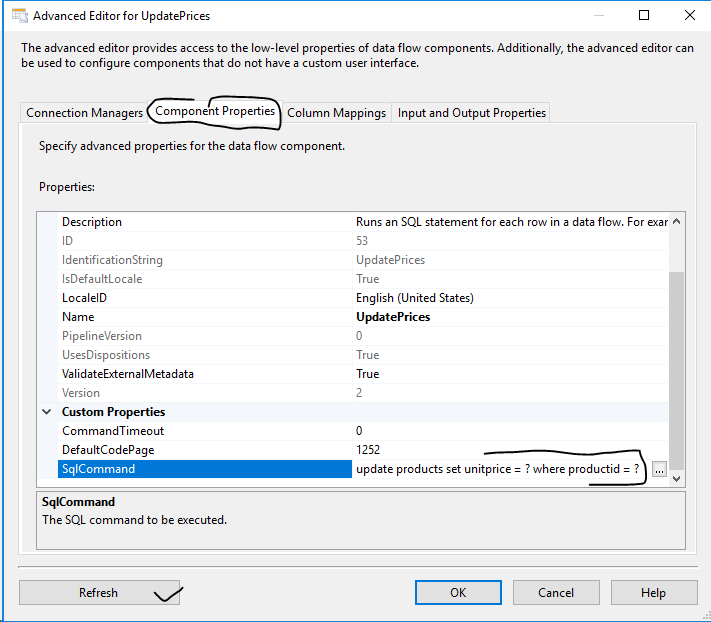
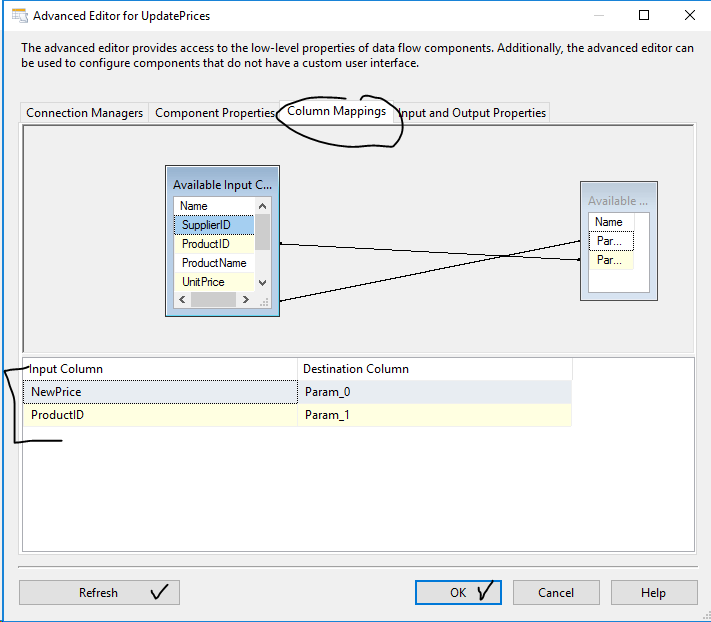
On the Component Properties tab set SqlCommand to
update products set unitprice = ? where productid = ?
and then click Refresh (the Refresh lets SSIS interpret the parameters embedded in the SQL command).
On the Column Mappings tab set NewPrice as the value for Param_0 (i.e., the first ? in the SQL command) and ProductID as value for Param_1. You might hit refresh again to get the warning about not binding SQL parameters to go away. No changes are needed in the Input and Output Properties tab in our case so click OK to finish the definition.
Be sure to save all you package artifacts and then execute the process to test it. You should find that the NewPrice's changed in the CSV file have propagated into updated UnitPrice's in the Products table.
Follow on Exercise
In Northwind, Products records contain a UnitsInStock field but over time this recorded field may differ from an actual count of inventory. Add two SSIS Data Flow tasks GenerateUnitsInStockList and UpdateUnitsInStock to your ProductsMaintenance proeject in your NWSSIS solution which meet the following requirements:
- GenerateUnitsInStockList should apply a user supplied variable CategoryID to extract CategoryID, ProductID, ProductName, UnitsInStock and an ActualUnitsInStock column with initial value the same as UnitsInStock for only those Product records with CategoryID matching the user supplied value. The results of the query should be loaded into a CSV file ProductUnitsInStock.csv for use by auditors doing actual inventory counts.
- UpdateUnitsInStock should take ProductUnitsInStock.csv (after, presumably, ActualUnitsInStock have been updated by auditors), filter for any records where the ActualUnitsInStock differed from the recorded UnitsInStock and then update the Products' UnitsInStock with the Adjusted value.